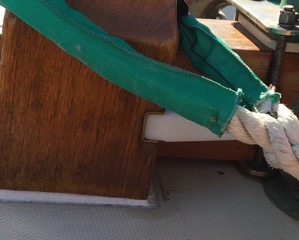
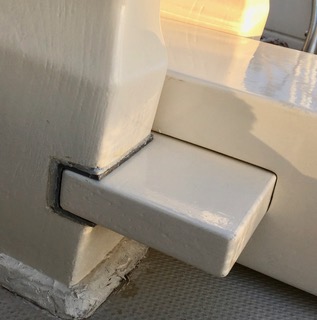
I’m curious about what appears to be an insert (?) in the notch of the bits that holds the fid on BCC Pixie. I took this photo while Pixie was in the Boat Haven marina at Port Townsend, WA, during the Woodenboat Festival. Does anyone know what the material is, and is it used on other BCCs? Bill and Kathy, were the inserts there when you bought Pixie, or have they been added since?
I wonder if they are bedded so as to seal the end grain of the notch? That seems like an excellent idea and I’m wondering what material was used. Shaula’s bowsprit is out and I’ve now refinished the bits. A sealant like 3M 4000 between the insert and the bits would protect the end grain, especially at the lower aft corner of the notch.
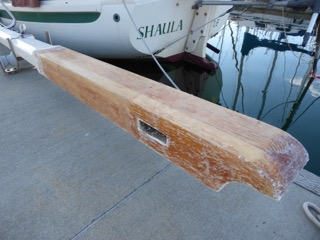
Shaula’s bowsprit has been sealed with West epoxy, primed with Interprotect epoxy primer and painted with marine enamel for almost all of its 35 yrs. I’ve removed the sprit several times over the years, most recently in 2008. It’s always been a tight fit getting it out and back in through the gammon iron. Sometimes I’ve had to do a bit of sanding. Due to what’s mounted on the sprit forward of the gammon iron, I’ve always pulled it forward. Usually a bit of paint gets scraped off on the way back in and needs retouching. This time the douglas fir had absorbed enough moisture that I needed to remove most of the paint, epoxy primer and West epoxy sealer! Heavy duty paint stripper did the job. I’m now in the process of planing down the sprit aft of the gammon iron and then it’s on to the brush work.
Zygote also has the insert to which I think you are referring, in the notch in the aft face of the each of the bitts.
I always assumed that all Sam L Morse Co boats came that way! Ouch!
I have not investigated closely. I think the “insert” is what I would call stainless steel channelling. In other words, short sections of U-shaped stainless steel.
I’m a little embarrassed - I had Z’s housing bowsprit off the boat during our refit late in 2015. And I used the opportunity to sand and recoat the bitts. I did not take out that ss channelling (and never have). I suspect the channelling is only lightly bedded, perhaps with Dolfinite, if at all. Your message has led to a facepalm! In hindsight, I should have looked more carefully at the bitts and perhaps removed and rebedded that channelling (and likely using my now preferred bedding compound of Bostik’s silyl modified polymer: Simson ISR 70-03).
I just noticed that the BCC Construction Manual lists the inserts on page 5 of the materials pages. “SS Fid Slot Insert” was supplied by Nimmo machine shop, a still going Costa Mesa concern. However the manual does not show the inserts on the construction page on the bits. It’s interesting that the materials page indicates the bit’s wood is mahogany with an option for teak. Back in 1981 the standard wood was ash (as were the rudder cheeks, fid and tiller).
Looking at Pixie’s inserts, it appears that they are not quite 1” wide, as the 1” fid looks to be machined down to fit the insert. I replaced the original ash fid with an 1” thick Al plate many years ago, and I don’t want to have to machine it down. I’ll see if I can find some SS u-stube that has a 1” inside width. Maybe I’ll bend some copper or brass and make my own inserts? It seems to me that the inserts’ purpose is to allow sealing of the bit’s end grain and keeping water out of notch. In the Pacific NW we get a lot a rain and wood rot is a concern for wet unsealed wood.
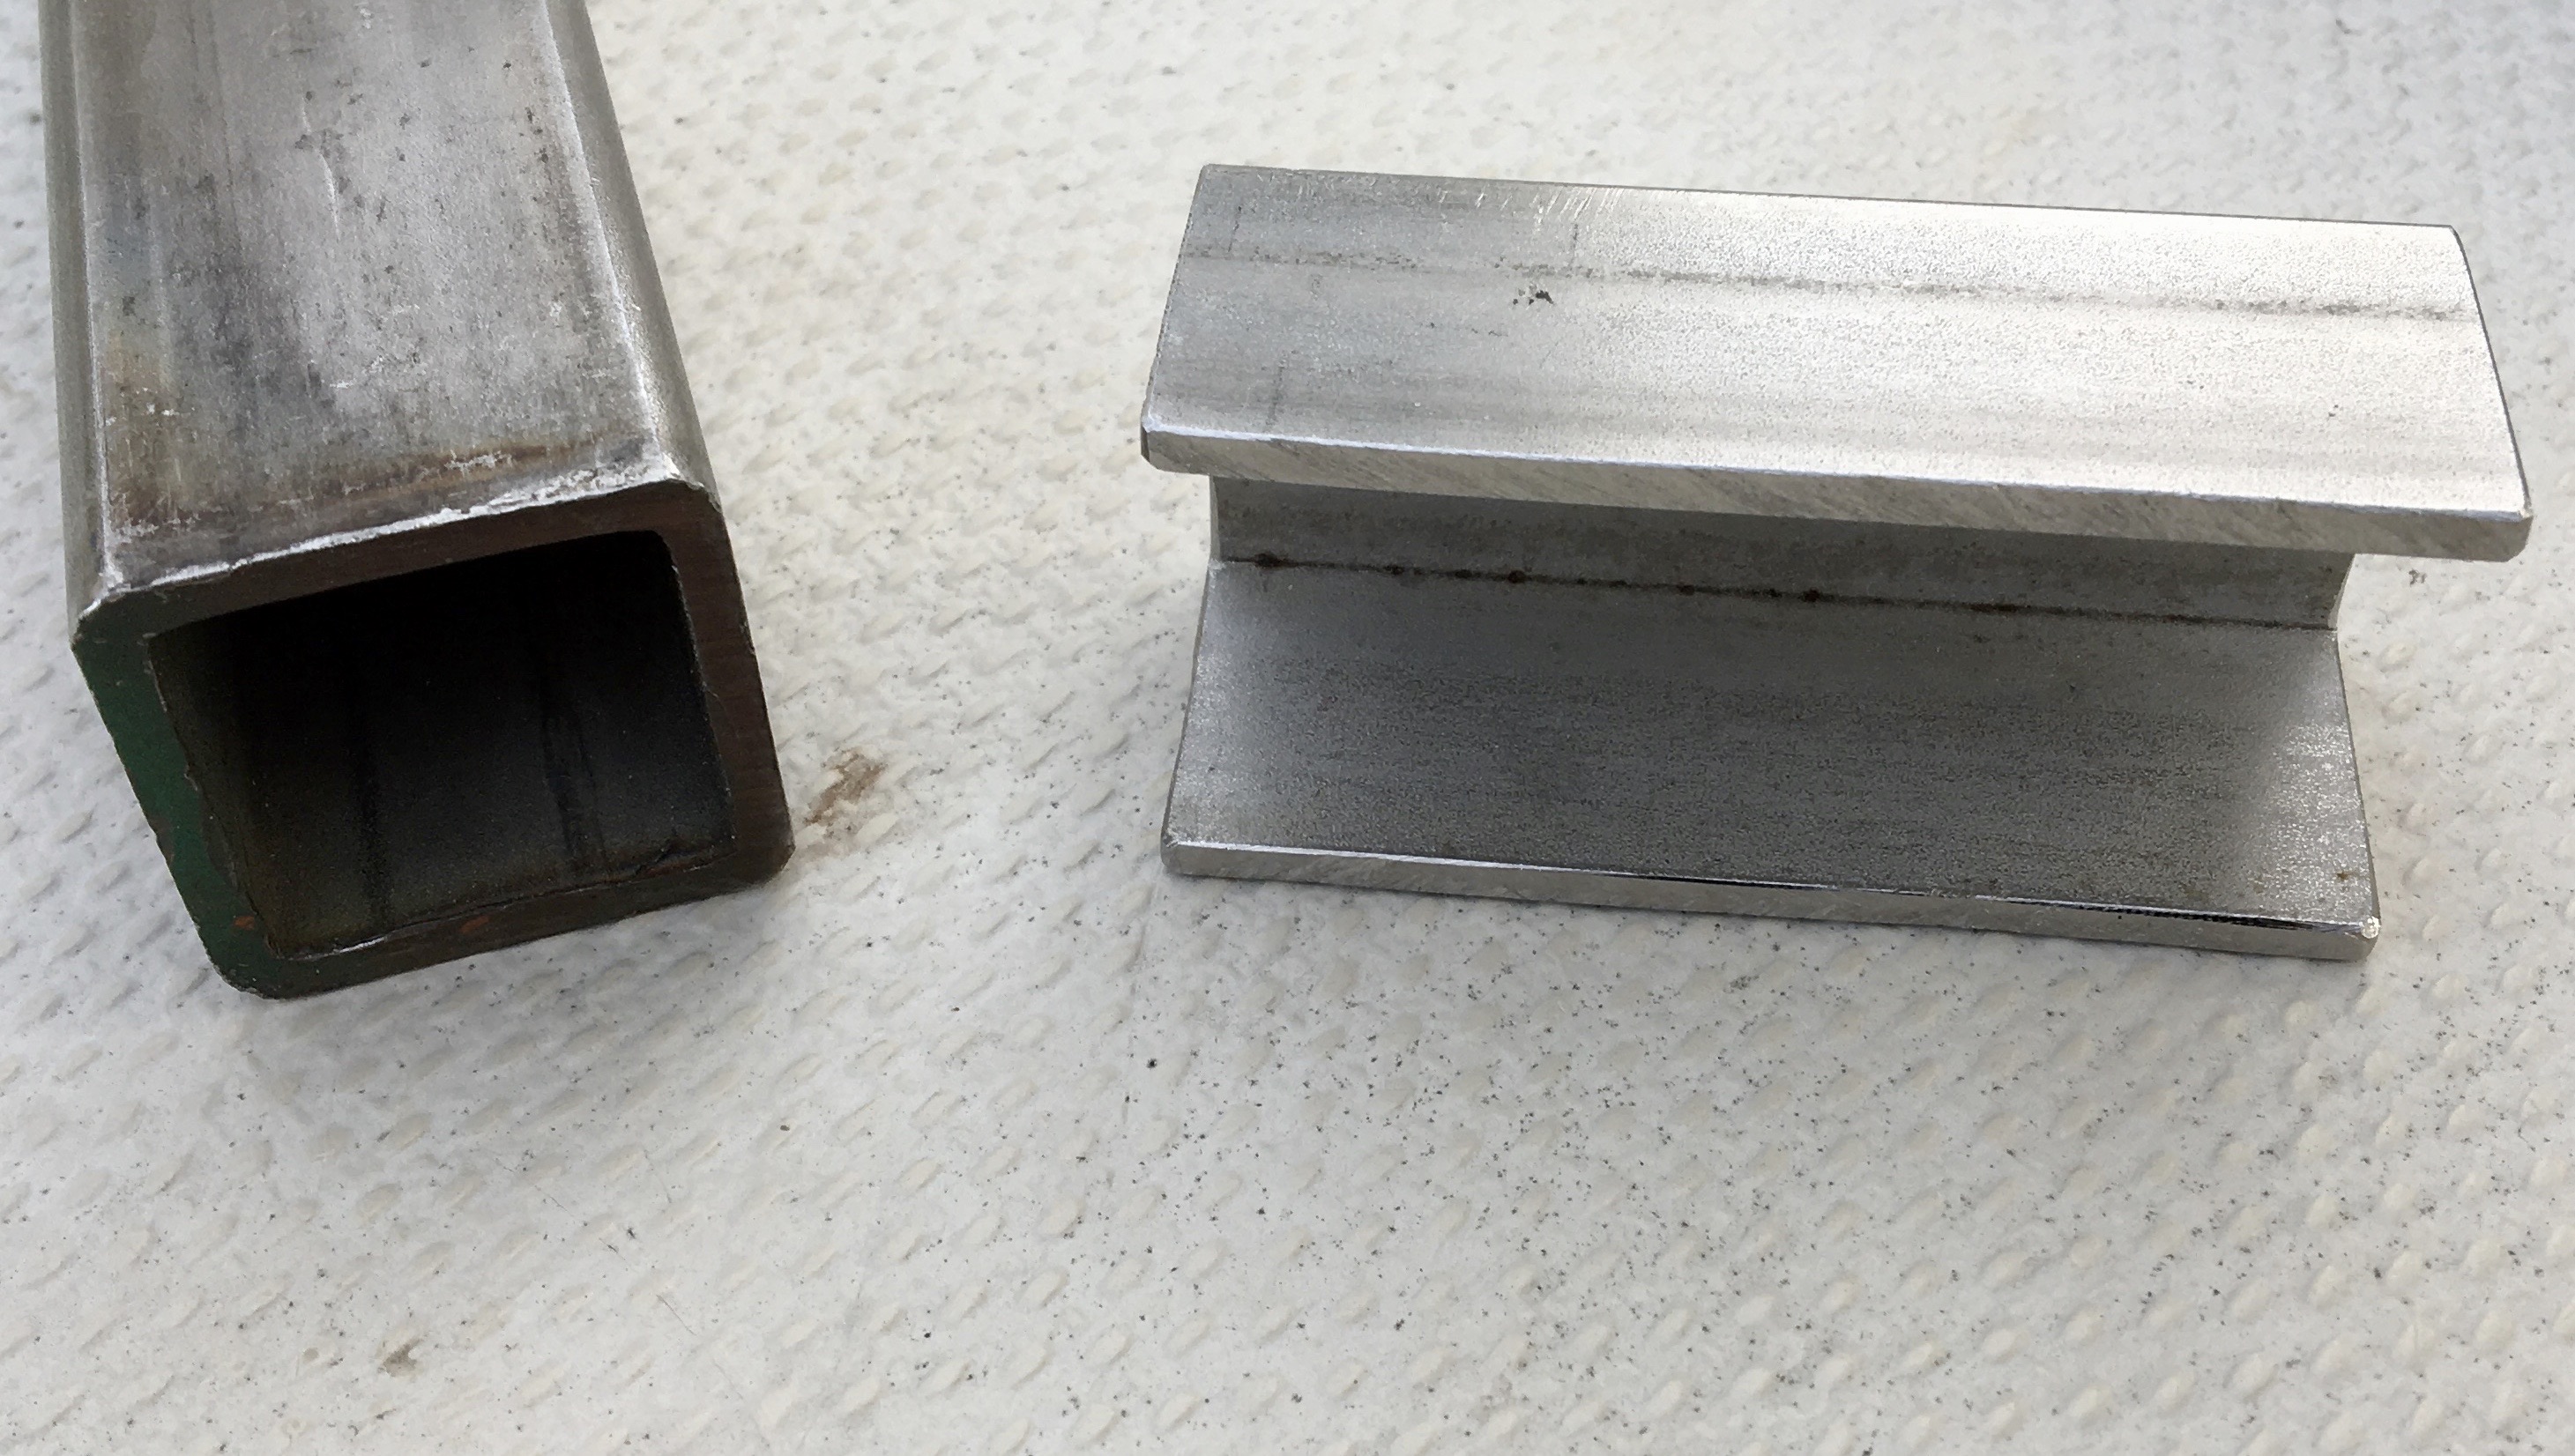
It looks like a metal supplier located just a few miles from here has a square 316/316L SS material the I could use by cutting off one side. It’s 1.25” wide with a 0.12” wall thickness which gives an inside width of 1.01”. It’s only $13.23 for a piece 10” to 12” long. ShieldSquare Captcha
Update:
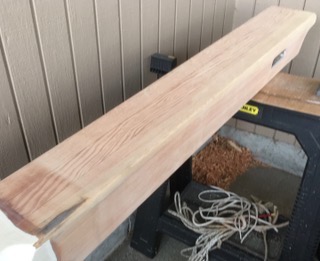
It was straightforward making the SS inserts from a piece of square tube. Taking the sprit to our carport got it out of the weather while I planed down about a 1/16” off the top and one side, and sanded back to bare wood the other 2 sides. Then on to epoxy sealer, West epoxy, epoxy primer and finally Interlux enamel, with lots of sanding in between. Luckily we had an unusually warm fall with temps mostly 55 to 60 most days.
The exact alignment of the notches was lost with their enlarging for the insert fitting. With the fid in the inserts, I used a yard stick to extend the fid’s top surface to 1/2” above the vertical middle of the gammon iron. (The sprit’s fid slot is in the middle of the sprit and the fid is 1” thick.) This allowed me to file the notches so that the inserts were close to being aligned correctly.
Originally I planned to bed the SS inserts with a flexible material like 3M 4000. I finally decided to use a fiber strengthened epoxy mix due to the significant pressure that the fid exerts on the inserts. Because the inserts have to aligned just right to receive the fid, it was necessary to reinstall the sprit right after applying the goop to the inserts. I tried not to use too much goop because it would squeeze out where it was hard to remove without taking out the sprit again. And I didn’t tighten the bobstay and jib stay because I didn’t want to squeeze out all the epoxy mix.