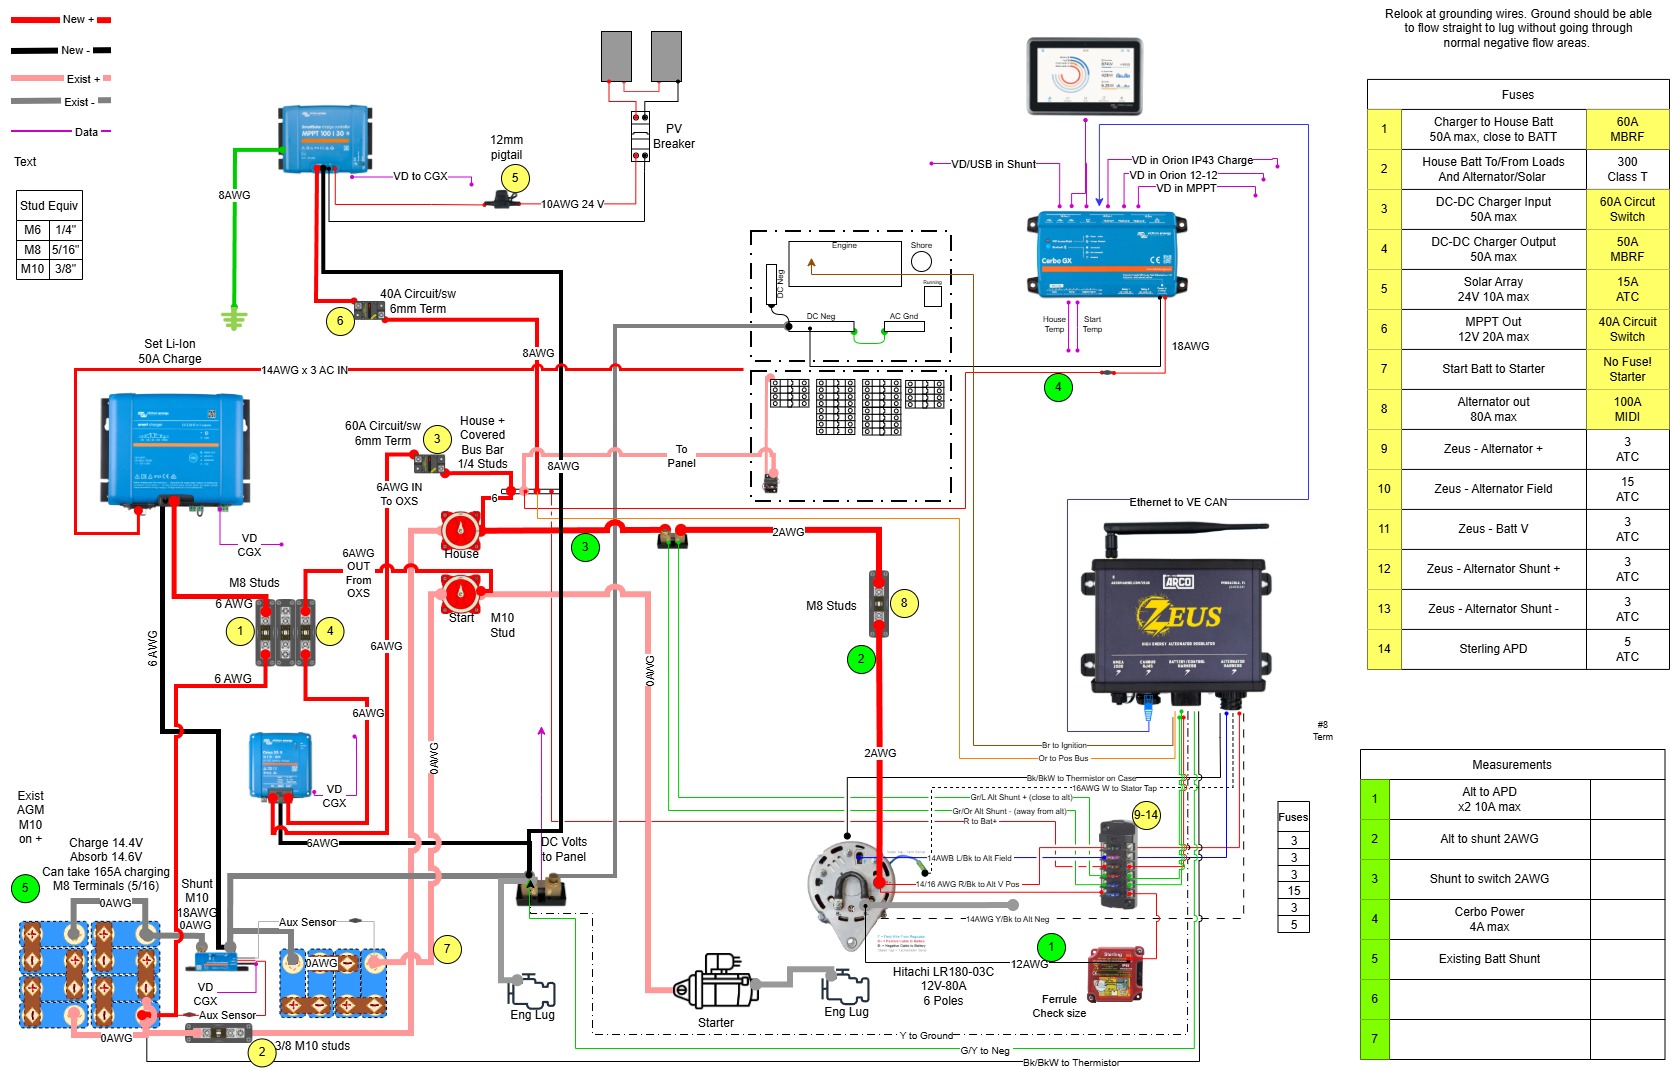
As part of my updating, I’ve moved from AGM to LiFePo4 batteries, necessitating a rework of my charging system. I’ve got a drafting background, so I made a very quick and dirty sketch of the existing setup, then went home and downloaded “Draw.IO”. I drew up my existing system, then used that as the basis to draw up my new system. I’m in the middle of the actual install now, but here’s the diagram I put together. I’ll as-build it after I’m finished, then go down to Kinko’s and print it out on their 11x17 waterproof paper and keep it on board. Should make any troubleshooting MUCH easier.
2 Likes
I am doing the same thing. Currently sketching the rebuild on paper. I’ll check out draw.io, though.
~Hans
Hans, I agree that sketching on paper first makes sense, though I’d keep the sketch as a working document rather than a one-time pass. Labeling conductors consistently matters more than color coding once the LiFePo4 charging side gets complex, since colors get ambiguous fast. To your question about waterproof printing: I’d treat the print as secondary to the as-built record, since the diagram is only useful if it stays accurate as the install drifts. Documenting changes as you go beats saving it for one final pass.
I couldn’t agree more that a software drawing tool is useful. When I redesigned CYMBA’s main bus, I started sketching by hand, but it was very difficult to make incremental changes. After taking Nigel’s Boathowto.com electrical course, I used EasyEDA (the course includes a tutorial on the software) and found it very easy to use and quick to make modifications.
Attached is an article I wrote for the now defunct Ocean Navigator on the effort, if it’s helpful at all.
Cheers,
Mike Cilenti
Cymba
BCC #77
Cilenti_Partial Electrical Refit 3394 (Clean Edits).pdf (146.4 KB)
CYMBA-Main Bus.pdf (92.2 KB)