Elizabeth's Deck Core

Hi All,

The boat finally arrived in Danvers MA, where I’ll be spending some time working (learning) on her…

Job #1 rotten deck core near my thru deck cowl vents. Fwd one is bad, aft one is nearly fine. I’d like to coat it with epoxy though to seal the exposed edges of the plywood.

Here’s some pics of what I found yesterday. Not wet at all, but rotten. Rot Looks to go about 2" in, then gets hard again. I pulled out most of it I think. Rot mostly extends forward towards windlass.

Do you think I can fill this successfully from the side and get all the way back 2" without any voids? I think some sealer or rot inhibitor first, then fill with thickened epoxy… am I on the right track? I’m making this a group effort… hope no one minds… I have no shame admitting I’m partially clueless!

Check out the pics here:
http://picasaweb.google.com/BenEriksen/HauledOutInDanvers

THANKS!

Ben,
Glad to see she has made the trip. I always got worried when we had valuable things moved by the lowest bidder.
The problem with your core isn’t bad looking.The unfortunate thing is that gravity isn’t working with you on this filling process. To be sure that you limit voids in the inner reaches of the cavity the epoxy filler is going to have to be pretty stiff as to avoid flow out or slumping. If you can get the filler into an empty caulking tube and lay it into the cavity starting at the bottom working to the outside you will avoid most air pockets. When putting this in with a putty knife you run the risk of voids as it is unsure if you are getting material all the way in. Even once you have the areas filled you can blow up a balloon inside the vent hole to limit the filler from running out or slumping.I would avoid the rot inhibitor and make sure the area is dry. Once dry saturate the area with unthickened epoxy,let set, then fill with the filler. Best of luck with all your projects, it will be fun to see her come back.

Bob & Lois

BCC Jolie Brise

Bob,

Thanks that’s a good idea on the tube. Too bad I didn’t flow in the epoxy while she was still on the truck… with the downward angle she was at. Wonder if its worth it to re-block the boat…sounds extravagant.

Ahoy Ben, Congratulations on you’re new arrival, where and when, is that Champane re-launch ?

Ok, obviously, you do have a heap of things on the “to do list”, but try to enjoy each accomplishment, as each one is not easy, and ends up v complicated and appreciates all your resources !

All of the BCC Owners, wish you much success , and a timely departure, for your dream fulfillment, a very worthy endever , Congratulations again , from all of us, owners !!!

Douglas , BCC Calliste , 072

Ben looks like a bit of surgery needs doin’ alright, but if you can get back to sound structure there is no reason to expect anything but an excellent repair as quite possible. Might be an idea to seal once all of the guck is excavated, the rougher the better which if all areas get wetted properly will ensure a good bond. These materials are quite excellent for bond strength.

Once a sealer has been applied and set you can then fill with a filled resin, be a bit careful as some of these will expand on setting and blow the deck apart! Depending on depth this may well best be done in increments, I would check epoxy putties for suitability, you could knead these into place with your gloved fingers and thereby eliminate air bubbles.

Alternately FG resin with chop strand mat (which can be cut with scissors into short fibres) can make a nice “porridge” which can be stippled into place with a coarse paint brush. Again could be done incrementally. Careful use of a catalyst in the resin can adjust the working time to help with flow issues. The edges at the end don’t have to be neat as a rotary rasp once the material sets will provide the necessary finish. Even better it will create a great “key” for the future setting of the dorade tubes.

You have great boat and whilst you have a wee bit surgery scheduled the boat is very further ahead of a new project!

Ben:

There are several approaches to filling the void space, as was discussed. Another suggestion is to use small blocks of marine plywood the same thickness as the plywood used for the original coring. These can be cut longer than the depth of the void space. If I were taking this approach, I would dry fit all the plywood blocks. You may have to trim the thickness of each block. These blocks do not have to fit tightly. You need enough space between the GRP laminate and the wood for epoxy. I would number each block and reference these numbers to a numbering system around the hole. I would cut rectangular blocks, the filled epoxy will fill the space between the blocks when they are finally fitted to the void space.

Outline below are the steps:

(Wear cloves. If you are using latex gloves, double or triple glove. As one glove becomes “messy” remove it.)

  1. Test fit the blocks and number them,

  2. Coats the blocks with unfilled epoxy,

  3. Coat all surfaces in the void space around the hole with unfilled epoxy,

  4. Allow the epoxy to cure to cure for perhaps 30 minutes. (If the epoxy cures hard, there may be a “blush” on the surface which much be removed to ensure good bonding. The cured epoxy would also have to be sanded to ensure a mechanical bond)

  5. Partially fill the void space around the hole with filled epoxy - mixture of fumed silica, cotton micro-fibers and epoxy. The fumed silica will give the mixture a gel-structure such that is does not flow (thixotropic) unless sheared and the micro-fibers will absorb epoxy and ensure the joint is not starved of epoxy. Also, use a tongue depressor to coat, as best you can, the top and bottom surfaces in the void space with this epoxy mixture.

  6. Coat the top and bottom surfaces of each block with a thin layer of the filled epoxy mixture - as best you can.

  7. Insert the blocks into the partially filled void space until they bottom out. This will force epoxy into the void space and around the blocks.

  8. Clean up the excess epoxy with denatured alcohol. Do not use vinegar. Vinegar will stop the reaction. Vinegar is good for cleaning tools and hands. Rinse the tools with water to remove residual vinegar and dry them.

  9. After the epoxy has cured, trim the excess wood protruding into the hole space with a hole saw or router fitted with a top piloted trim bit.

  10. Coat the exposed wood with epoxy.

If you have not worked with epoxy, you may want to purchase a booklet from West System Epoxy. I would recommend this.

As I stated before, there are several approaches to solve this problem. All have their pros and cons.

Rod

P.S. Congratulations. Sail the boat as well as work on her to prevent burn-out. I am burned-out.

Rod,
Good idea using the wood blocks as a carrier and displacer for the thickened epoxy.

Bob& Lois

BCC Jolie Brise

Hey all,

This website offers what I believe to be the best way to deal with any hole through a cored deck.

Drilling Holes in Fiberglass

The gist is to have absolutely no wood exposed to holes, it having been routed out and replaced with epoxy. This makes sense as epoxy is rather brittle. So even end wood grain that is coated and “sealed” with epoxy, will flex and eventually the seal will be broken. By removing all wood around a hole to where objects going into the deck only have access to epoxy “plug”, you eliminate the possibility of moisture entering the core through the hole.

I worked in a boat yard for a couple of months doing deck core repairs and installing new hardware; this was the preferred method of ensuring a long lasting through-deck hole.

Hope this helps!

Love, luck, and sweet tomatoes,
Aaron N.
W32 #482

sealingholes1.gif

Nice article and a great way to solve a tricky problem, Thanks Aaron!

Yeah interesting topic. Do we see any negatives to this? Can water still get around this inverted T shape after what ever hardware it’s supporting has been worked pretty hard?

I have a few fresh holes in my deck from probing for rot…

Posted up to ye olde blog with some pics etc… Looks to me like it’s going to be a larger area than first suspected…

http://bccelizabeth.com/

Ben,
The problem that I see is that you make a bigger hole to take care of a smaller problem. I don’t like cutting away the already in place laminates, inner and outer layers of fiberglass, to repair a problem that lies between them. Applying working hardware to this plug is like building a structure on a soft foundation,look at the Leaning Tower of Piza. I know cowl vents don’t issue a lot of sideways stress but the outer area of the plug has to be doctored so that it looks like the rest of the surrounding area.This type of repair is great if you can laminate over the plug but in most cases the repair will show unless the hardware has a flange large enough to cover it. I use this technique when running a bolt through wood where I drill a larger hole than needed, fill with epoxy, then drill the correct size hole for the bolt. The washers on the head and nut end of the bolt give support and hide the plug. This works as a “stopwater” around the bolt and gives the washers something extra to bear on so the wood won’t cave in when tightening the nut. Usually a repair of this type is good when the larger hole or access is taken out on the underside or non visible side of where the core repair is going to be. A laminate can be laid over the plug then covered with ceiling strips or whatever the inside fabric may be. If luck has it and ends up in a locker or area that is out of view so much the better.

Bob & Lois

BCC Jolie Brise

Ben:

Before you become “happy” with the skill saw, give me time write how we solved a similar problem in a previous boat we owned. I agree with Bob and Lois post, the last thing you want to do is cut out the laminate. The problem area is relatively small and there are other simplier solutions.

Rod

Thanks Bob and Rod…
Yes, absolutely, the last thing I want to do is cut away the deck (I tend to get little over-dramatic when I post to that blog). I think the question in my mind is more about how far reaching is this rotten area. I wonder - can I safely say the orange (normal) colored wood is OK? I don’t feel qualified to determine this yet. Back to basics here.

Ben:

The fungus that rots wood requires four “ingredients:” oxygen, moisture, heat and food (wood). Take away anyone of those ingredients and the rot can not spread. The fungus spores are still there but they can not spread. Information about wood rotting fungus may be found at Site | Ohioline .

Now that we have the academics out of the way. let’s discuss Elizabeth’s little problem. When we rebuilt one of our boats, we discovered a small section of rot in a plywood partial bulkhead. I drilled small holes into the edge of the plywood, mounted syringes in the holes then fill the syringes with Clear Penetrating Epoxy System (CPES). The cure time for this epoxy is 1 to 3 days and it has the viscosity of water. The epoxy penetrates through the wood and “petrifies” it. The resultant structure is as sound as the surrounding wood.

http://www.rotdoc.com/index.html

If I were doing the job, I would dry the coring per Bob and Lois earlier post. Once the wood was dry, I would setup tubes in the 1/4" drill holes, i.e. stand pipes. If possible, I would use 12" long tubes. When filled with liquid, the hydrostatic pressure will be about 0.4 psi for a 12" vertical tube. After inserting the tubes in the holes, fill the tubes with CPES and keep filling the tubes as the CPES penetrates the rotted wood. The CPES will also penetrate into the coring not affected by the fungus but it will not penetrate as fast as in the rotted coring. You want the CPES to penetrate the unaffected wood to ensure the CPES encapsulates any spores that may have traveled into the unaffected coring. Once, the CPES has cured, I would route out the coring around the hole and fill the space with filled epoxy. The stand pipes can be cut off, drilled out and the hole repaired with filled epoxy. The key to the success of the repair is to ensure the coring is dry. Another approach to drying the coring is to fill the stand pipes with acetone (requires metal stand pipes). The acetone will “carry” the water out of the wood but it will be necessary to let most of the acetone evaporate from the coring before applying CPES. A couple of heat lamps can be used to drive the acetone from the coring. Warning, acetone is highly flammable, hence no sparks or open flames. Make sure the cabin is well ventilated to prevent acetone vapors from concentrating in the cabin. You do not need to be the first astronaut sailor.

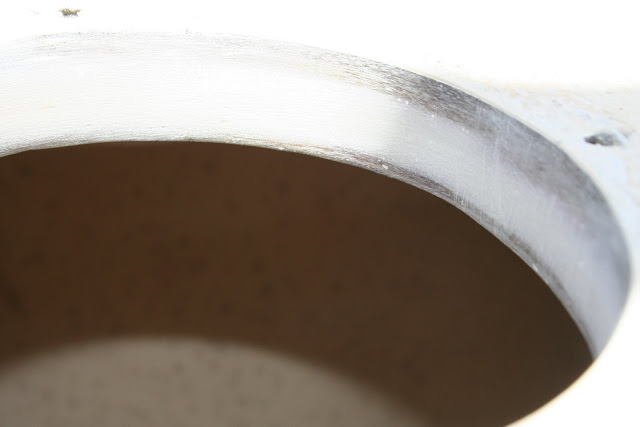
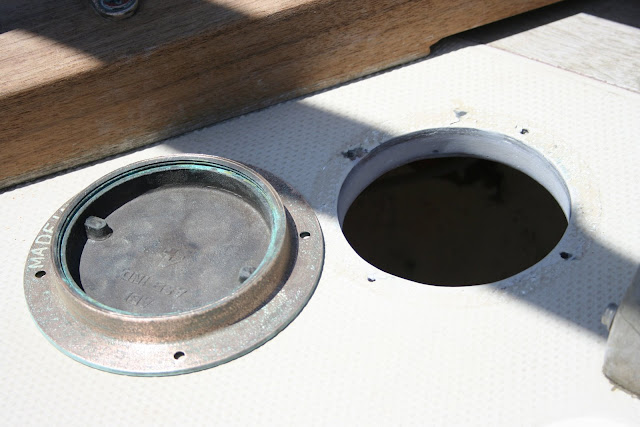
I looked at the photos on your blog and do not believe the small area of rot around the vent holes will affect the structural integrity of the cabin top. BCC’s are “built stout strong.” These holes are relatively small compared to the holes cut into the cabin top for the skylight hatch and companionway.

The bulwark area shown in the photo on your blog can be remedied by cutting out the area and bonding a dutchman into the hole.

http://everything2.com/title/Dutchman

I like dutchman patches that have tapered edges. i.e. a mini-scarf joint around the dutchman. A stepped scarf will work just as well and is easier to make. I would use epoxy filled with micro-fibers to bond the dutchman into the bulkhead.

The small amount of rot you have found is insignificant compared to the rot we found in African Moon’s aft cabin and engine well. I could stick my finger through some of the rotted areas. Repair was not an option. We ripped out the engine well, after cabin, cockpit, etc. until all we that was left aft of the main cabin was a hull and two side decks. Once this was accomplished we built a new aft cabin, engine well, cockpit, etc. This is how we completed our undergraduate studies and one year of graduate school in boat repair. The aft cabin project, took a year working on weekend but is only represented 1/5 of the total project.

As I have mentioned before, there are usually several approaches to solving boat problems. None are perfect but they work. Regarding rot, the old saying is, “every boat has rot, it just has not been discovered.”

Fair Winds,

Rod

Dutchman repair description and illustrations page 102

With epoxy glues, the fit has to be good but not perfect.

Rod

Thank you so much Rod … lots to read, love it.

When y’all need help with yer websites - ya know ill be right there to return the favor!

tnx
B

Here’s an update on this project…

My aft cowl vent hole didn’t have any rot really, but I did route out the plywood core and fill it with epoxy… so that no core is exposed if any water was to get thru…

It’s pretty sexxy looking… thought I’d post a pic or two…

Ben:

Nice job, it’s good to see progress taking place.

Rod