Hatch Cover Sealant, Varnish and options

Hi Roger, Ah, Yes, I agree, a very interesting read, especially because of your post, in there, too.

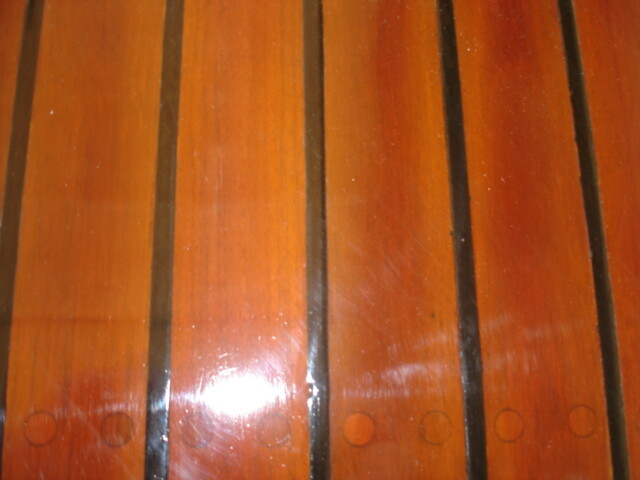
This interests me : "If you want the varnish to adhere to the old varnish, it must “all” be sanded so there is not one single spot that is shinny. "

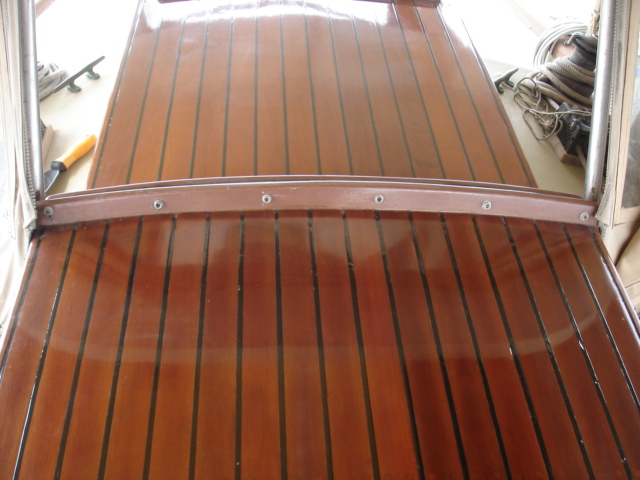
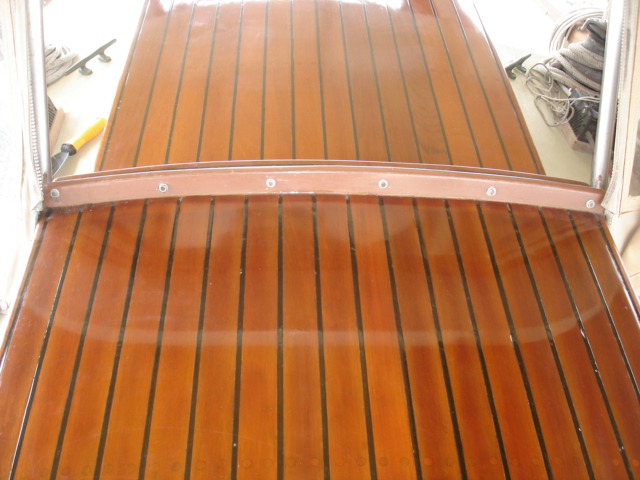
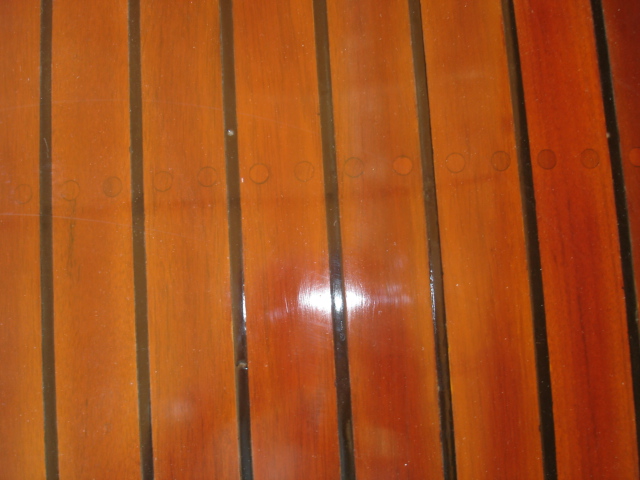
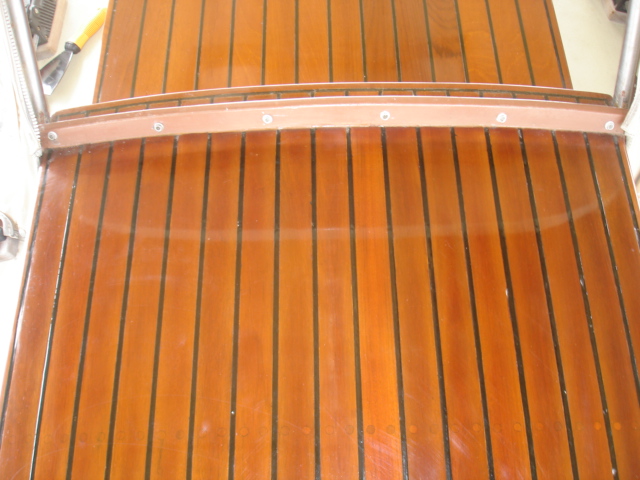
The only “shinny” spots that I get after sanding, and between coats, are in the grain grooves, as I can not sand the wood down past the grain grooves, or there would be no wood left !

I have always suspected that the varnish deterioration starts first, in my “shinny” spot grain grooves .

As for Ben’s question and interest, and mine too , we are trying to reduce future maintaince and prolong the life of our work.

As a woodworker in a former life, we were always aware that wood moves, it is just a wood characteristic that can not be avoided with the material.

We then tried to accomodate that principal in all applications, with wood construction, calks and finishes, everywhere, on our boats.

Advice from you, Honkinsailor, Bob&Lois, and others, are very helpful, T Y , All for your help .

Douglas

Douglas,

I’ve had good luck using semi-fine bronze wool to get into grain crevices when sanding varnish. I’ll use 150-180 open-grain paper for the majority, then finish with the bronze wool going with the grain to get into all the nooks the flat paper does not reach. Wool gums up very quickly though, which is why I don’t use it more.

Roger,

Thank you for the photos. Your brightwork is really amazing. I love the reddish color Honey Teak imposes on teak, and with so many coats of Varnish over it, it looks spectacular!

Cheers,
Aaron N.

Hi Doug, Yes, wood does move. The more it is exposed to the elements, the more it moves. The larger the surface area, the more it moves. The more the natural grains are exposed opposed to being sealed, the more it moves. One reason I do no like a two part varnish (honeyteak and others) on a large area (bulwarks) is that the wood moves where the pieces meet. That said, I used Honeyteak on my walestrake and it is in excellent condition. Reason, I bonded the teak to the hull with 5200 and removed all the screws except those on the ends and where there are joins. There is little if any movement. Remember this is the walestrake that is underwater a lot of the time. I have about 12 or more coats of varnish on all my varnished teak. I have no cracks or separation at the joins or caulking. I have my boat in the most extreme environment with tropical sun and lots of heavy rain. I do have covers for my varnish so I only varnish once a year. When I varnish, I do not leave any shinny spots at all. The worst place to leave a shinny spot is where two pieces meet. If the wood moves at all, this is where it will break the bond of the varnish. Regarding your grooves in the wood. The only solution is to sand down to solid wood. Do it only once but then maintain the varnish. If Ben wants to have a boat that really looks good and he likes the varnish look, then I suggest he remove any silicone based caulking, sand, caulk, sand, prime, and begin the long process of lots of varnish and the keep it maintained.

Anyone out there who has bare wood exposed to the elements will eventually have the soft grains of the wood erode leaving grooves. If this is sanded down to smooth wood, it will happen again and again. Eventually the wooden plugs will be gone and the screws will have to be removed and re-set deeper into the wood. Eventually it will happen again, and again until the wood will have to be removed and new applied. Unfortunately, I learned this lesson from my first boat, a Chinese Junk.

Many years ago I met a guy who had an original Cris Craft power speed boat. His varnish was like new. I asked him what he did and he told me exactly what I mentioned on this forum.

Roger

Indeed interesting!

So Roger, what exact sealant/caulk did you use in your hatches with such success?
And for those who have used epoxy/graphite in OEM hatch, how has it held up?

Seems to me what is being said here is that as long as there is a good coat of varnish, there shouldn’t be much wood movement at all here, so either epoxy or sealant will work.

I think that is my current internal debate: epoxy or sealant.

Thanks much for info as always.

Hi Doug,
Ah, Sorry, I did not see my previous post and thought it was lost so wrote another one which says about the same thing…I apologize to all and especially to John Cole…

Yes, I agree that wood moves. As long as it can absorb moisture and exude moisture, it will move. The larger the area, the more movement. As you know, a good furniture maker will let kiln dried wood adjust to the humidity before manufacturing. When the furniture is finished, they seal the wood to prevent an further expansion and contraction which will cause cracks. We are talking about two square feet of teak that is 5200 to plywood and then sealed. My wale strake is also varnished and does not have cracks. This is underwater at times. I installed the walestrake with 5200 and removed the screws after it set for a week. I did leave the screws in the ends and where the wood was scarfed. It also has at least 12 coats of varnish but looks as good as the day I installed it. I feel that by properly sealing the teak after properly adhering it, will prevent most if any expansion or contraction. I would not say this about the bulwarks where it is impossible to seal where the woods meet. Anyway, I attached some close-up photos of my hatches. These hatches have not been varnished in about one year. I can only varnish in the dry season and the dry season has just begun. I do use covers for all my varnish which I credit for the longevity.
Roger

Varnish 001.jpg

Varnish 002.jpg

Varnish 004.jpg

Varnish 003.jpg

Varnish 005.jpg

Varnish 006.jpg

Varnish 007.jpg

Thanks for the pics Roger!

A great way to make varnish stick when you have some “shiny spots”
or to do build up coats without sanding, use a light coat of Penetrol. I usually just use a tac rag to wipe it on instead of brushing. Also thin your varnish with Penetrol instead of thiner and it flows much nicer. GREAT product, have been using it for 30 years.

Gary

ps…I leave my planked areas natural, and varnish the trim.

Well, I finally wrapped up the forward scuttle hatch today… Looks Ok, not ideal. I posted on the blog about it where there’s more info and pics. Thanks for all the info and help here guys…

http://bccelizabeth.com/

Ben, I am really impressed with your work. Take your time and do it right the first time… So, congrats…

Now a word of wisdom…I watched your dinghy sailing video…YOU MUST BE CRAZY.

Roger

Ahoy Seacap, that is v good info on Penetrol, and a great referal.

I assume that you used Penetrol on your Falmouth Cutter, too !

Hope that you are enjoying your new BCC as much as you did your F C .

Can you explain why Penetrol works so well, and if there are any cases, where it wouldn’t be appropriate to use it ?

Douglas

Ben:

The sketch is based on Roger Olson’s setup he showed me while visiting Baltimore, MD.

When we first started using the snubber setup, I would loop the strop with attached snatch block around the bowspit after deploying and setting the anchor then remove it before we won the anchor. When I singlehand, I leave the snubber setup in place and attach both ends of the nylon snubber to a stanchion. This arrangement moves the block to the side and prevents it from banging against the sprit. This year, I will drill the lower cranse iron tang and attach the block to the cranse iron with a shackle.

In practice, we use a rolling hitch or a taught line hitch to secure the nylon rope (snubber) to the chain. The other end of the snubber is attached to the bits by taking two wraps around the starboard bit in a clockwise direction first. The line is then lead to the port bit and two wraps are taken in a counterclockwise direction around the port bit (starboard side anchor roller). We repeat this pattern several times then tuck a loop of the snubber under the last turn of line. The rope’s friction against the bits prevents the snubber from slipping. The snubber can be quickly removed from the bits by pulling on the bitter end of the line to remove the loop under the last wrap then unwrapping the rope from the bits. I got the idea from working as a deckineer (deck hand/engineer) on tugboats.

Our 1/2" diameter nylon snubber is 50 ft long. This allows one to play out more chain without removing and reattaching the snubber to the chain (Roger Olson). We used this technique to withstand a squall line packing an estimated 60 knots of wind. It is the only time the boat swung 90 degrees to one side then the other before straightening out to face the wind (mud bottom). Yes, I was concerned until the boat faced into the wind.

Fair Winds,

Rod