- Butt joints: where the packing material ends are cut square and the ends pushed together, the joint forms a line perpendicular to the shaft, does seal, but not for long.
- Scarf joint: This is a tough one to describe, here goes nothing. The BCC, unless someone has install an unusual type packing gland, usually used 3/16" packing. Cut the ends at 45 degree angle to allow the ends to overlap. If you look at the packing material wrapped around the shaft, looking perpendicular to the shaft, you should see the overlapping joint line of the packing.
- Length: cut the packing material roughly 1/64-1/32" longer than needed, this will force a tighter seal at the joint line.
Installing Flax packing:
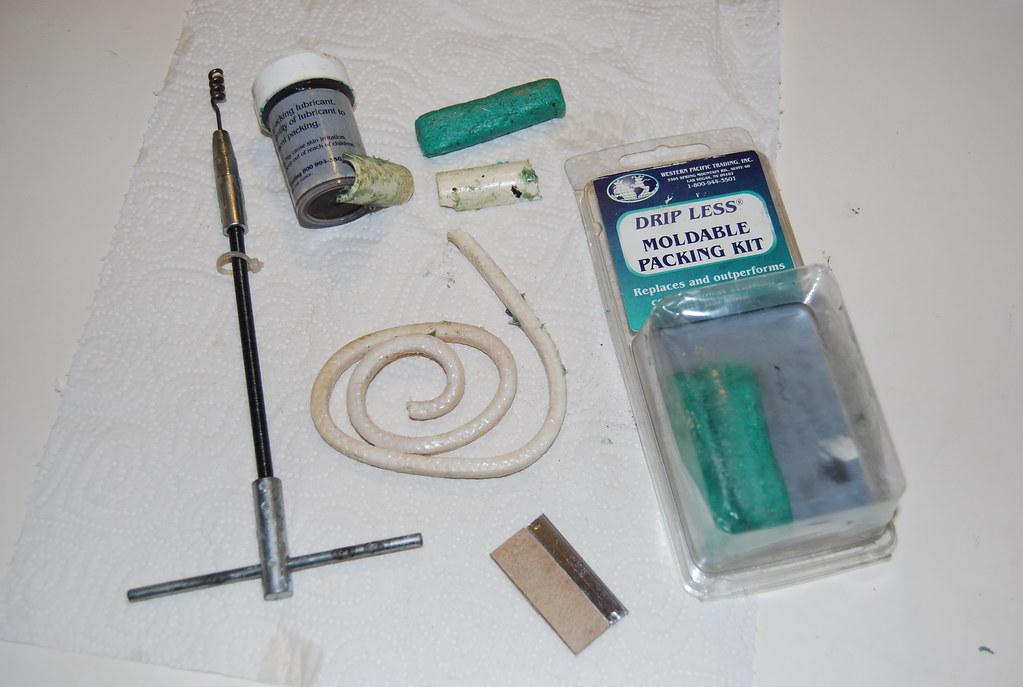
- Go to your local automotive store, Kragen, Ace hardware etc. and pick up an automotive scribe, it has a knurled round handle in the middle, a straight pointed end that screws in one end and the other end has a straight shaft with a 90 degree pointed tip (sharp). You will also need a single edged razor blade (has metal back to protect you hand) or a box cutting knife that also has a razor blade. You can get a little piece of plywood to use as a cutting board, but we prefer to use and unused portion of the shaft to wrap the packing around and hold it in place to cut the packing to length. Small common screwdriver 1/4"-3/8" blade about 4" shank, 2 packing gland wrenches or 2 18" pipe wrenches. We purchased a $200 set of professional packing gland wrenches and found they fit about 2% of all packing glands, pipe wrenches if used properly are preferred. Small quantity of waterproof marine grease, a stainless steel bristle wire brush, no mild steel please, puddy knife and a piece of 3M gray scrubber pad.
- Make sure your bilge pump automatic float switch and pump are working properly, if your new to repacking your shaft in the water it will take you a little longer than normal, but rest assured, it looks like a lot of water coming in because it is, but its a lot less than it appears. Don't panic, be patient, even if you don't, you bilge pump knows what it's doing.
- Take your wire brush and clean off the threads on the packing gland and apply a little grease. Very gently, puddy knife, wire brush and 3M gray scrubber pad, clean the shaft in front of the packing gland; we are not trying to scratch it, just clean it.
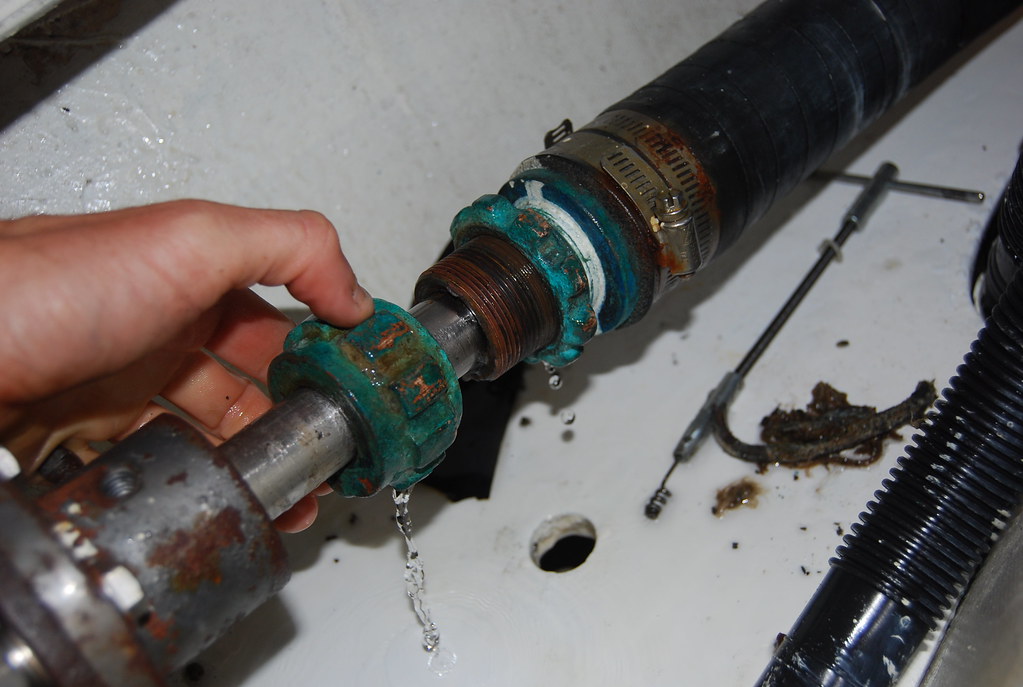
- With your pipe wrenches or packing wrenches, put one on large packing gland nut and one on the locking nut behind the large packing nut, listen the locking nut, not the large packing gland nut, locking nut is usually only about 1/4-3/8 thick. Ensure the pipe wrenches are gripping the flats of the nuts and not the corner, don't want to round them off. Our packing gland has is ringed with flat top teeth and uses a special spanner wrench which we don't have and have never seen for sale, so we use the pipe wrenches with great success.
- Once the locking jut is loose, there should be a flange on the main body of the packing gland before it enters the packing gland hose, hold the flange with a pipe wrench and use the other wrench to remove the large packing gland nut. The large nut is hollow and is where the packing material resides.
- Slide the large packing gland nut up the shaft towards the engine. Take your Automotive scribe and unscrew the straight pointed end and put it some place safely out of the way (tool box or call your local surgeon and arrange to have the holes in your spacesuit repaired), with the bent end of the scribe, reach up into the large packing nut and try to hook the old packing material, it may be necessary to rotate the nut slightly to aid in hooking the joint line and pull the packing free. Get it all out, rotten packing feels spongy and hard dried packing will fee like packed clay, when its all out, you will have a metallic feeling when scraping the inside of the nut with the scribe.
- Push one end of the new packing material into the nut around the shaft with your finger, ensuring the packing does not twist and the overlap is correctly aligned. Using your small screwdriver, gently work your packing material into the nut deep enough to clear a couple of threads at the opening. Slide the packing nut back and screw it onto the packing tube/body, this will drive the packing deep into the nut.
- The next ring of packing should be installed with the joint 120 degrees away from the first ring, the third ring should be 120 degrees from the second; it doesn't have to be exact, we just don't want the joint to land on top of each other for a better seal.
- We do not recommend any more than 3 rings of packing as this results in overheating the packing and may burn the shaft, causing groves to form. With flax packing, it's designed to leak 7-10 drops per minute underway, water is the lubricant.
- Reinstall your packing nut and lock nut, tighten to snug fit, pipe wrenches have a lot of leverage so use a little caution here; bronze in particular needs very little torque to tighten securely. At this stage, we want to make sure the shaft rotates smoothly with out binding and the packing is not leaking static. Warm your engine in neutral, when warm, put your engine in gear and run it for 5 minutes to break in the packing. When running, BE CAREFUL not to get your hand anywhere near the propeller shaft flange coupling and the set screws they HURT, no loose clothing, preferably a short sleeve shirt, place a finger on the packing gland to check temperature, should be no more than luke warm to the touch, if hot, shut it down and loosen the gland slightly and re-run.
- After a brief run, the packing gland may start to drip, check the drip rate to see if it falls between 7-10 drops per minute, if not readjust as necessary. Always check drip rate and temperature after adjusting.
- Finally, apply a little grease on the shaft in front of the packing gland, periodically examine this area for mineral build up, clean mineral off when found; your shaft moves in and out of the packing gland when running about 1/8-1/4", these minerals if left to form will grind away at your packing shorting it's useful lifespan.
Synthetic Packing material and drip-less packing:
- We cured our leaking shaft and wet bilge problem with products from Rhumb Line Ltd. We use exclusively the Synthetic Teflon Packing TP-316 (3/16"), Drip-Free Packing rings 10146 and SYNTEF Shaft Lubricant TG-100.
- Cutting the Teflon packing material is cleaner and easier than flax and much easier to install in the packing nut, works best however, if the shaft is in pristine condition.
- The packing material and shaft is liberally coated with the SYNTEF installed the same as flax packing. It can be use alone or with Drip-Free Packing. If using the green Drip-Free Packing, install one ring of the Teflon packing followed by one ring of the green Drip-Free, followed by a final ring of Teflon packing. The green Drip-Free packing material is pliable, similar to play-dough we had as kids, just roll it between the palms of your hand making it round and small in diameter to fit into the packing nut, save any extra as it has the shelf life of nuclear waste. Most Drip-Free packing kits contain enough for several packing adventures. Cote all packing, Teflon and Drip-free with SYNTEF lubricant, it's sticky nasty stuff, bring plenty of rags, I promise it is harmless and will eventually wash off your hands, forget gloves, no try gloves once and let me know how it comes out:) Kind of like liquid Velcro.
- You should have 3 rings total, first and last are Teflon and center ring is green Drip-Free.
- It varies from boat to boat, but for the most part, Drip-free does not leak underway or static.
Important to remember, even the best packing job will not make up for a mis-aligned engine, bent shaft or an out of balance propeller. Despite having a bent shaft in our boat, we intentionally drive it at a speed where the shaft does not vibrate -2,000 RPM and the Drip-Free and Teflon packing does the job. New transmission and shaft going in 1/10/5.
P.S.S (Packingless Sealing System) Shaft Seal, sold by PYI through West Marine and most marine suppliers, uses a accordion bellows type hose clamped to the stern tube, the other end is clamped to a carbon bearing (face seal), a stainless steel rotor is sealed to the propeller shaft by 2 internal o-rings and the rotor is held in place by double set screws, the hose is slightly compressed rearward to create tension in the bellows and the rotor is pushed rearward on the shaft in contact with the carbon face seal then the rotor is locked into place. The rotor rotates with the shaft and the carbon face seal and hose remain stationary attached to the stern tube.
As the name implies, there is no conventional or synthetic packing material employed.
Do you Yahoo!?
Meet the all-new My Yahoo! – Try it today!

