Ahoy Everyone!
We’re in the middle of replacing our water tanks and ran into an impasse. Before just charging on, we thought we’d post something and see if anyone had any ideas.
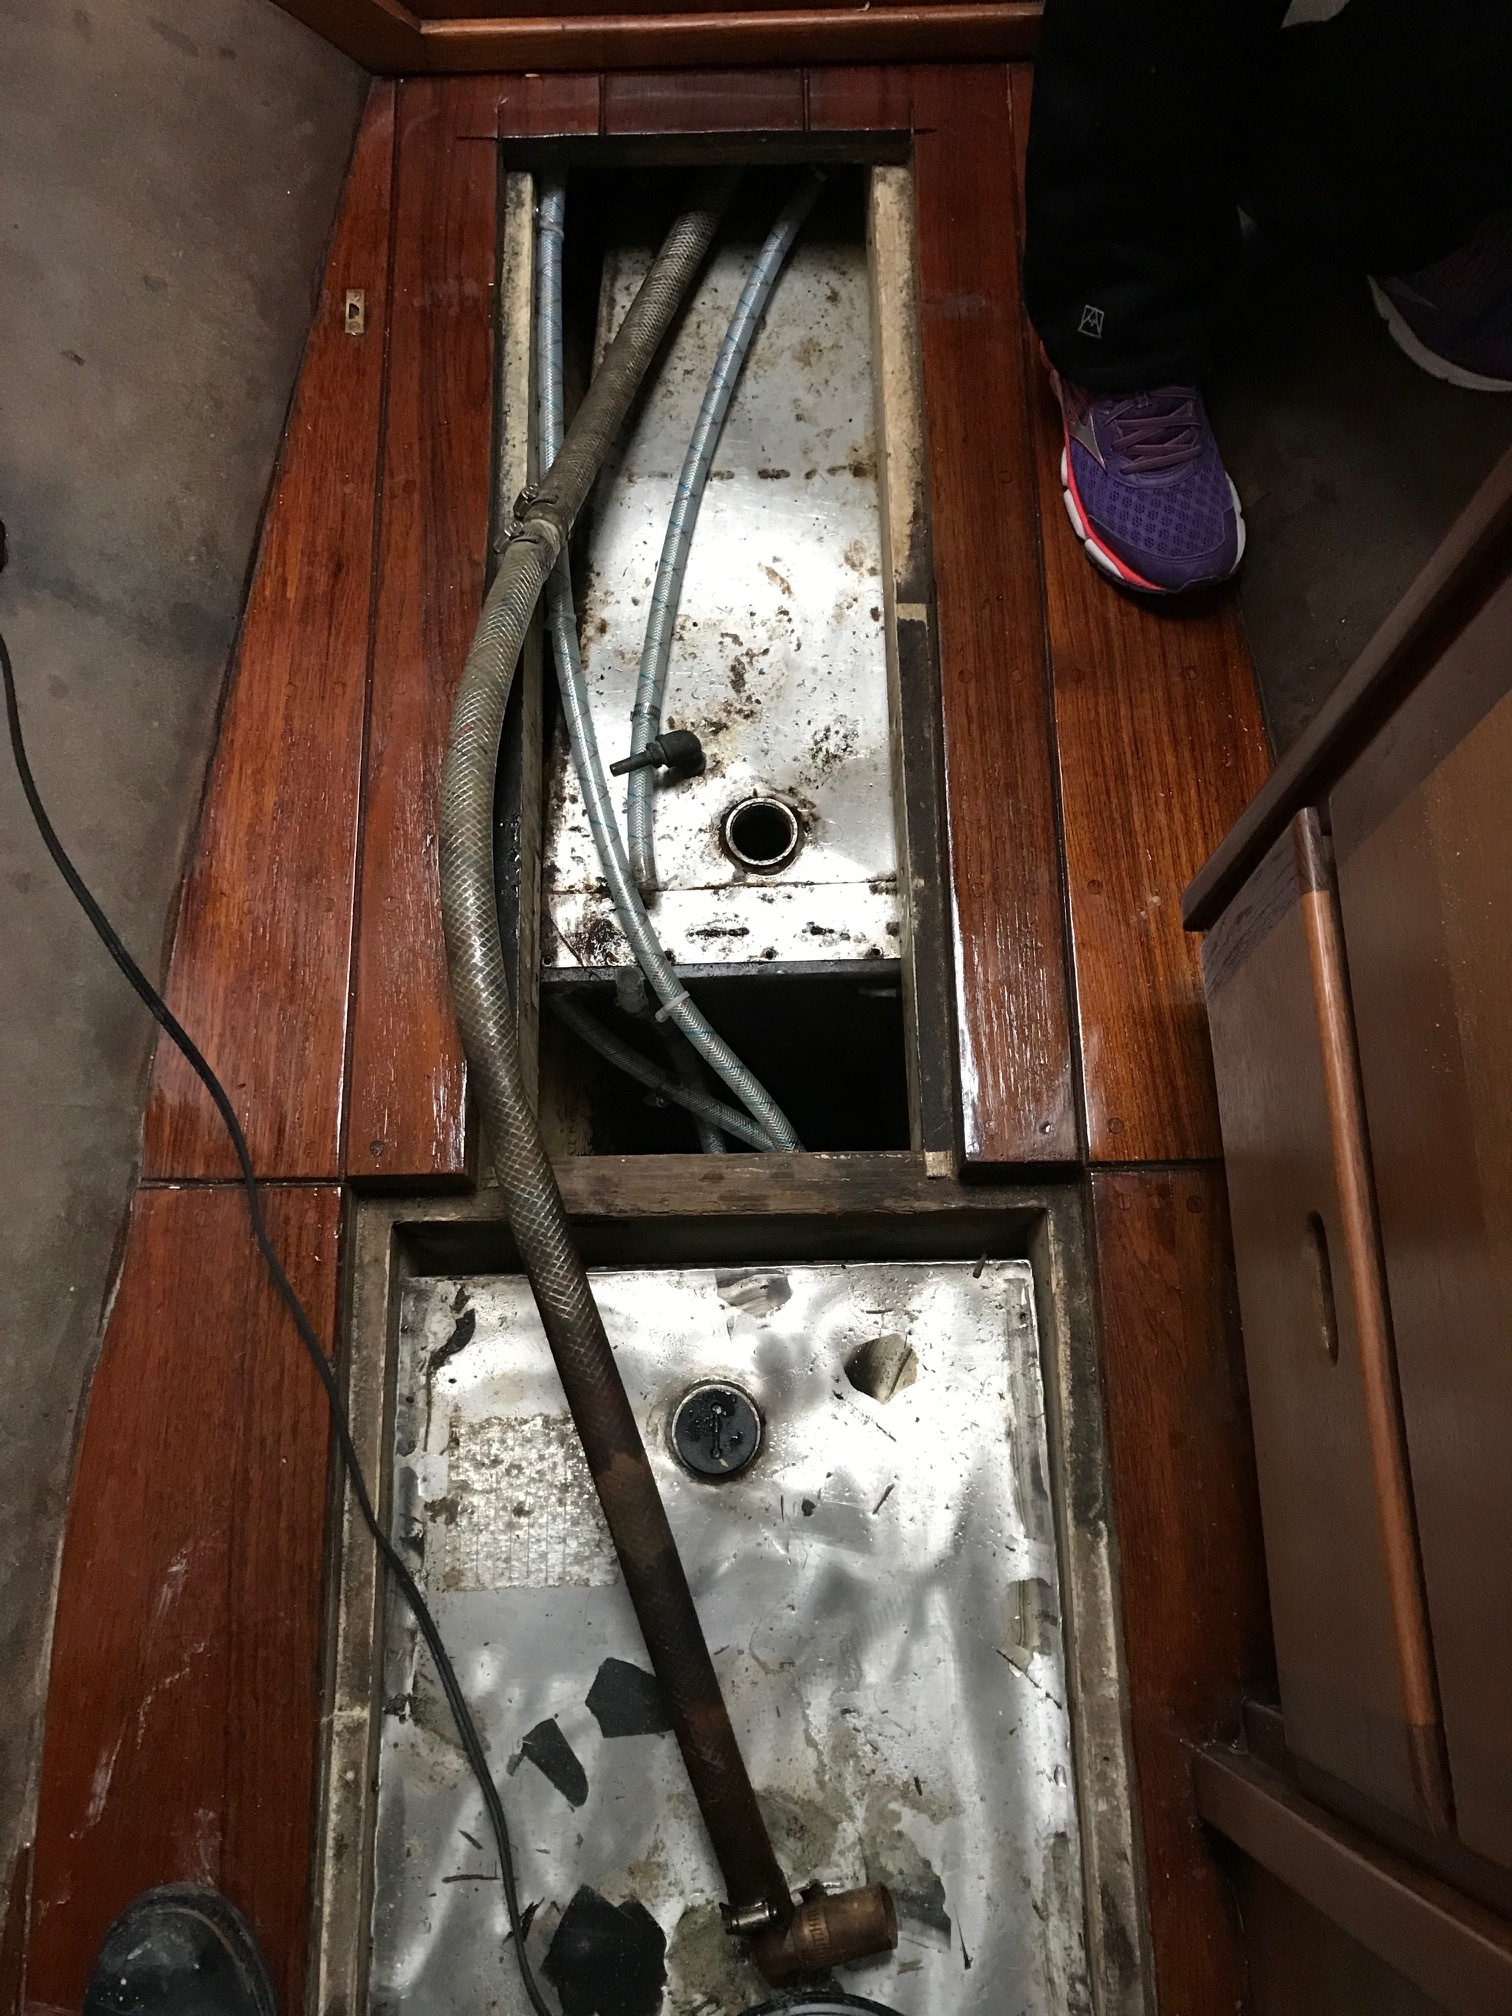
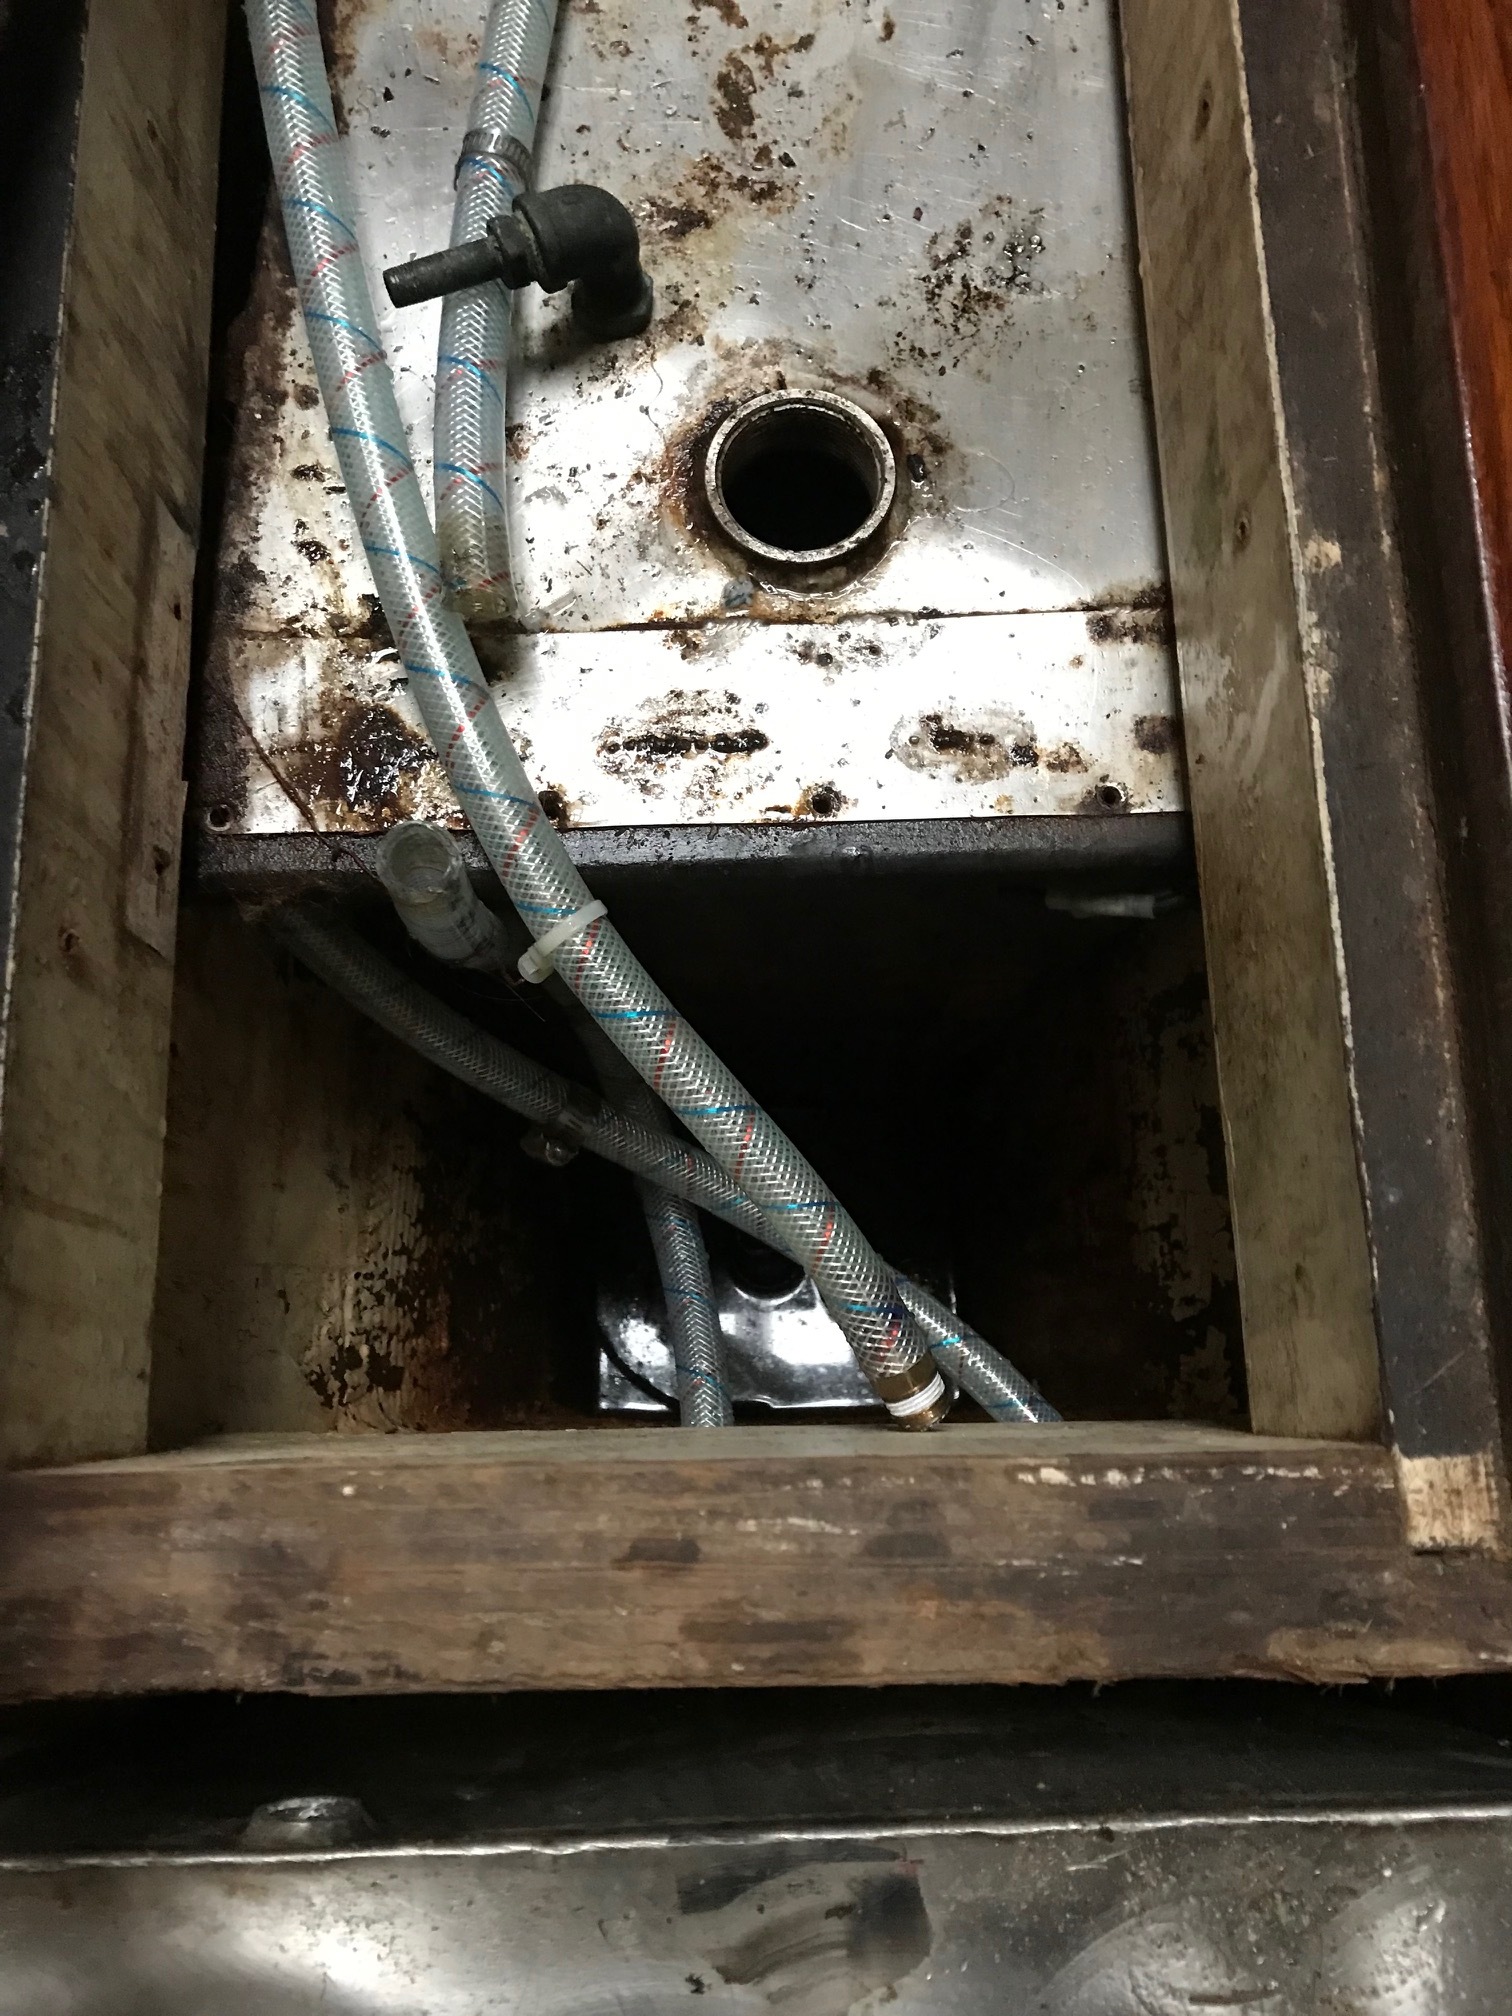
The forward tank came out with no problem. The aft tank however, is another matter all together. The forward part is just a little wider than the distance between the longitudinal supports and that coupled with the non-removable portion of the sole has me scratching my head at the easiest way to not only remove the old tank, but then install the new one.
So…any ideas on:
-
How to remove the fixed part of the sole? There are a lot of bungs, but I think most of those are for the screws that connect the teak to the plywood. I wasn’t sure how the sole was fixed to the hull and didn’t want to just start mindlessly drilling out all the bungs/screws in the hope that would work.
-
Perhaps once the sole is out it will be more obvious, but will it be possible to remove the longitudinal stringers without pulling off the engine compartment cover? Page 24-25 in the construction manual make it seem like it may, but I wasn’t sure.
Any hints and tips here would be very helpful!
P.S. I’m planning on replumbing using PEX, but still on the fence about using the crimp, expansion, or ‘click’ in type of fittings. Seems like each has it’s pros and cons, but any thoughts are always welcome.
Cheers!
Mike
Mike,
In your photo, it looks like the portside fore and aft stringer butts into the aft floor and is inset into the forward floor. Is that the case? It’s not clear in the photo that for sure the stringer butts on the aft stringer. It also looks like the stringer is screwed into something outboard of it—there’s a series of holes visible on its vertical surface.
My wild guess is that stringer is removable without removing the cabin sole. Seems like it should be removable doesn’t it? It’s purpose is to keep the tank in place. If they added some glue to whatever it’s screwed into, I think you’ll have to chisel it out and replace it. It’s probably Douglas fir which splits fairly easily.
Dan
The entire aft section of sole is removable as a unit.
Lift up on its forward edge and slide the sole section forward until the aft end clears the engine compartment cover. Then rotate as required to stand it on edge.
Once the sole section is out, the stringers above the tank can be removed.
Thanks Guys!
Dan: The sole is on half of the stringer, so I can’t yet lift it out. But if John is right this should be easier than I thought.
John: Thanks! We’ll give it a try next weekend. I tried to pull it up, but just gently since I didn’t want to damage anything. Now that I know it should be free I can try with a little more ‘enthusiasm.’
Thanks guys!
Mike
Thanks for the tip John!
I felt much more comfortable working to get the aft part of the sole out since John mentioned it should have come out. Came out pretty easily (seems like the last time the prior owner varnished the sole, they did it in place…which is why it didn’t want to come out right away).
So now both stainless water tanks are out. As you can imagine, I’ve got a lot of bilge cleaning to do. However, after that, it will be time to install the new roto-molded tanks.
One thing I noted was the stainless tanks, with their tabs were relatively easy to secure to the boat. The poly tanks will need to be blocked to ensure they are secure in the boat. If anyone has any specific hints/tips/drawings/pictures about how they’ve done this, I would appreciate it. Certainly happy to learn best practices from what others have done rather than re-learn it myself.
Thanks, in advance, for your help,
Mike
I was faced with the same dilemma when replacing a 45 gallon holding tank into the bilges. (Not a BCC!) As you can imagine, this is some weight when full of waste.
I did a couple of things; I created a pump dainer for cleaning/servicing, and then fitted the tank into the bilge.
Then I created a couple of stringers, located the tank on the stringers, and filled all voids with expanding foam. Job done, no odor, and no sound!
To remove the tank is easy, just cut through the foam.
All,
Thanks for all of the help. After a lot of powerwashing and scrubbing, the bilge is all clean and yesterday we started the dry fit to figure out where to glass in some new supports…then it occurred to us:
We were working on some supports underneath the tanks to ensure bilge water could flow. But, for both the forward and aft tanks there is room outboard of the bottom of the tanks for water to flow, and since the tanks are plastic, there doesn’t seem to be any need for an air gap like with stainless. Lastly, it seems like having the entire bottom of the tank on the bilge would provide the best support given the weight of water.
So…I’m scratching my head a bit and wondering if we should glass in standoffs on the bottom or just rest the tanks directly on the bottom of the bilge.
I feel like we must be missing something and look forward to your thoughts.
Cheers,
Mike
Wrote to Ronco and got this word back:
“You can have the tanks just sitting on the hull. Just make sure you have them secured down well enough that there is no movement of the tanks. If there is, it could eventually wear a hole in the bottom. If you can place something soft, rug, a piece of rubber under the tank, it will help prevent any rubbing.”
Obviously we don’t plan on putting anything porous that would absorb water under the tank, but if anyone has experience or thoughts here we would appreciate it!
Cheers,
Mike
I have held back on this, knowing there are many wiser people than me on this forum.
However, a full 40 gallon tank weighs over 300 lbs, (8.34 lbs per gallon) and if not full, the contents will change centre of gravity in a fraction of a second, making it extremely volatile. (A bit like a 300 lb gorilla)
In seas I have experienced, you don’t want this unsecured, and Ronco are wrong! Perhaps they think you are a bay sailor, but yours is a blue water boat. Consider if you are topside, trying to fight your vessel through serious weather, and that baby breaks free. The damage a 300 lb solid object can do in seconds does not bear consideration.
Finding a way to secure the tank is important, as it delays, and possibly nullifies the volatility of the content.
John,
Thanks so much for your thoughts, we couldn’t agree more! I apologize if I wasn’t clear on that.
The number one most important thing to us is making sure the tanks are secure. For example, for the aft tank, we plan to glass in some supports midway up just to provide extra support and ensure no movement in addition to obviously securing it both forward and aft at the top.
Our only question was the bottom: If we should rest the bottom of the tank directly on the bilge or glass in some stand-offs that would raise it off of the bilge. This is independent of securing it from movement.
To your point about the weight of water- that was exactly why I was thinking of having the bottom of the tank in direct contact with the bottom of the bilge rather than glass in a few stand-offs. It occurred to us that the weight would be better distributed if it was supported uniformly rather than just on a few stand-offs.
Not sure if that helps clarify at all?
Cheers,
Mike
I think you are correct. Although the tanks are designed and built to contain their content, wear and tear, particularly if they have any movement, can reduce their ability to retain shape.
I placed a 90 gallon stainless tank in my boat, and ensured it was embedded, almost as part of the vessel.
Ahoy Team!
So…bilge is clean, sanded and painted (Sherwin Williams Macropoxy…pretty tough two-part epoxy. Looks great and went on easier than we were anticipating…we’ll see how durable it is long term).
We’ve been preparing the stringers, etc. with penetrating epoxy and finalizing the fore and aft supports to ensure the aft water tank is properly supported (forward tanks are remarkably straight forward).
My question is - the aft tank (Ronco B338) appears to be purposely molded with some ‘twist’ (Water / Waste Holding Tank - Ronco Plastics). As such, when we dry fit some fixtures across the forward end, it’s not quite level across from port to starboard. Am I crazy or missing something?
Anyone have any good diagrams/photos on how they fixed this aft tank to ensure it was properly secured? I’m a big fan of not reinventing the wheel. I appreciate John’s idea to foam it in, but I was thinking about something more rigid (i.e. like wood/fiberglass supports to provide structural support).
Thanks, as always, for the help!
Cheers,
Mike