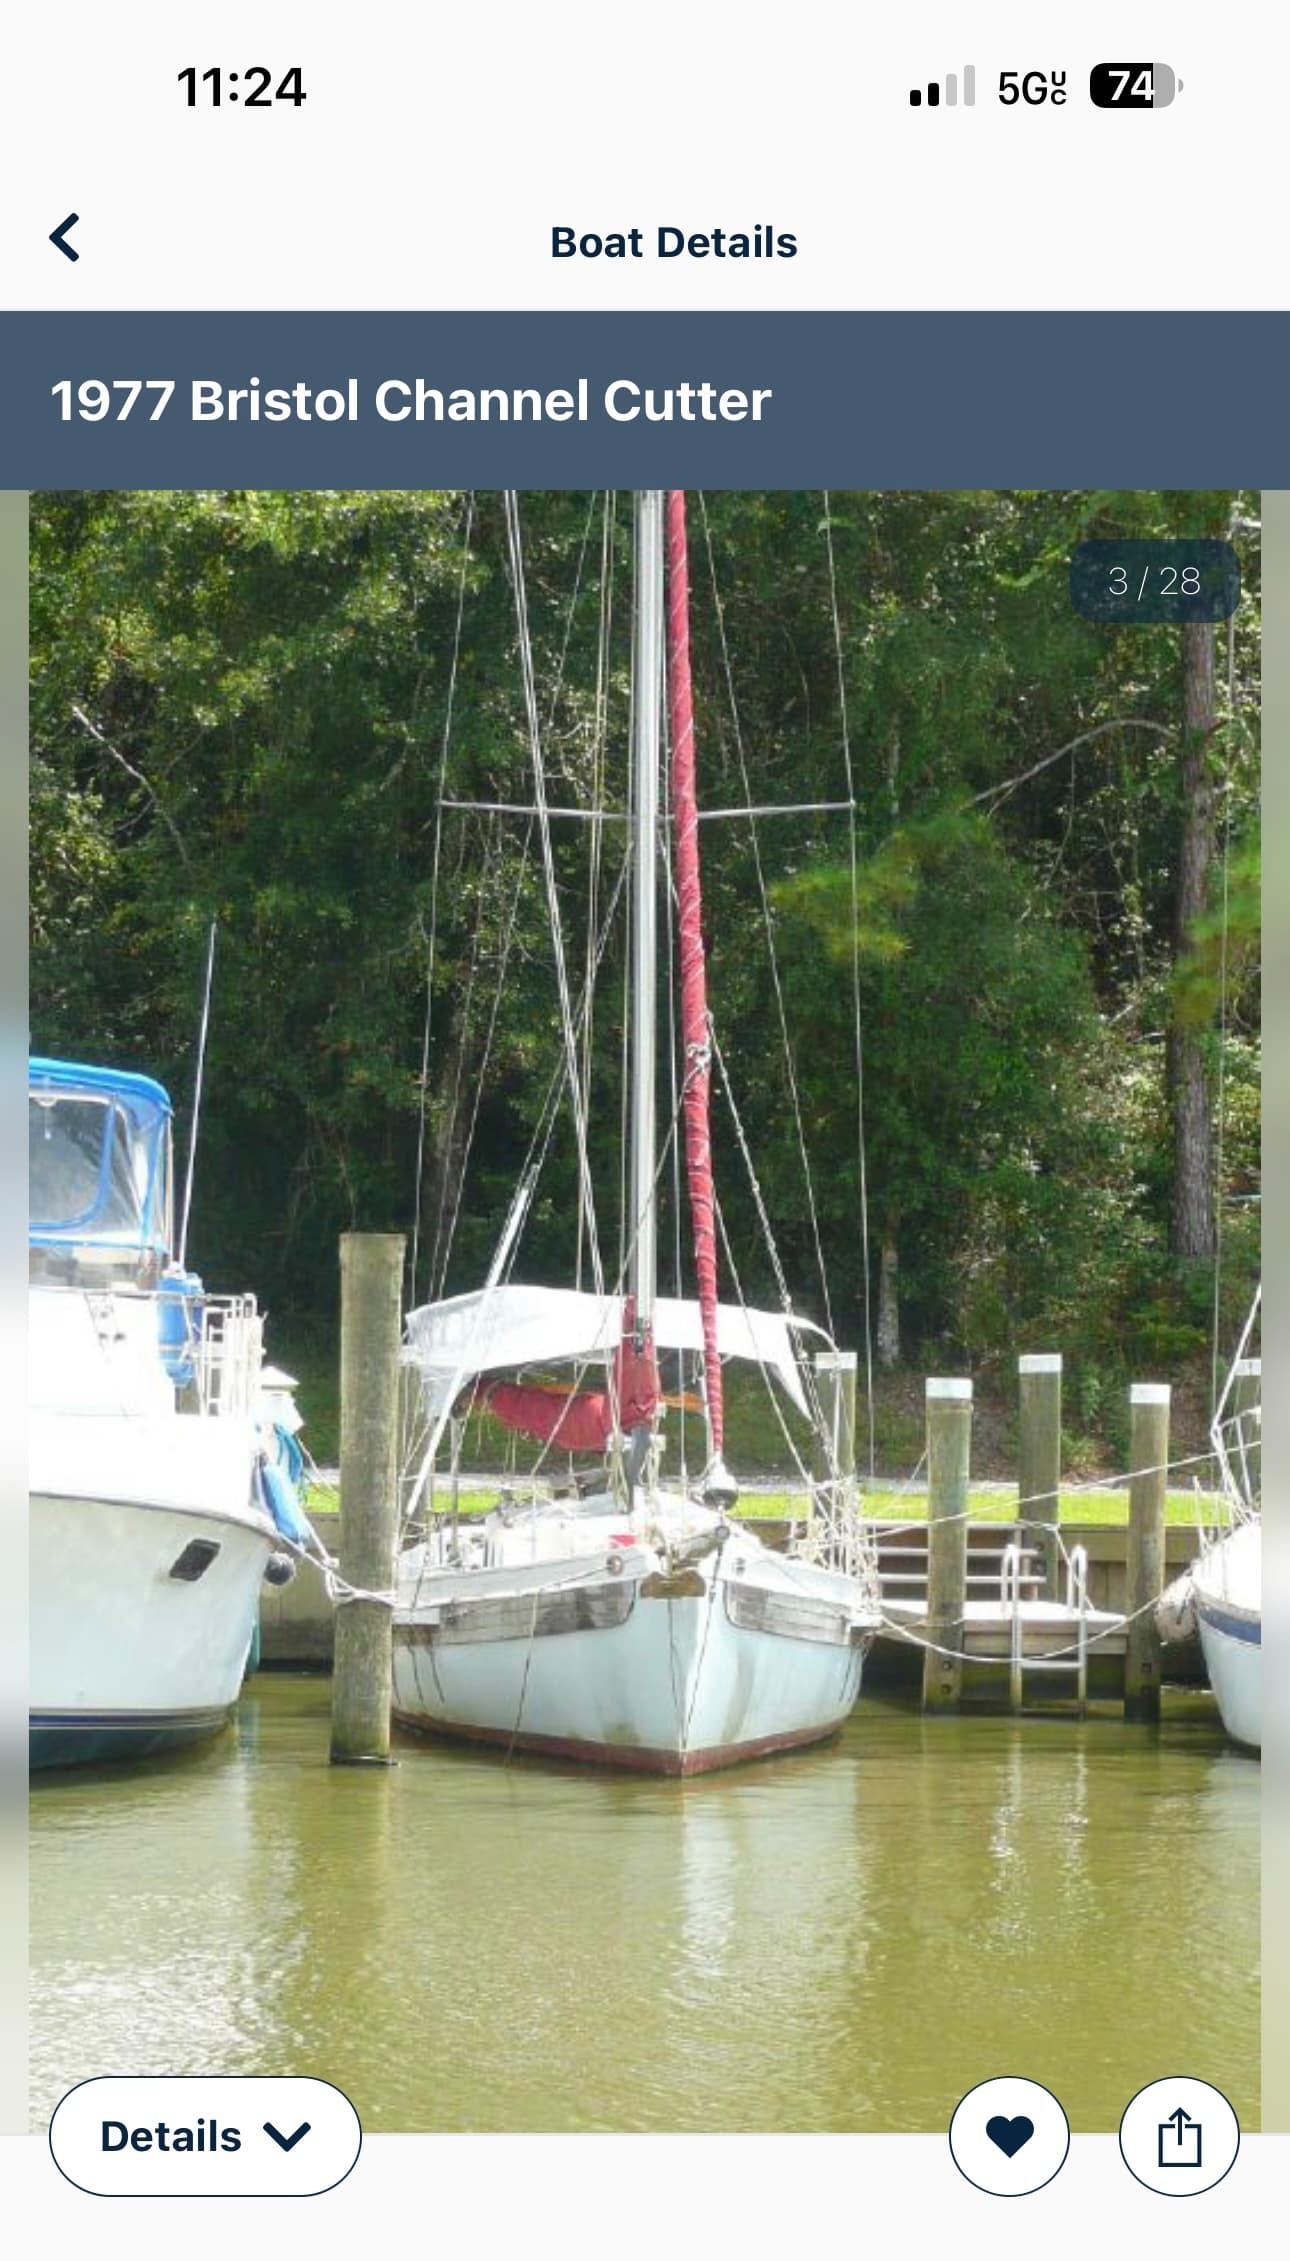
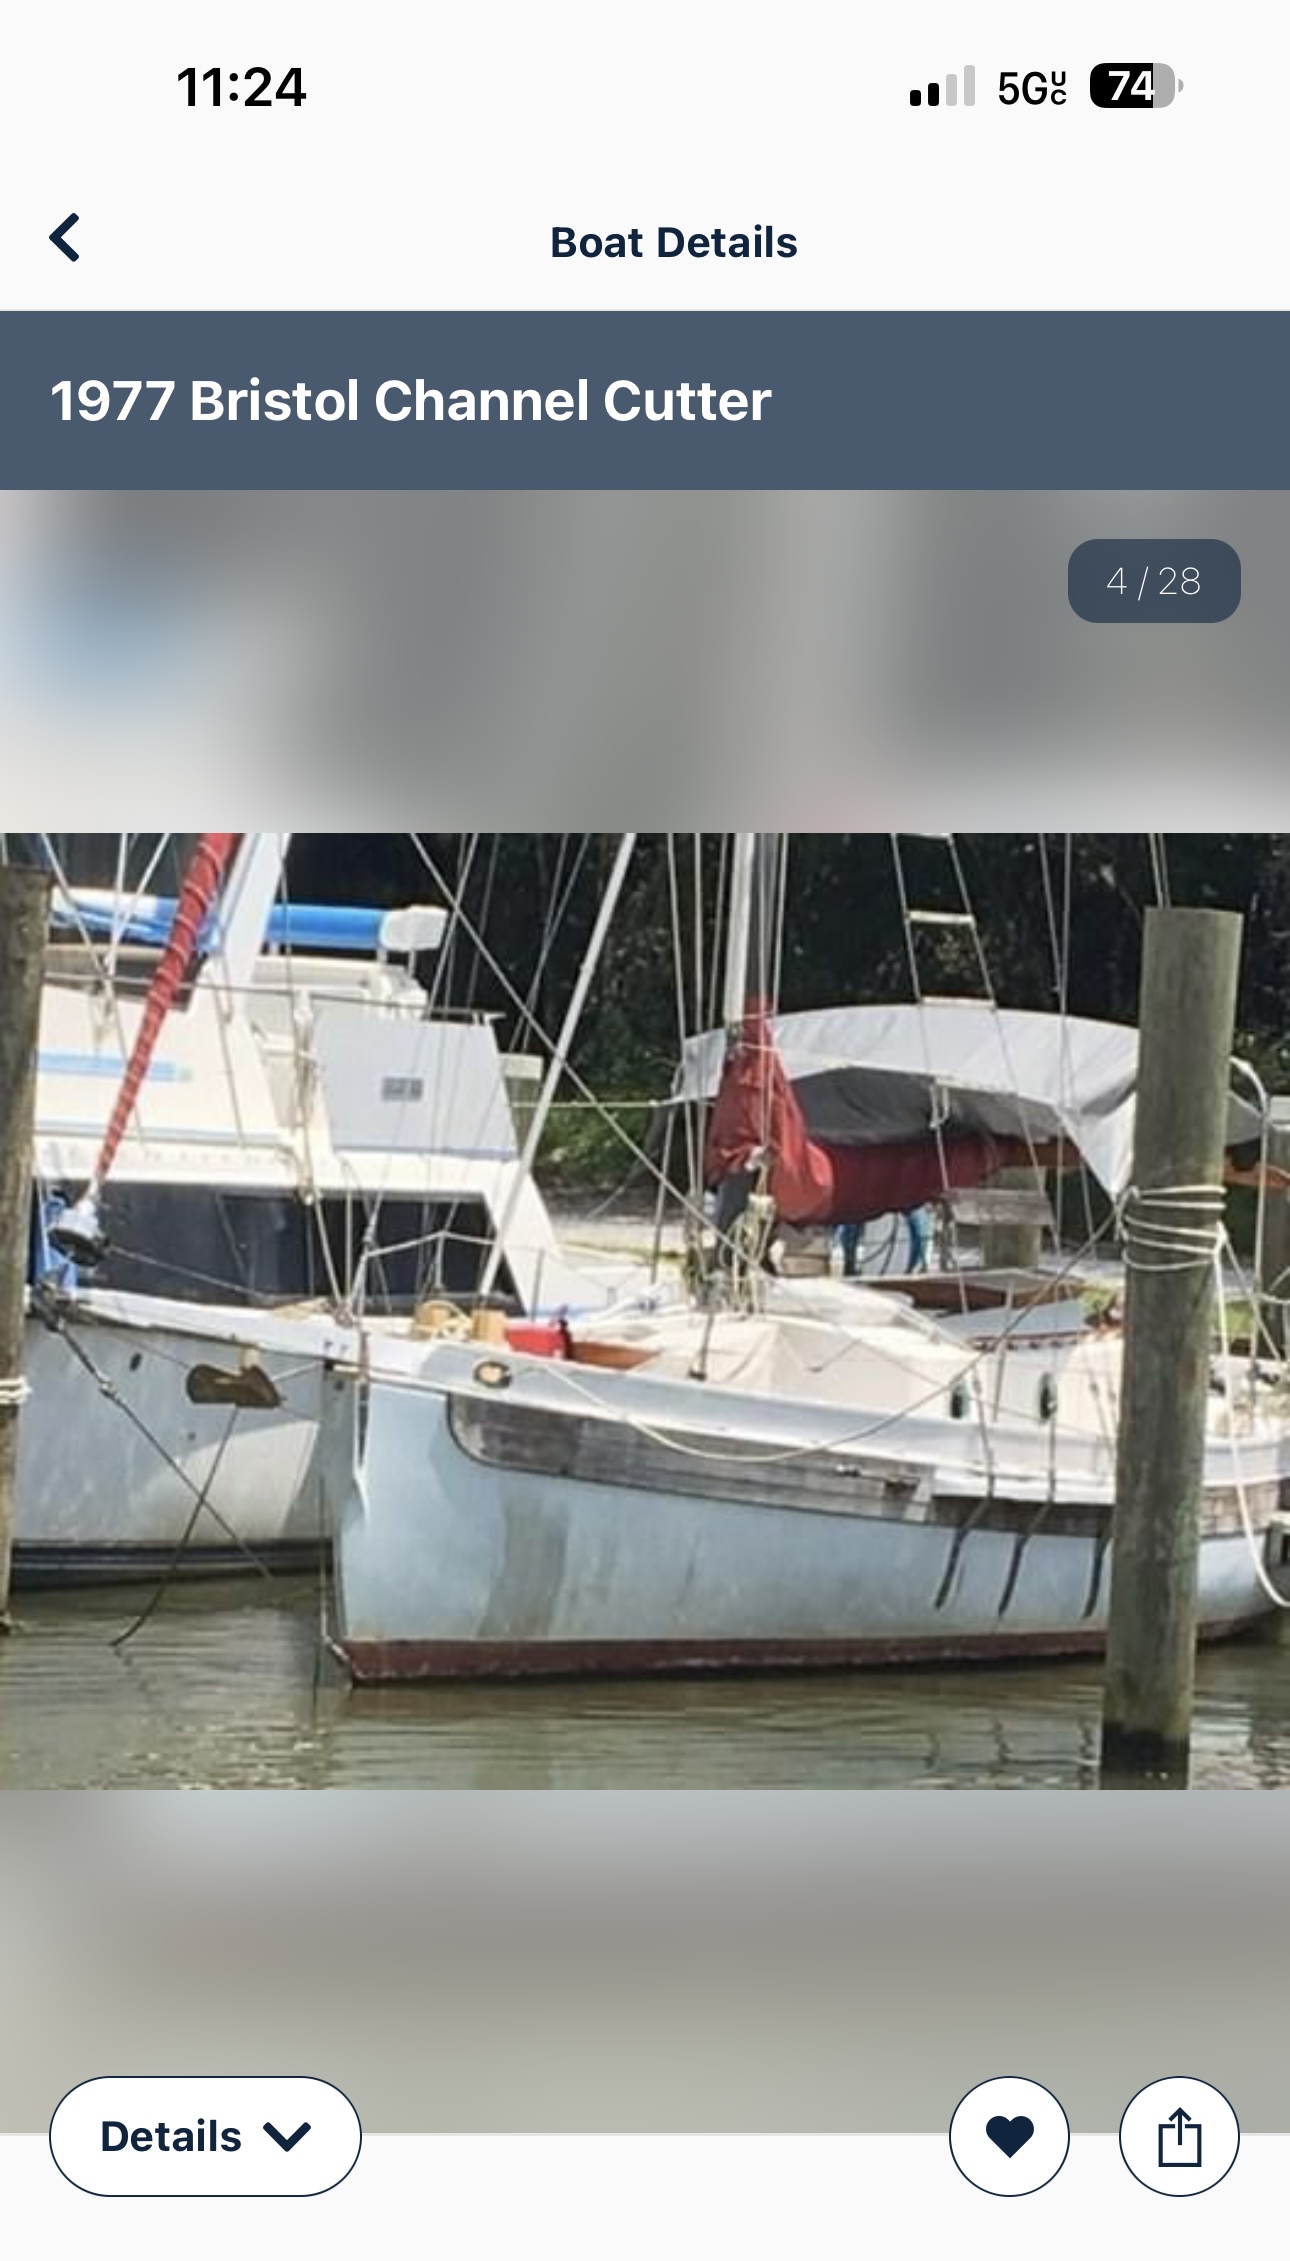
Well as of tomorrow, July 12 2023, I will be the new owner of Waxwing. She is hull #22 and single owner up to this point.
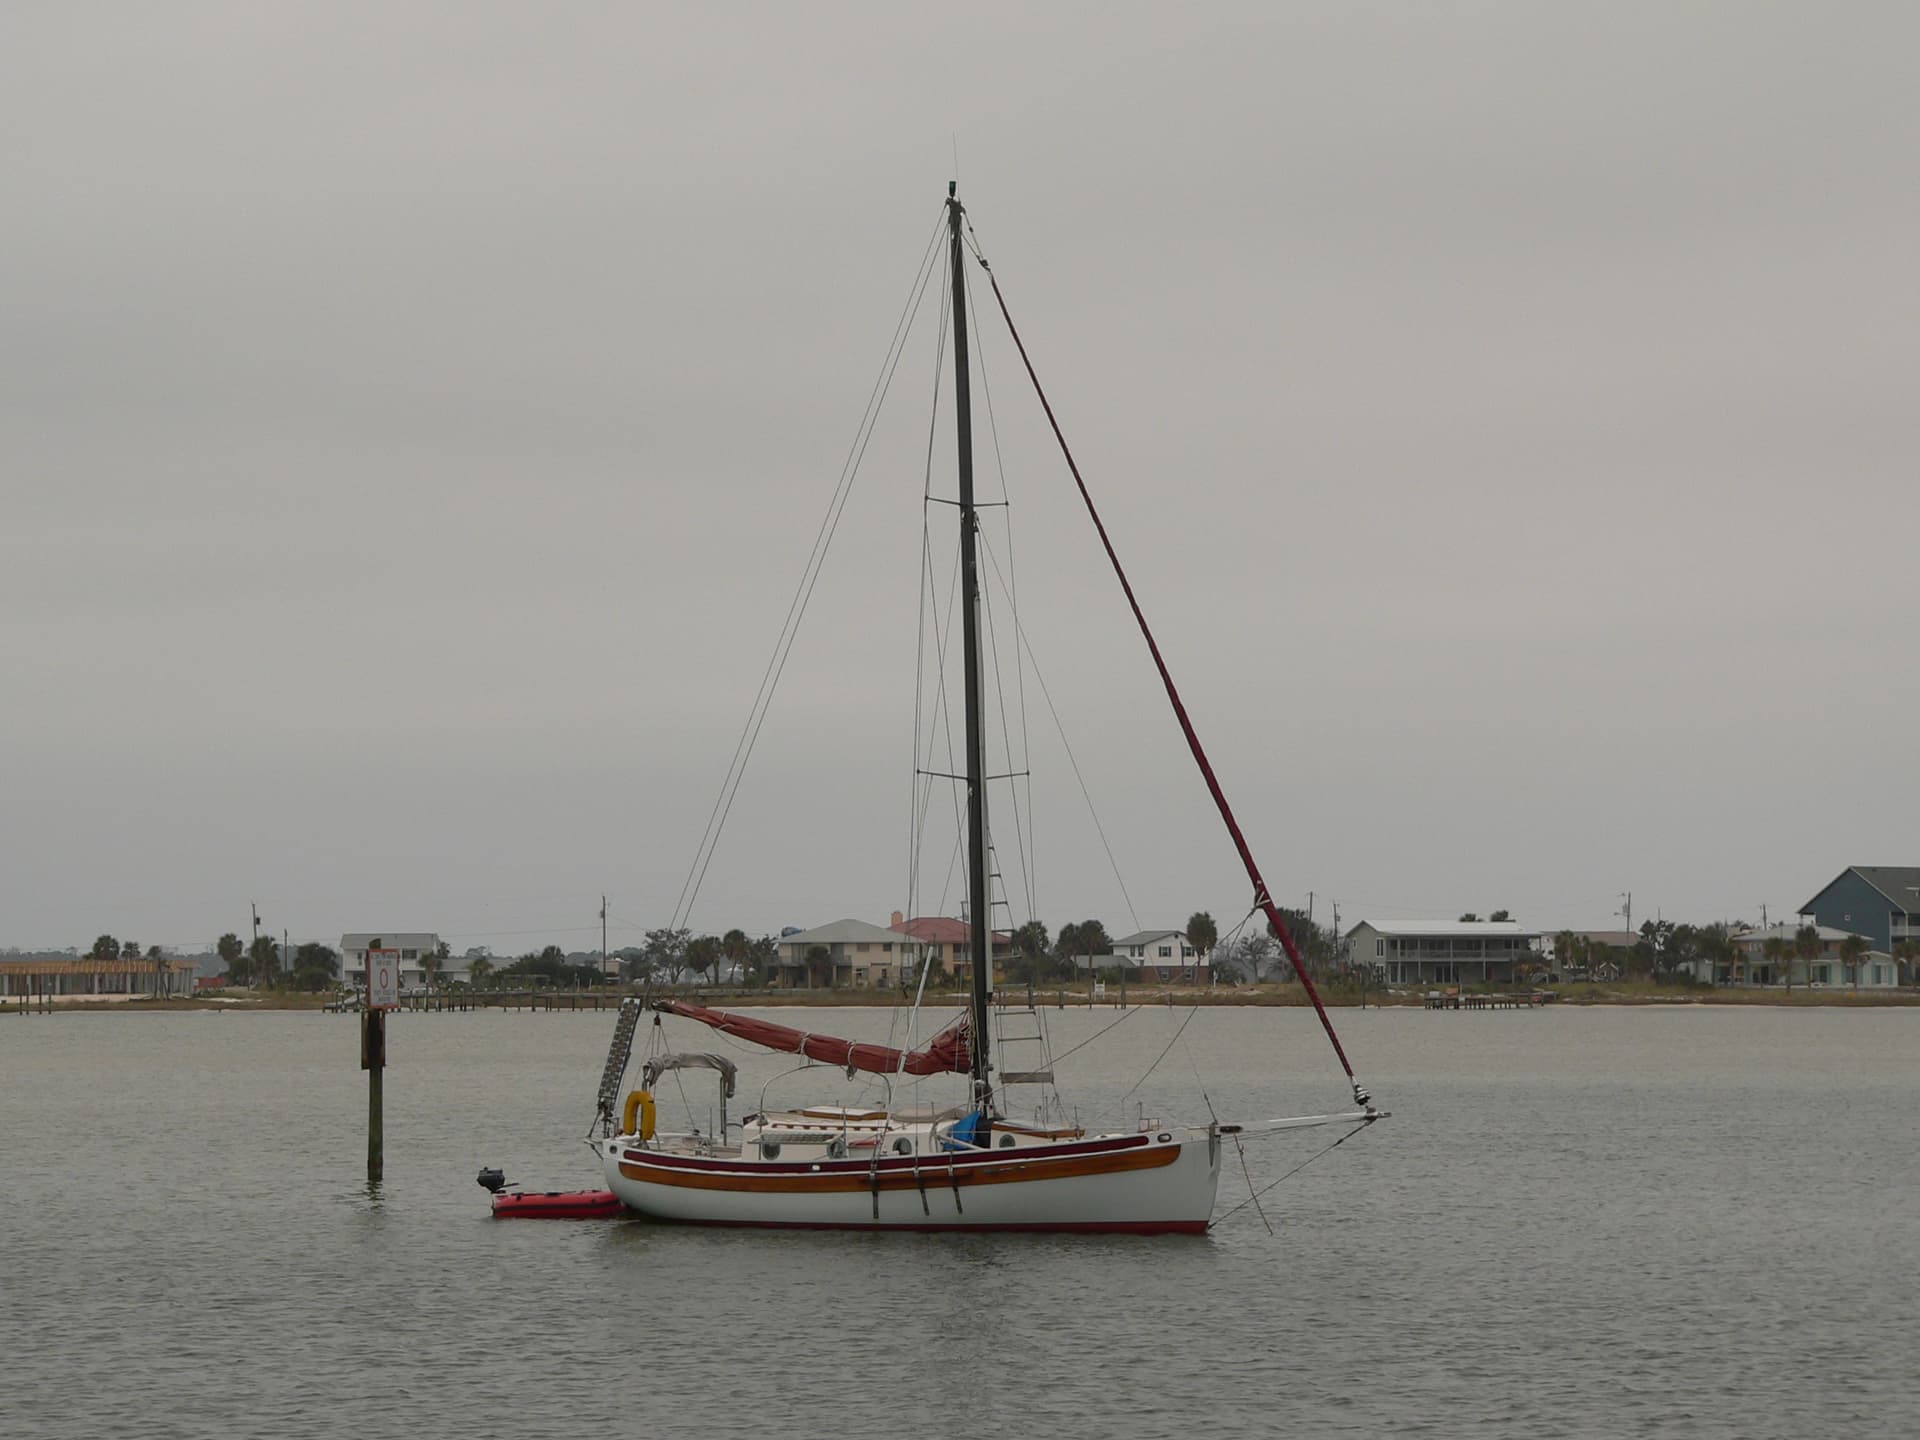
She is an owner finished vessel, and from the looks of her she has been done right. I believe delivered with just two main bulkheads. She has a queen berth upfront. I know very little of her travels other than she was launched in San Francisco, cruised the Pacific coast to and thru Panama Canal, the Gulf and has been tucked away in a little creek off of Mobile Bay for sometime.
I am lucky to have found her, good times ahead for both of us.
I’ll try to document her revival here as much as possible.
Hi,
I said with Waxwing (Stan and Barbara) many years ago when we were both cruising the Exumas, Bahamas. I was on my own BCC, Dilkara, at the time and it was so unusual and so much fun to meet another BCC. We sailed together briefly and then we headed down to the Virgin Islands and Waxwing sailed the East Coast. You’ve got a great boat.
Ray Walton
Hi Tom - Congratulations on purchasing Waxwing and welcome to the family. I’ll update the owners database and map. Let us know if you have any questions while you get to know the boat.
There is a great little anchorage ocean side just inside of Tavernier Key if anyone here is cruising by. I’m just a short dinghy ride from there for any maintenance or supply needs. Or you can just tie up to my dock.
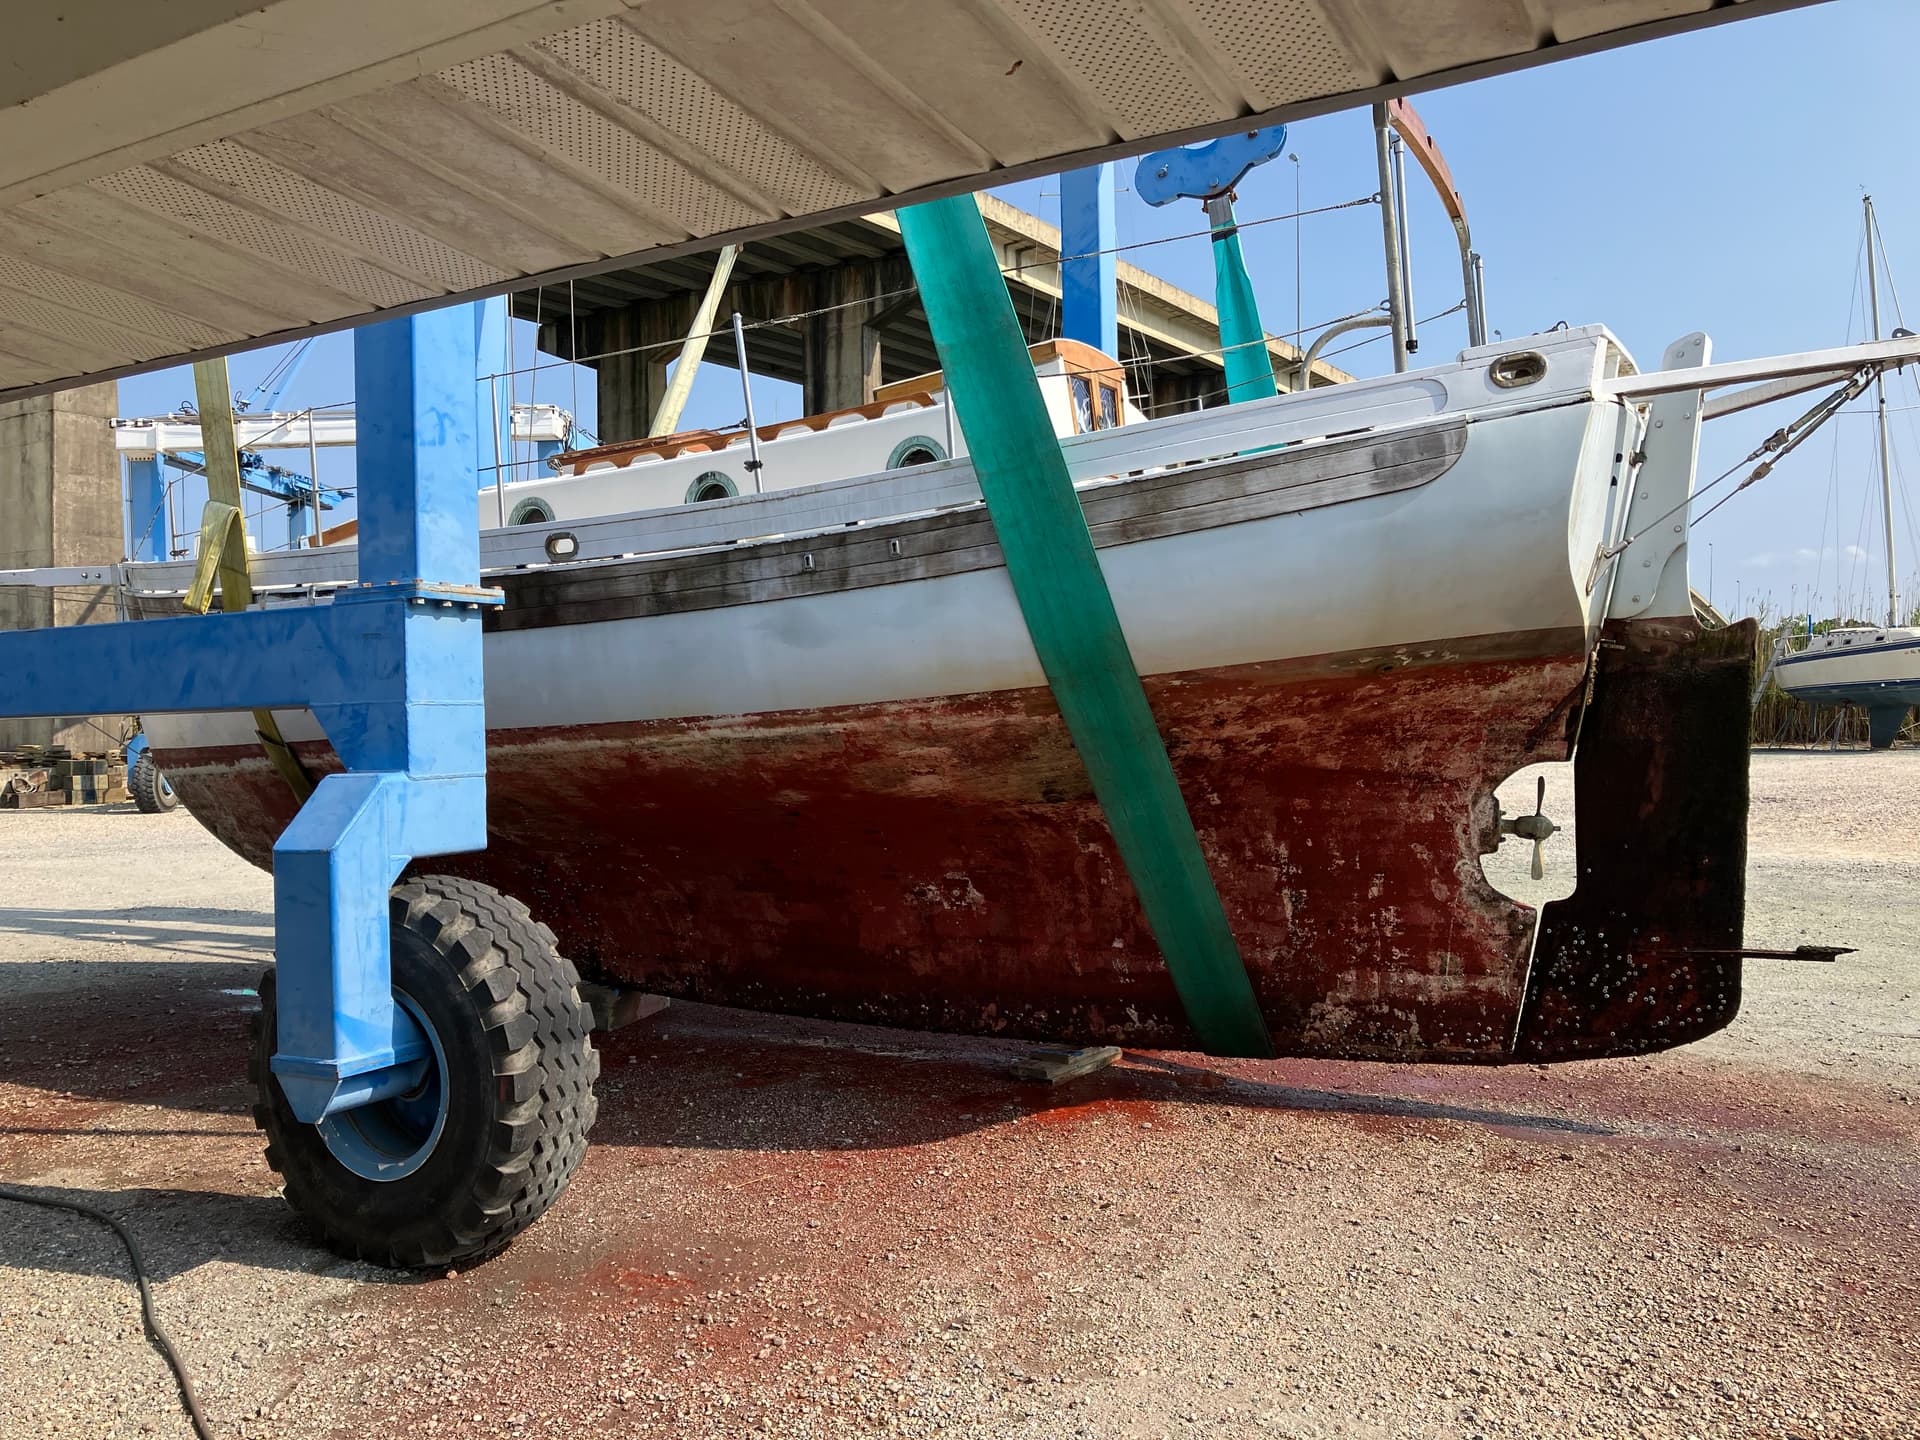
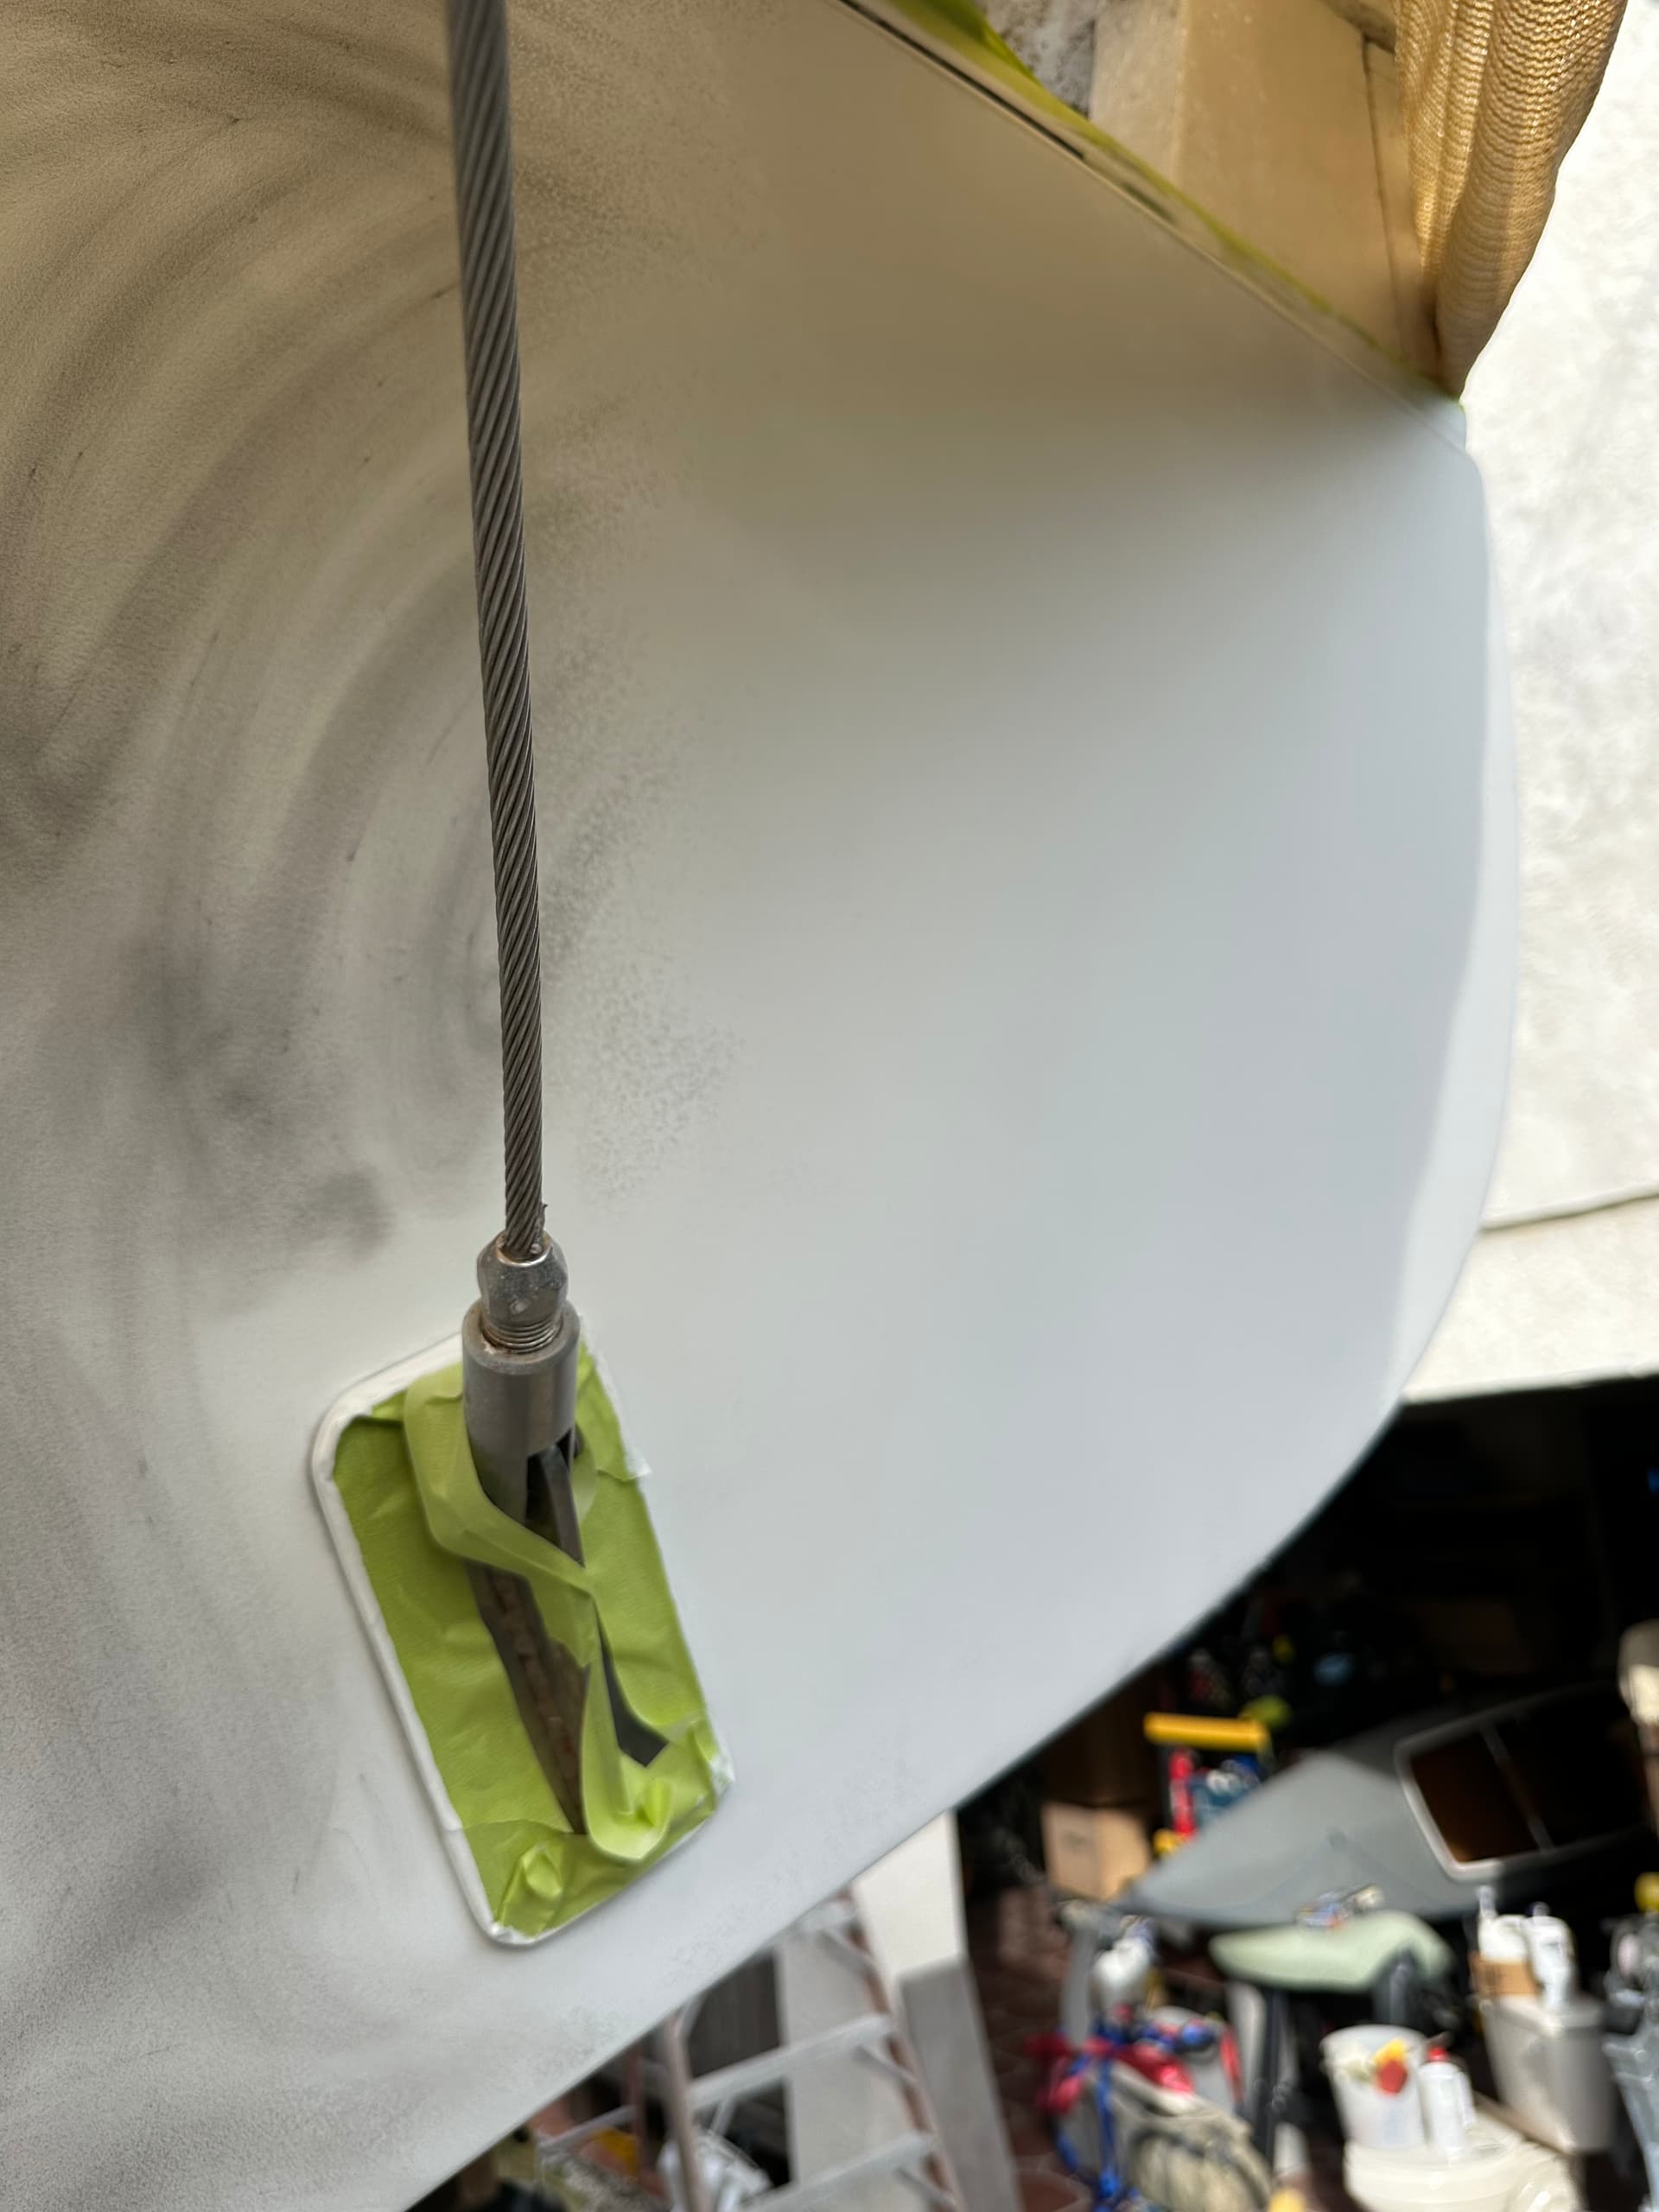
Will need a new rudder and gudgeons/pintles Trying to get in touch with Capegeorge Cutter to see how much a new fiberglass one is. If that doesn’t work I’ll rebuild.
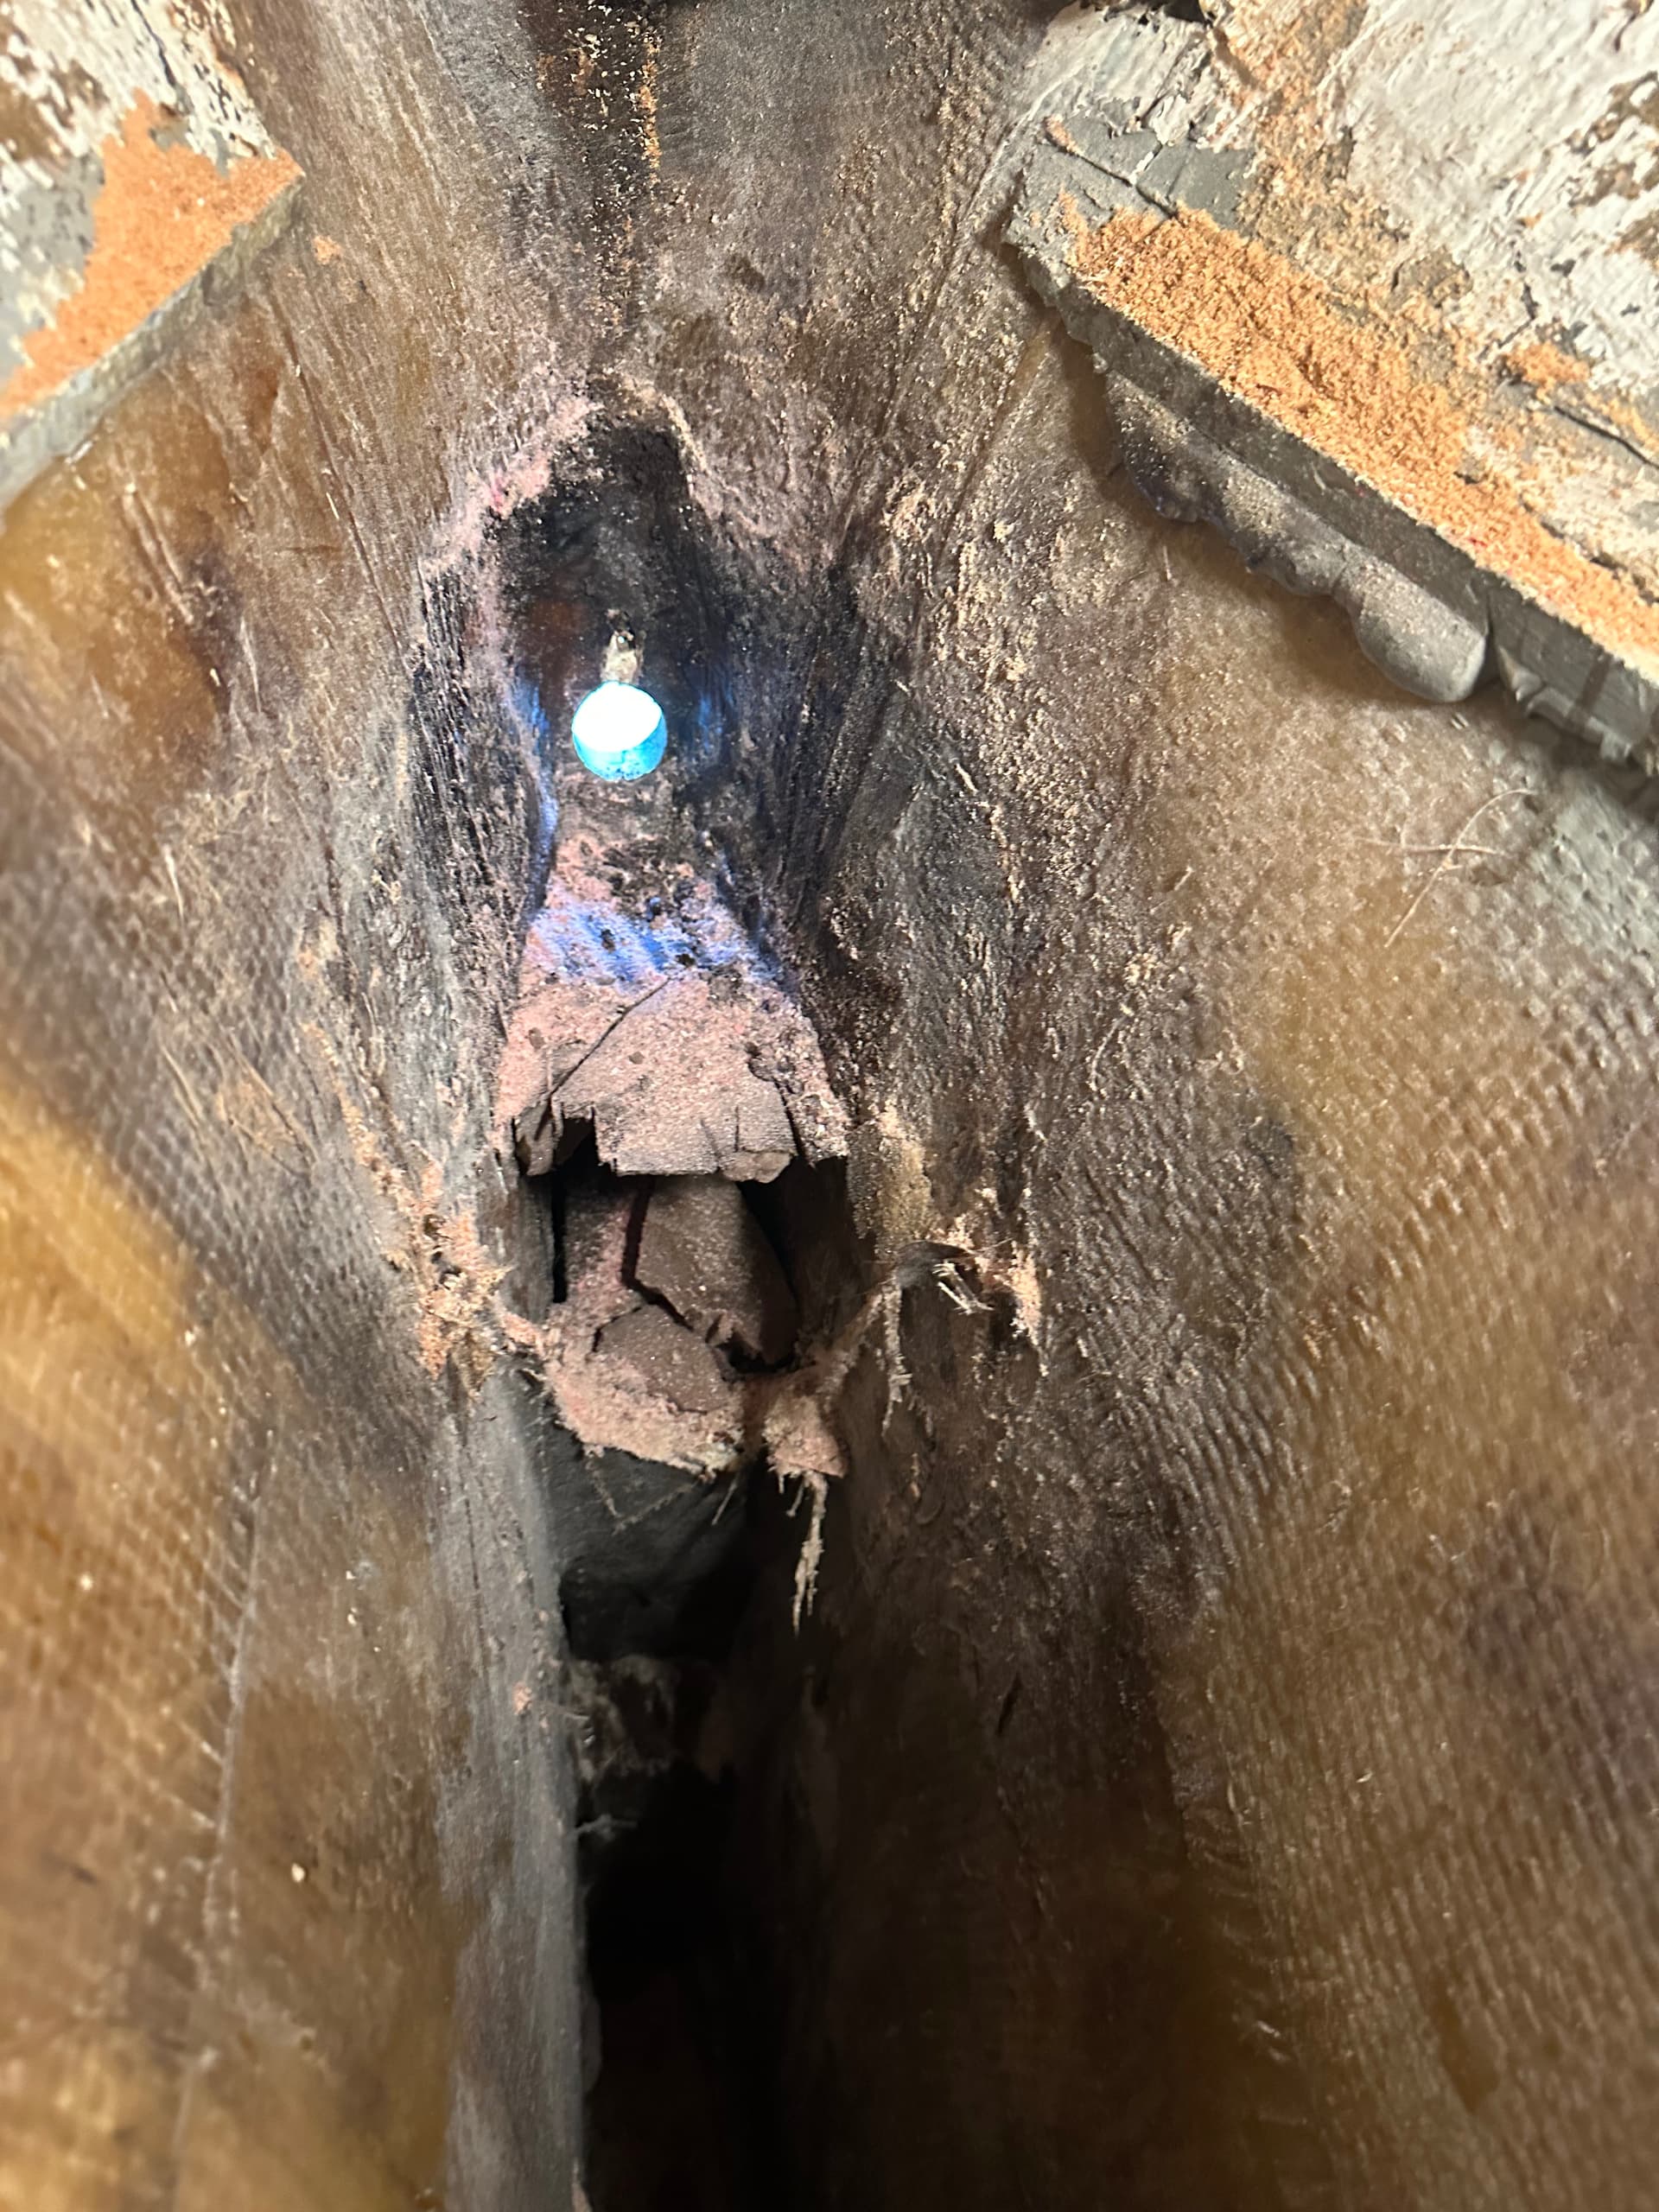
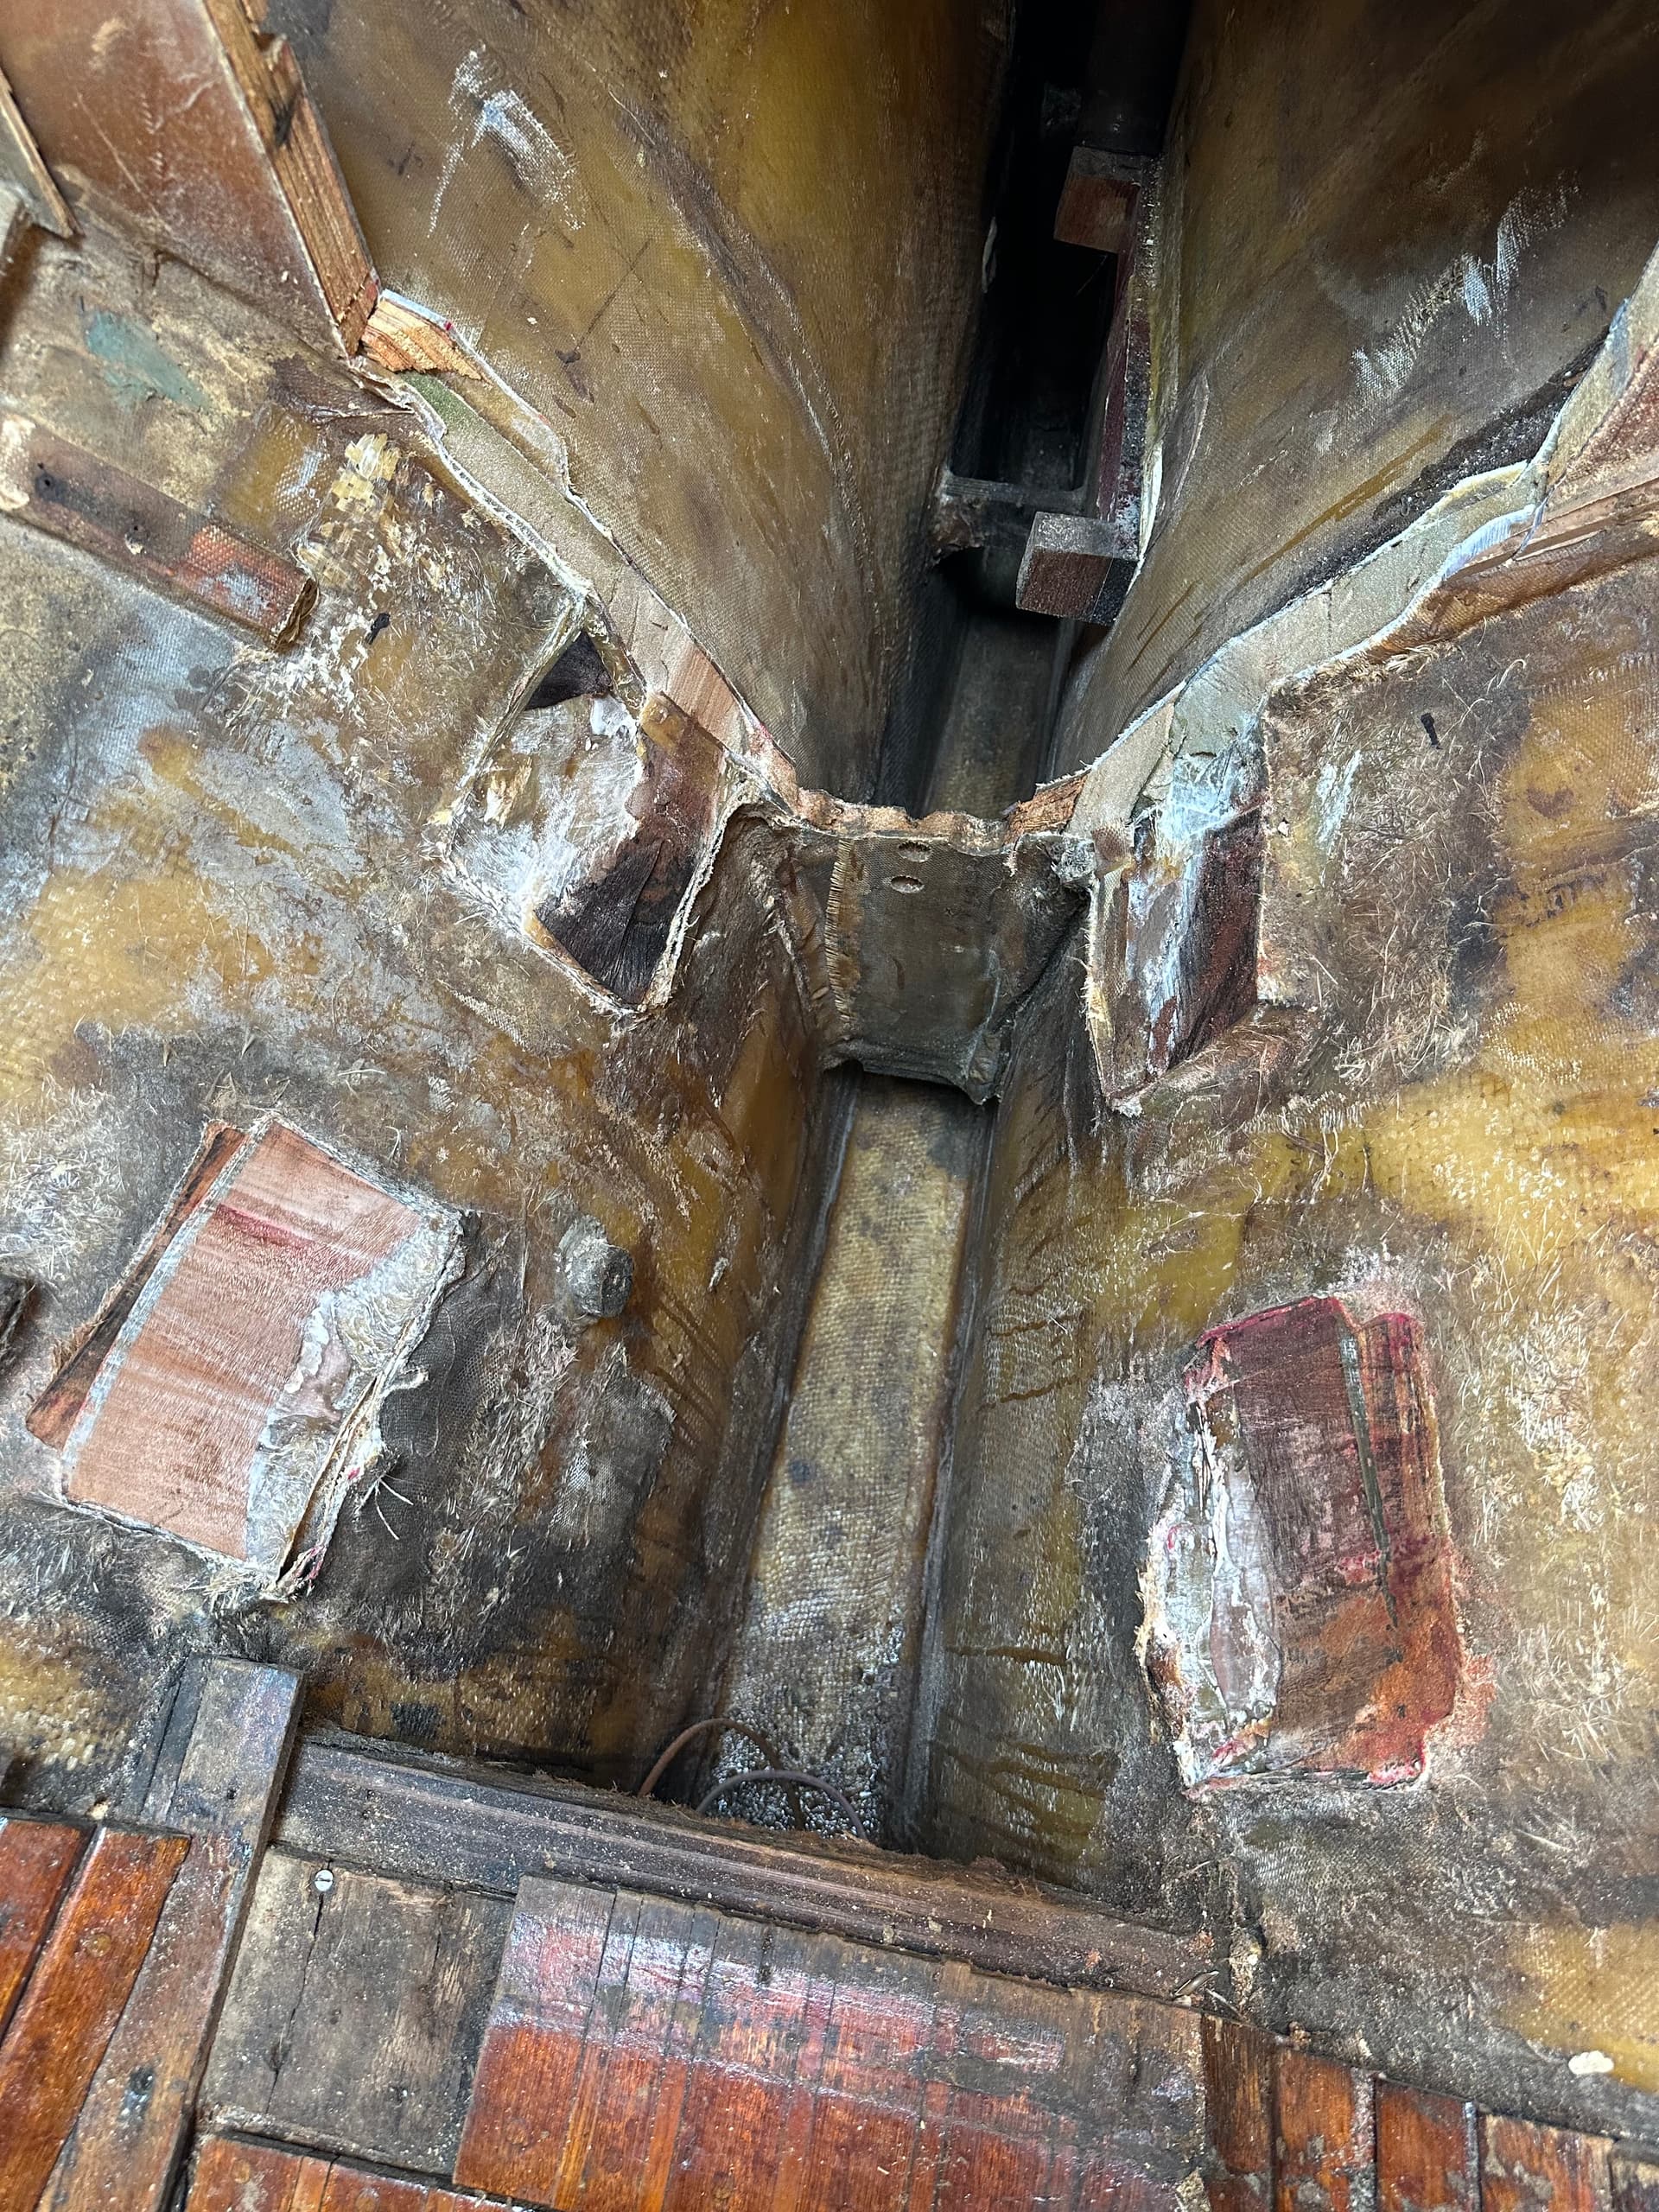
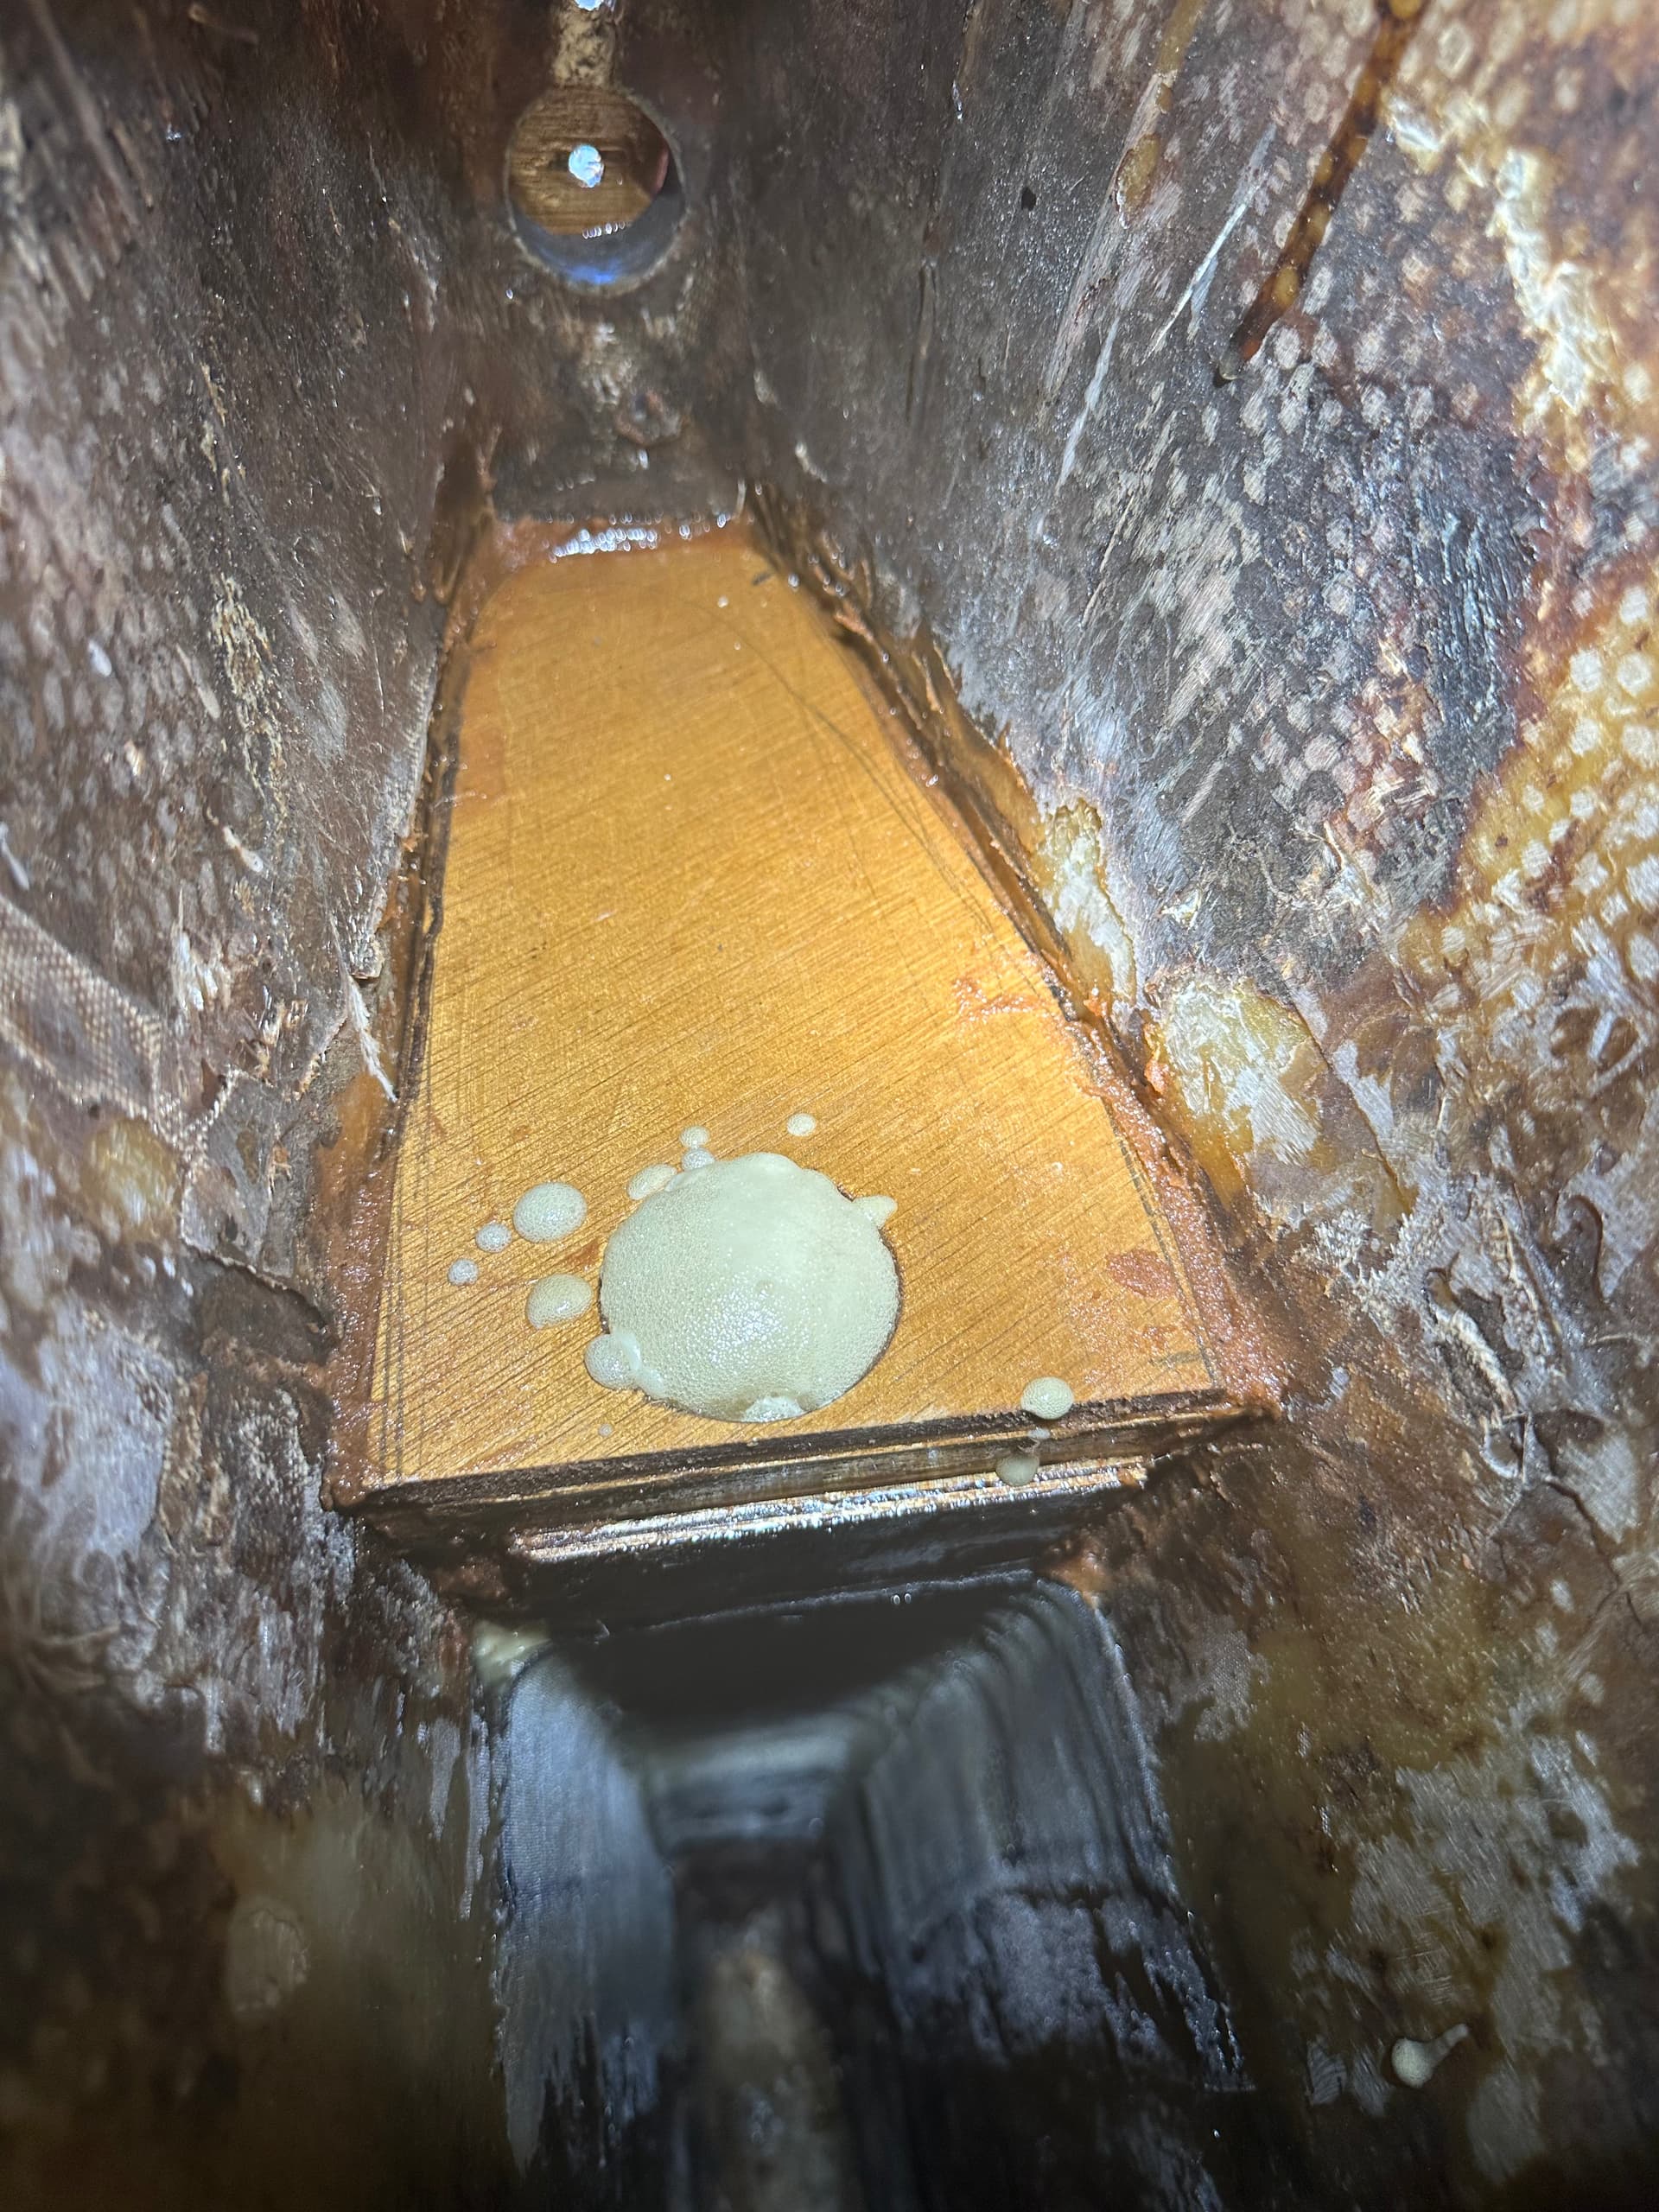
Also looks like some rot on the cover boards under the bulwarks, hopefully not too bad and I can repair without removing the bulwarks completely.
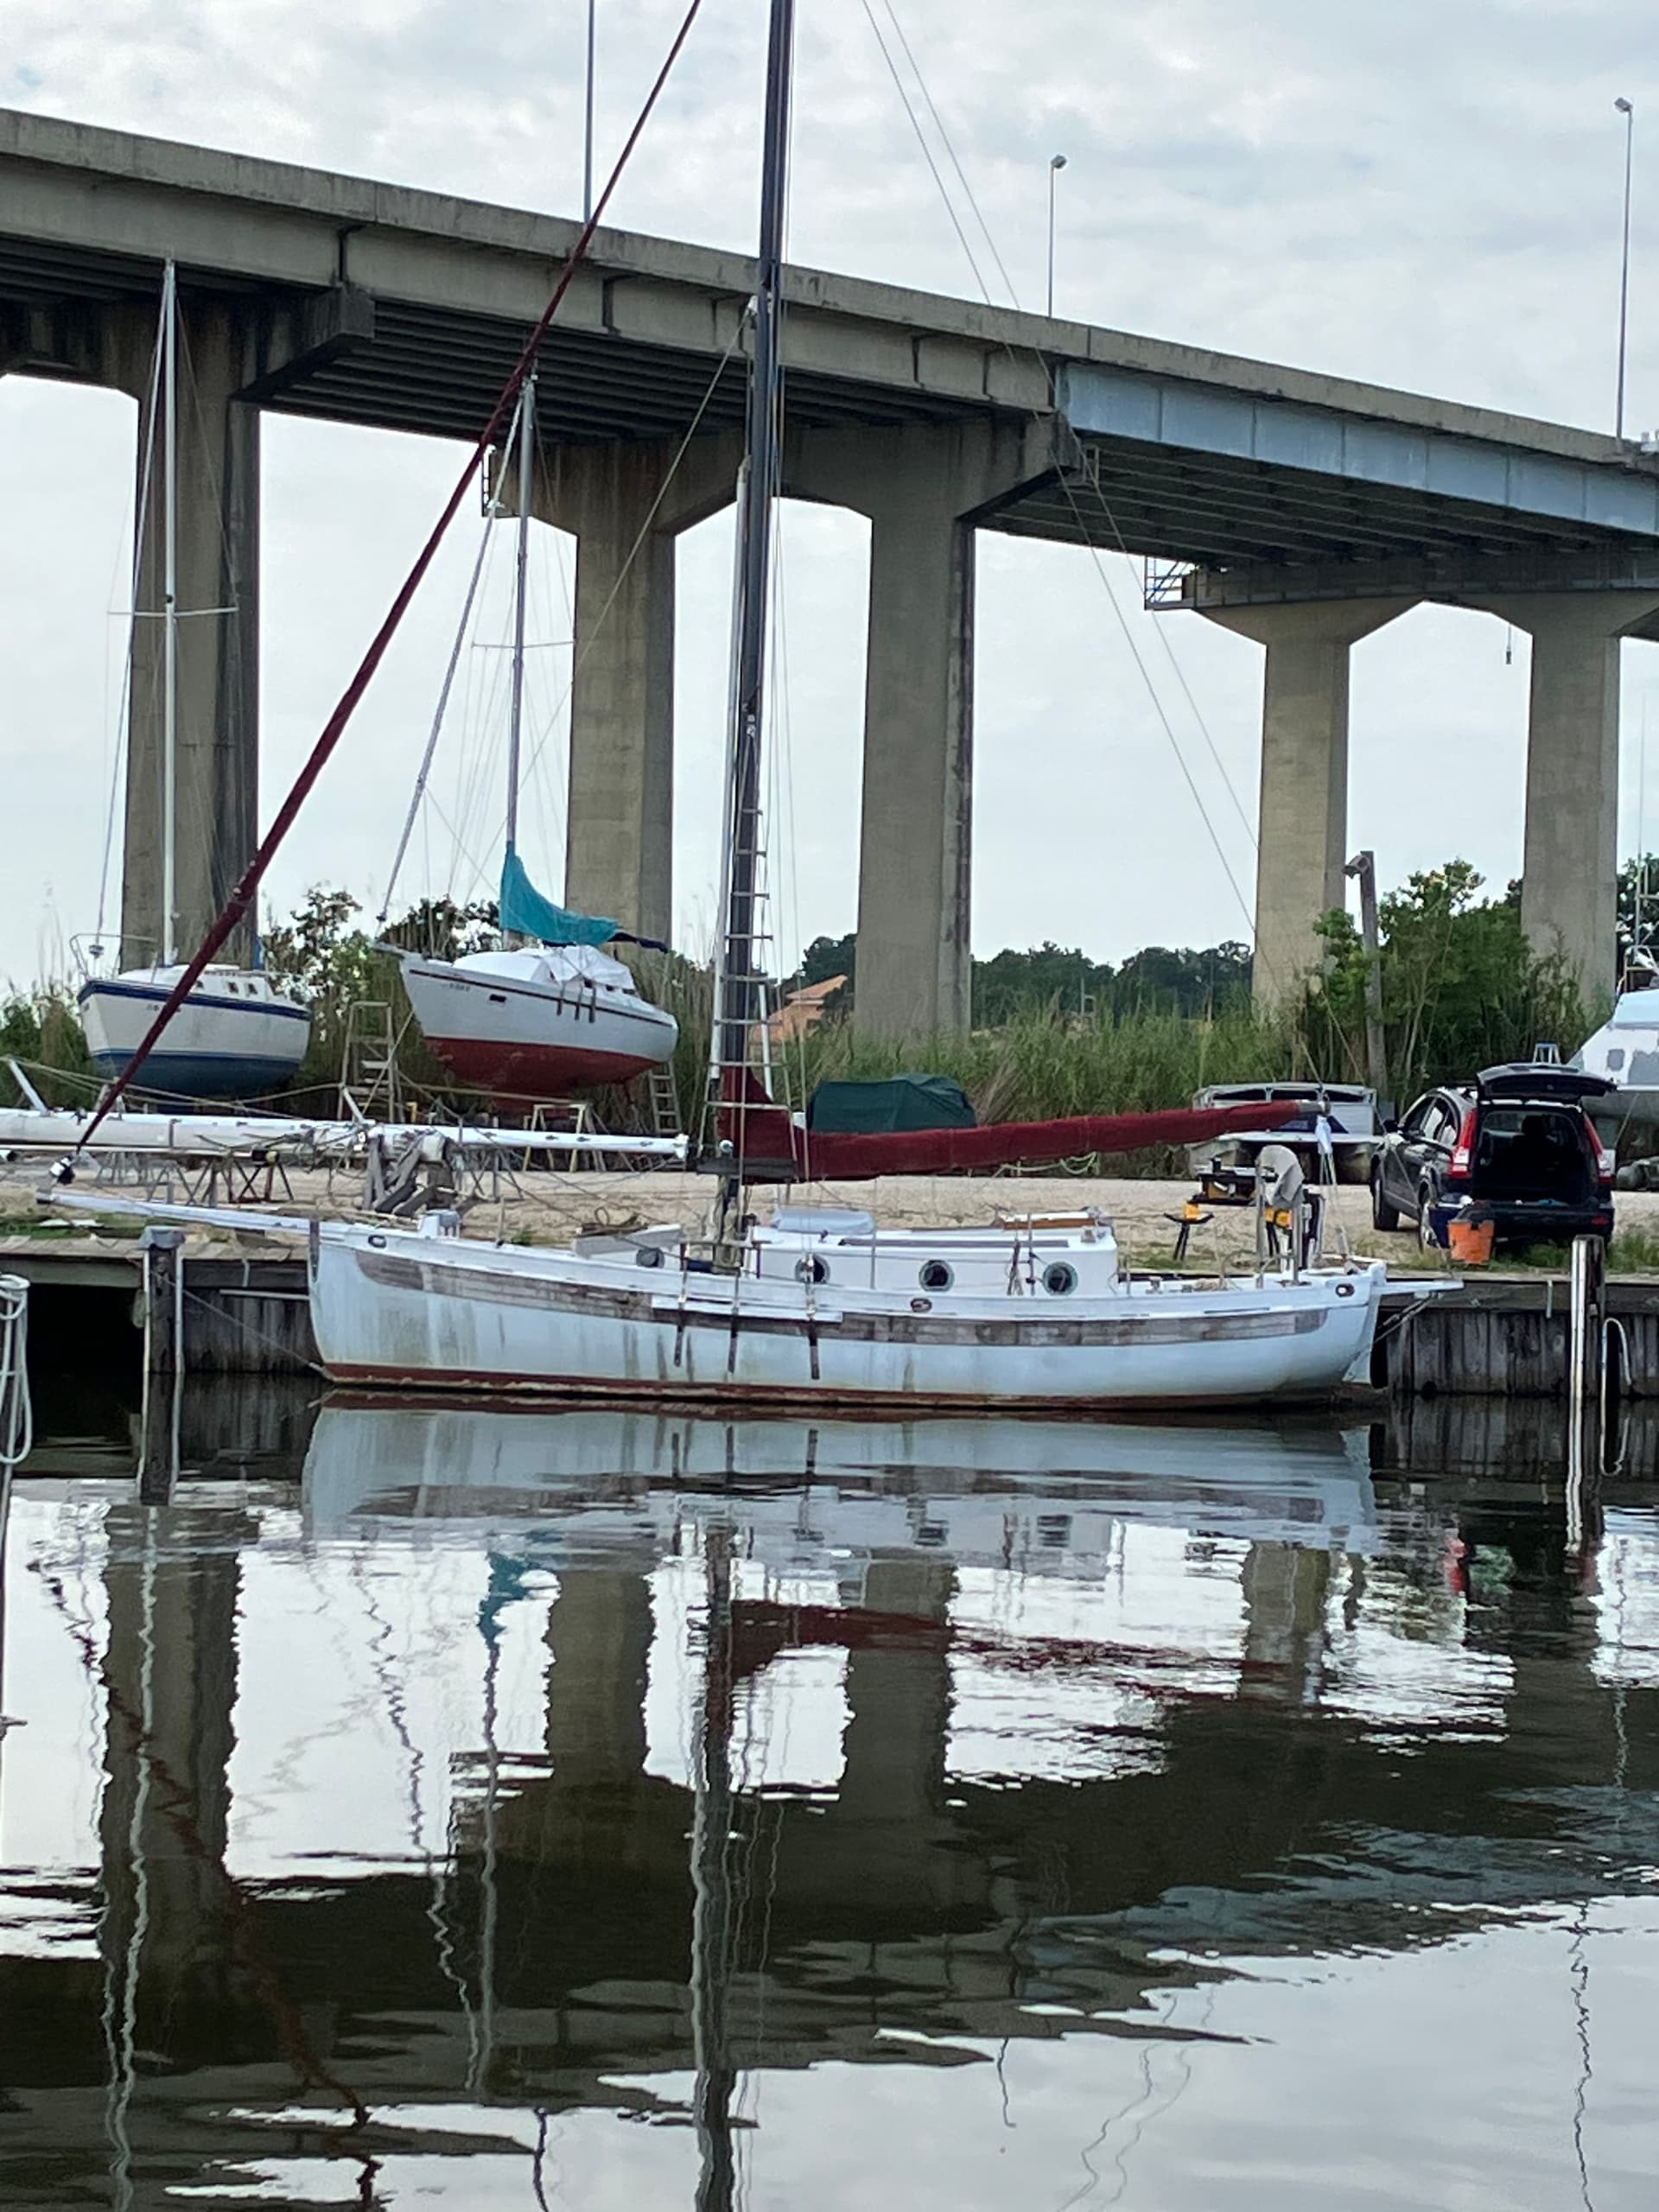
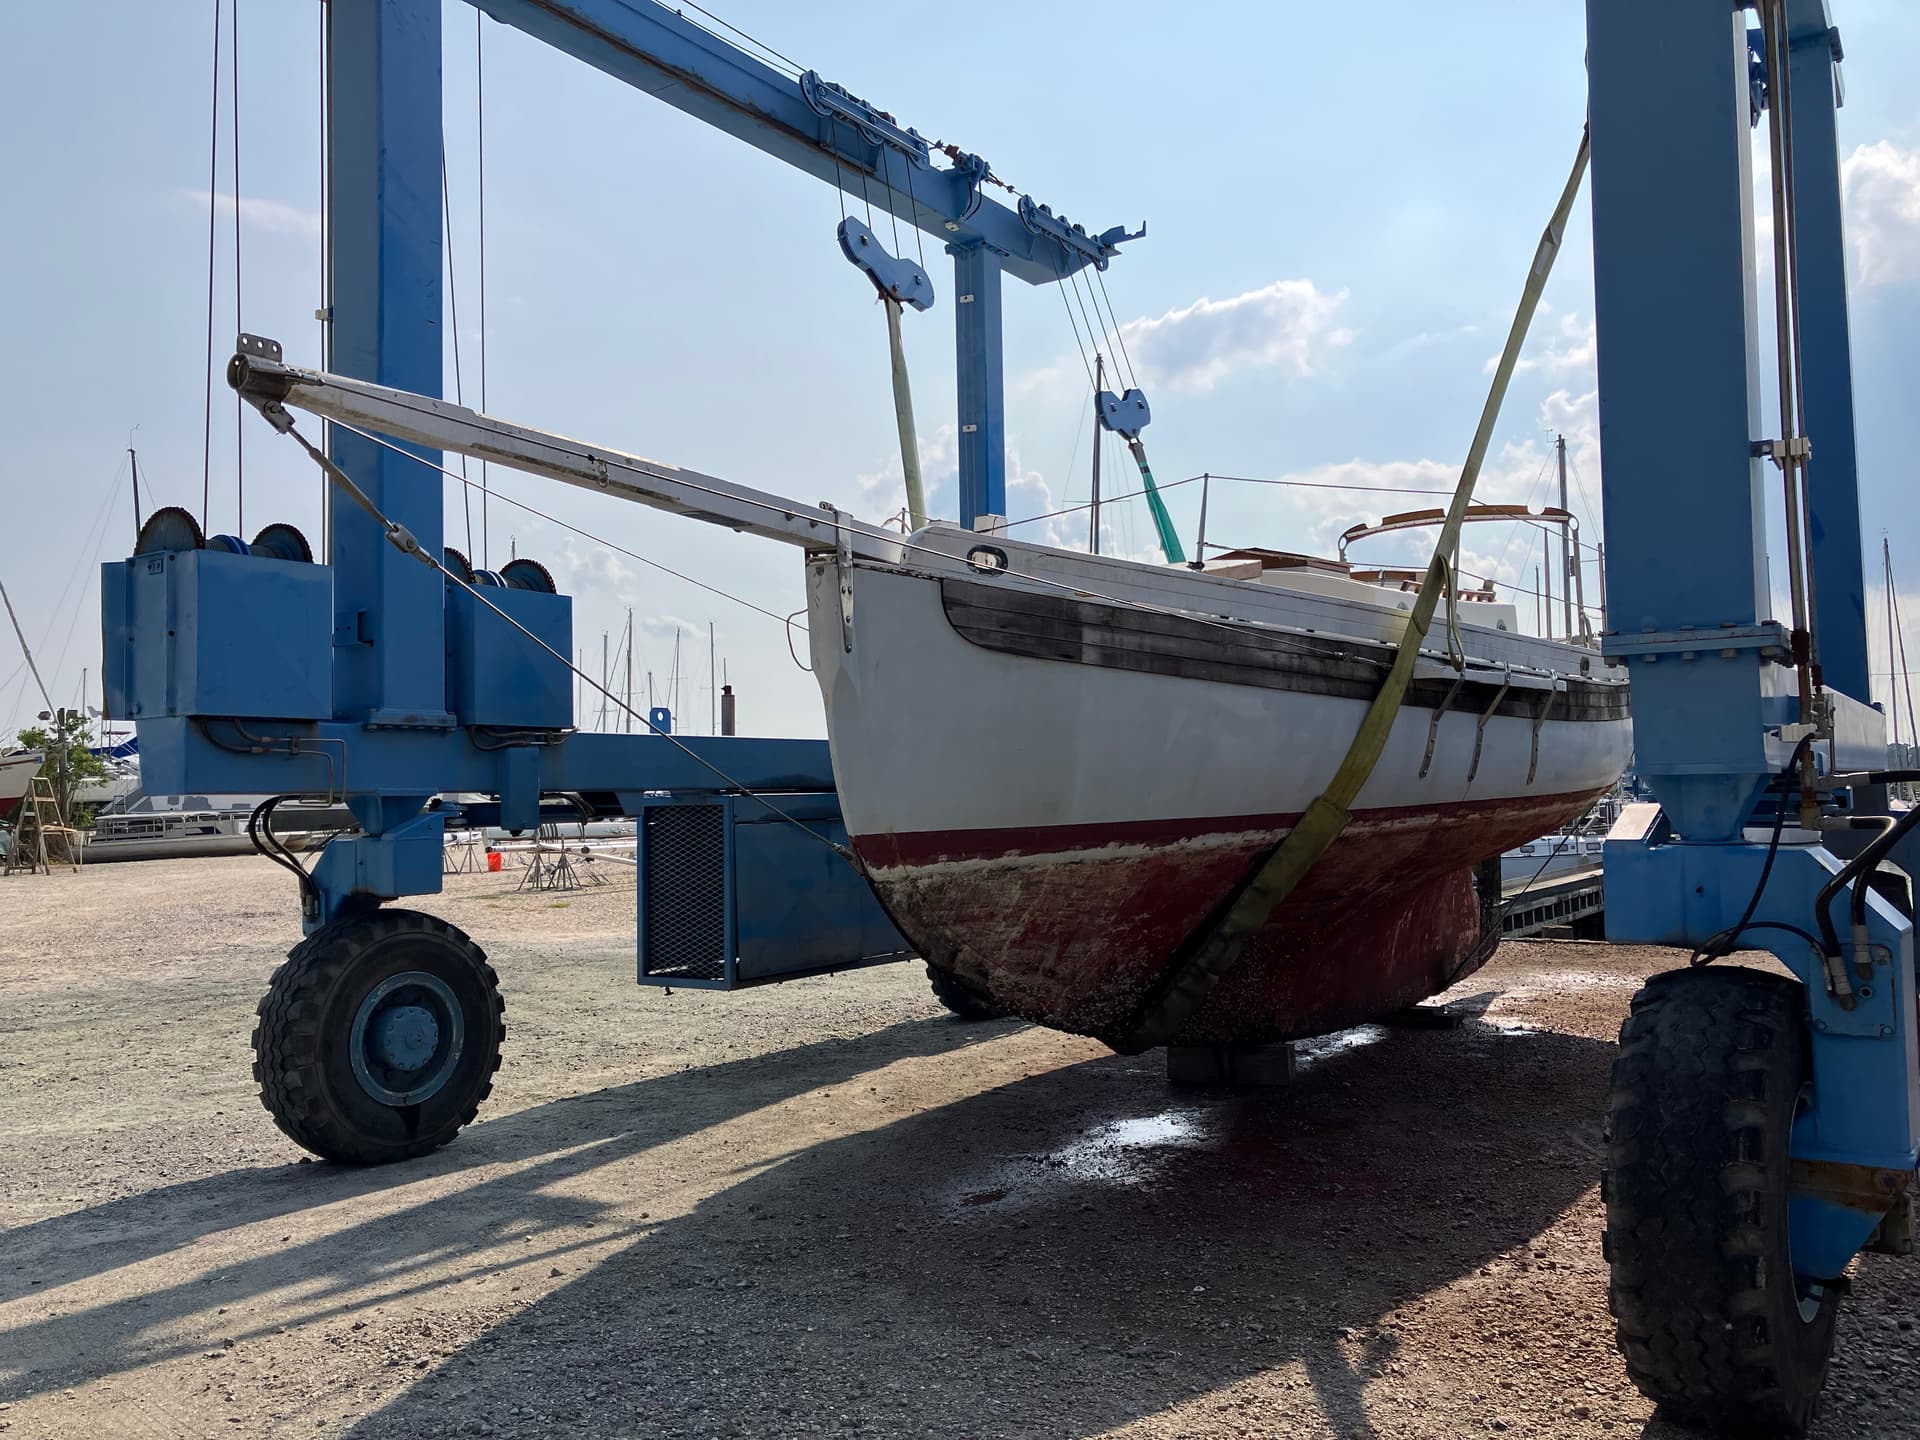
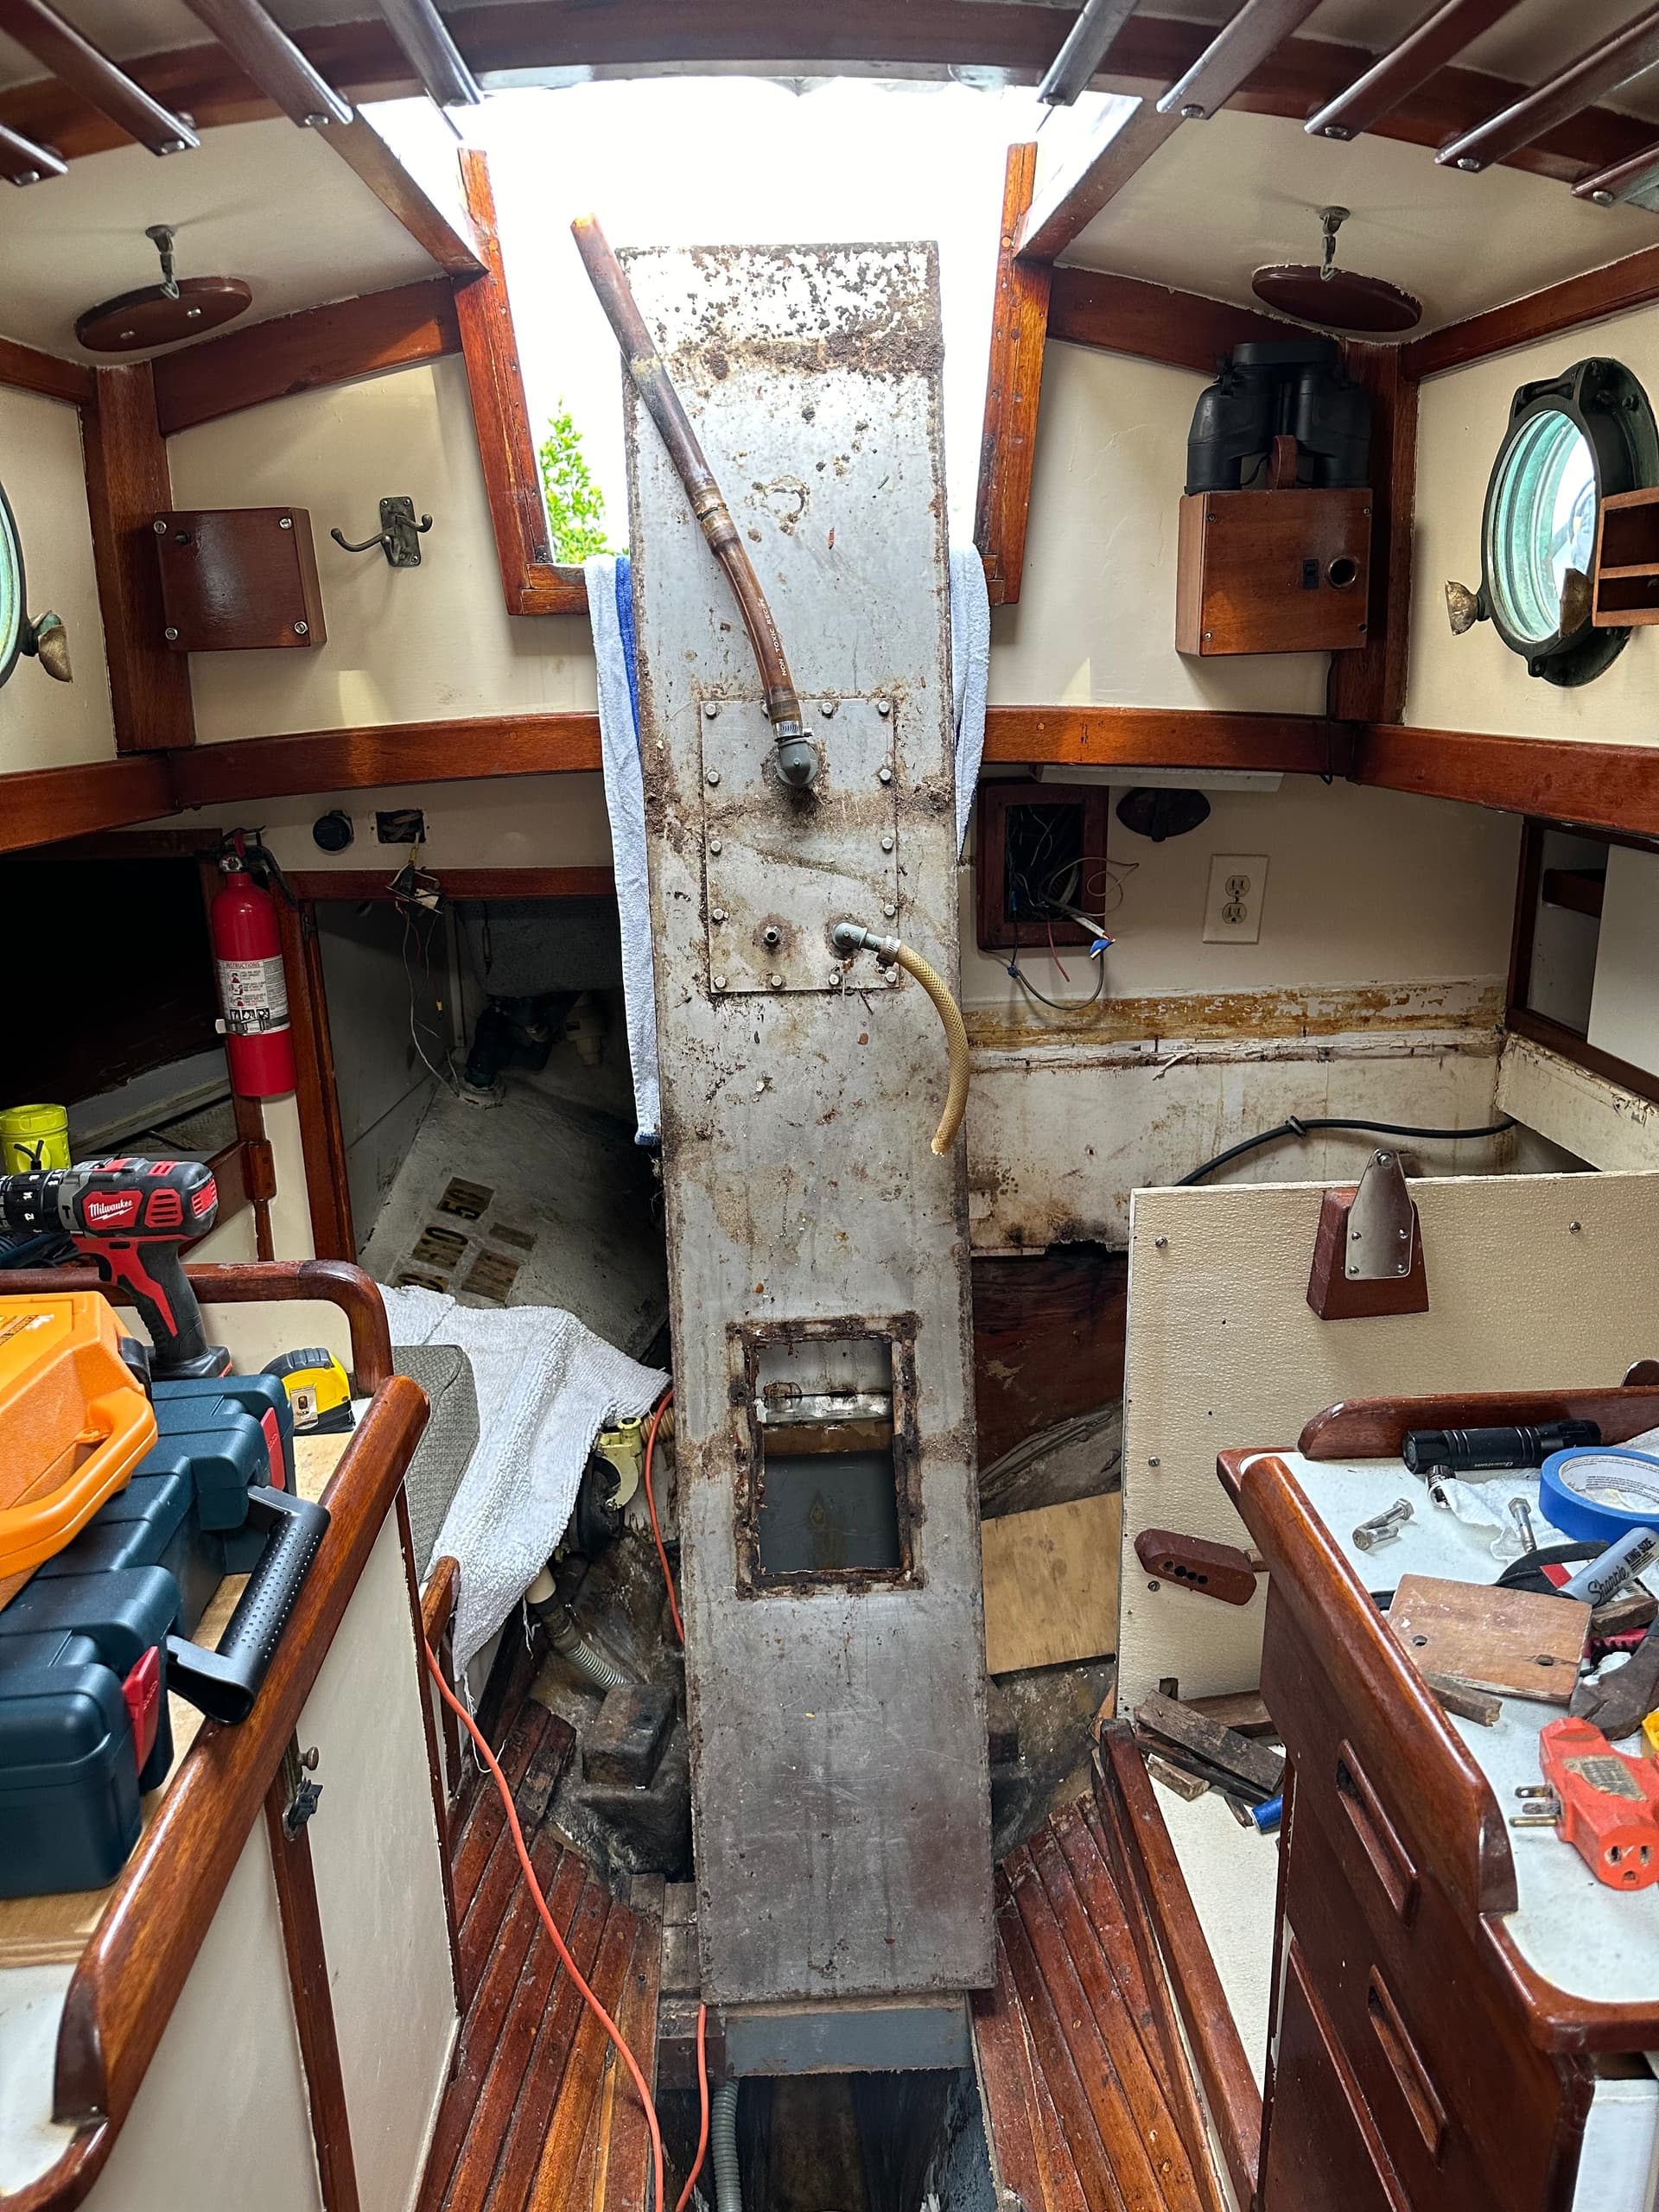
Restoration update…When I got WW to my place in the Keys, it was obvious she needed a full restore. I decided to take a year working on her as able with a target launch in Dec 24.
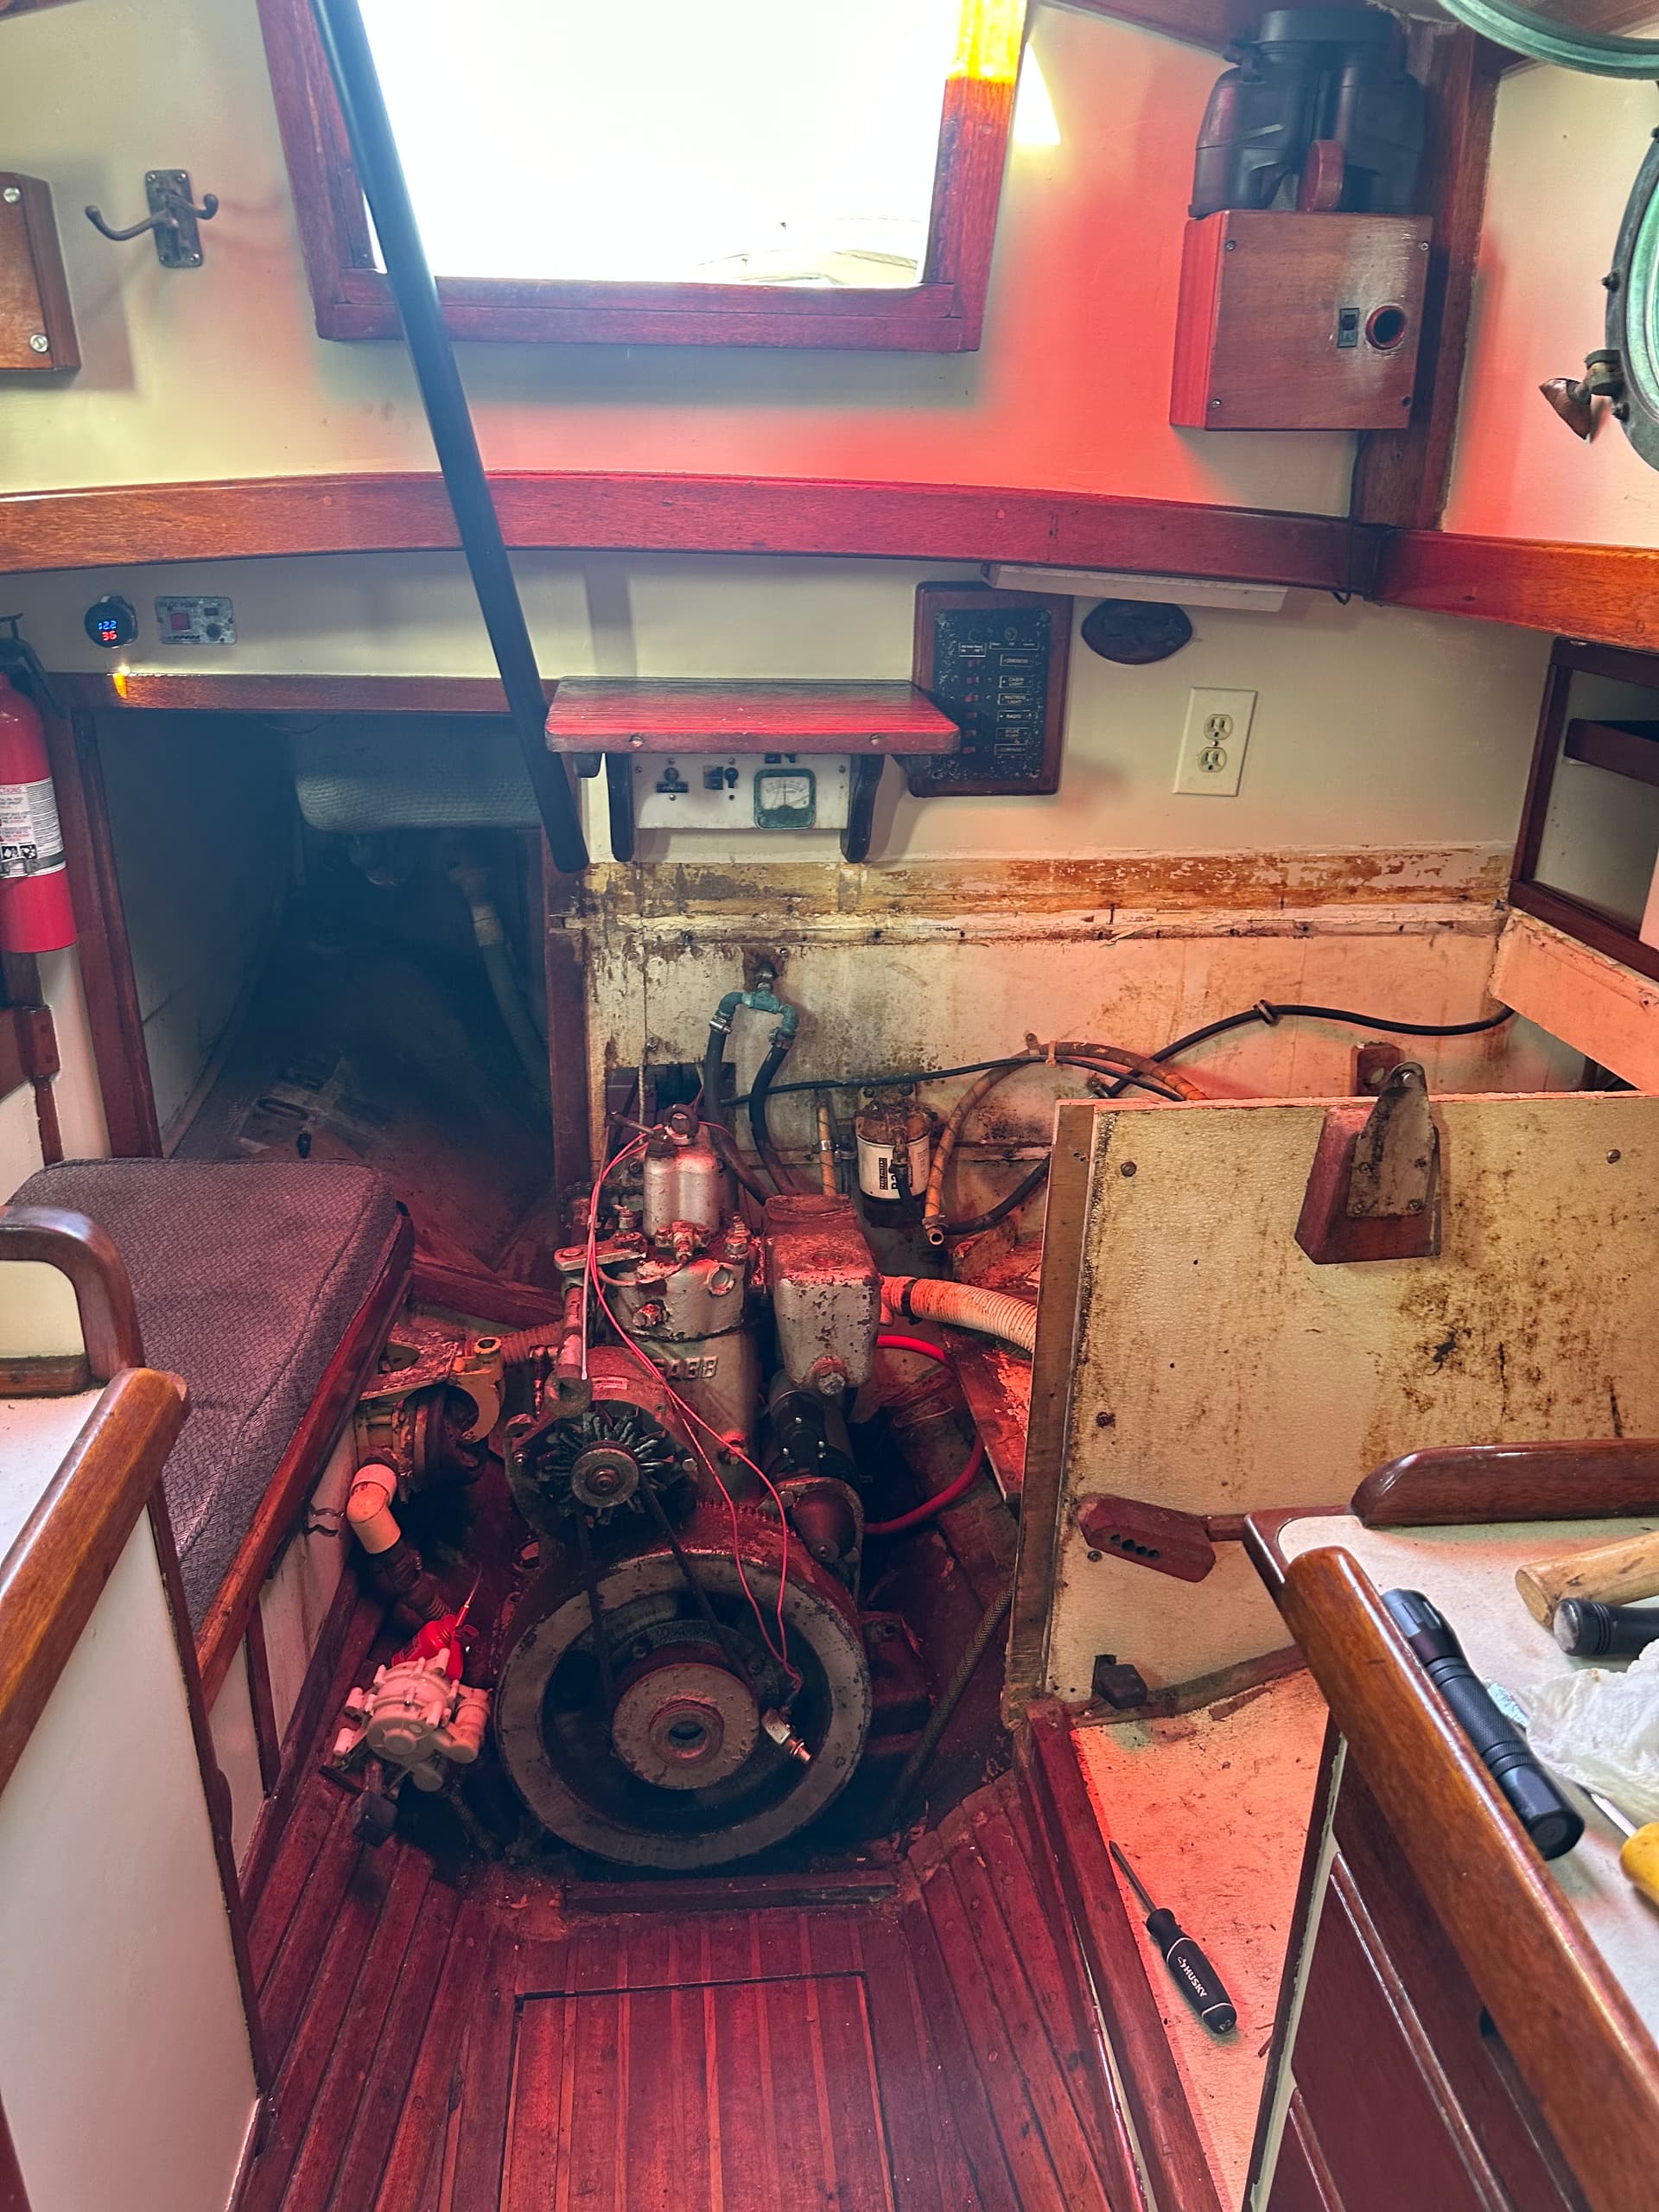
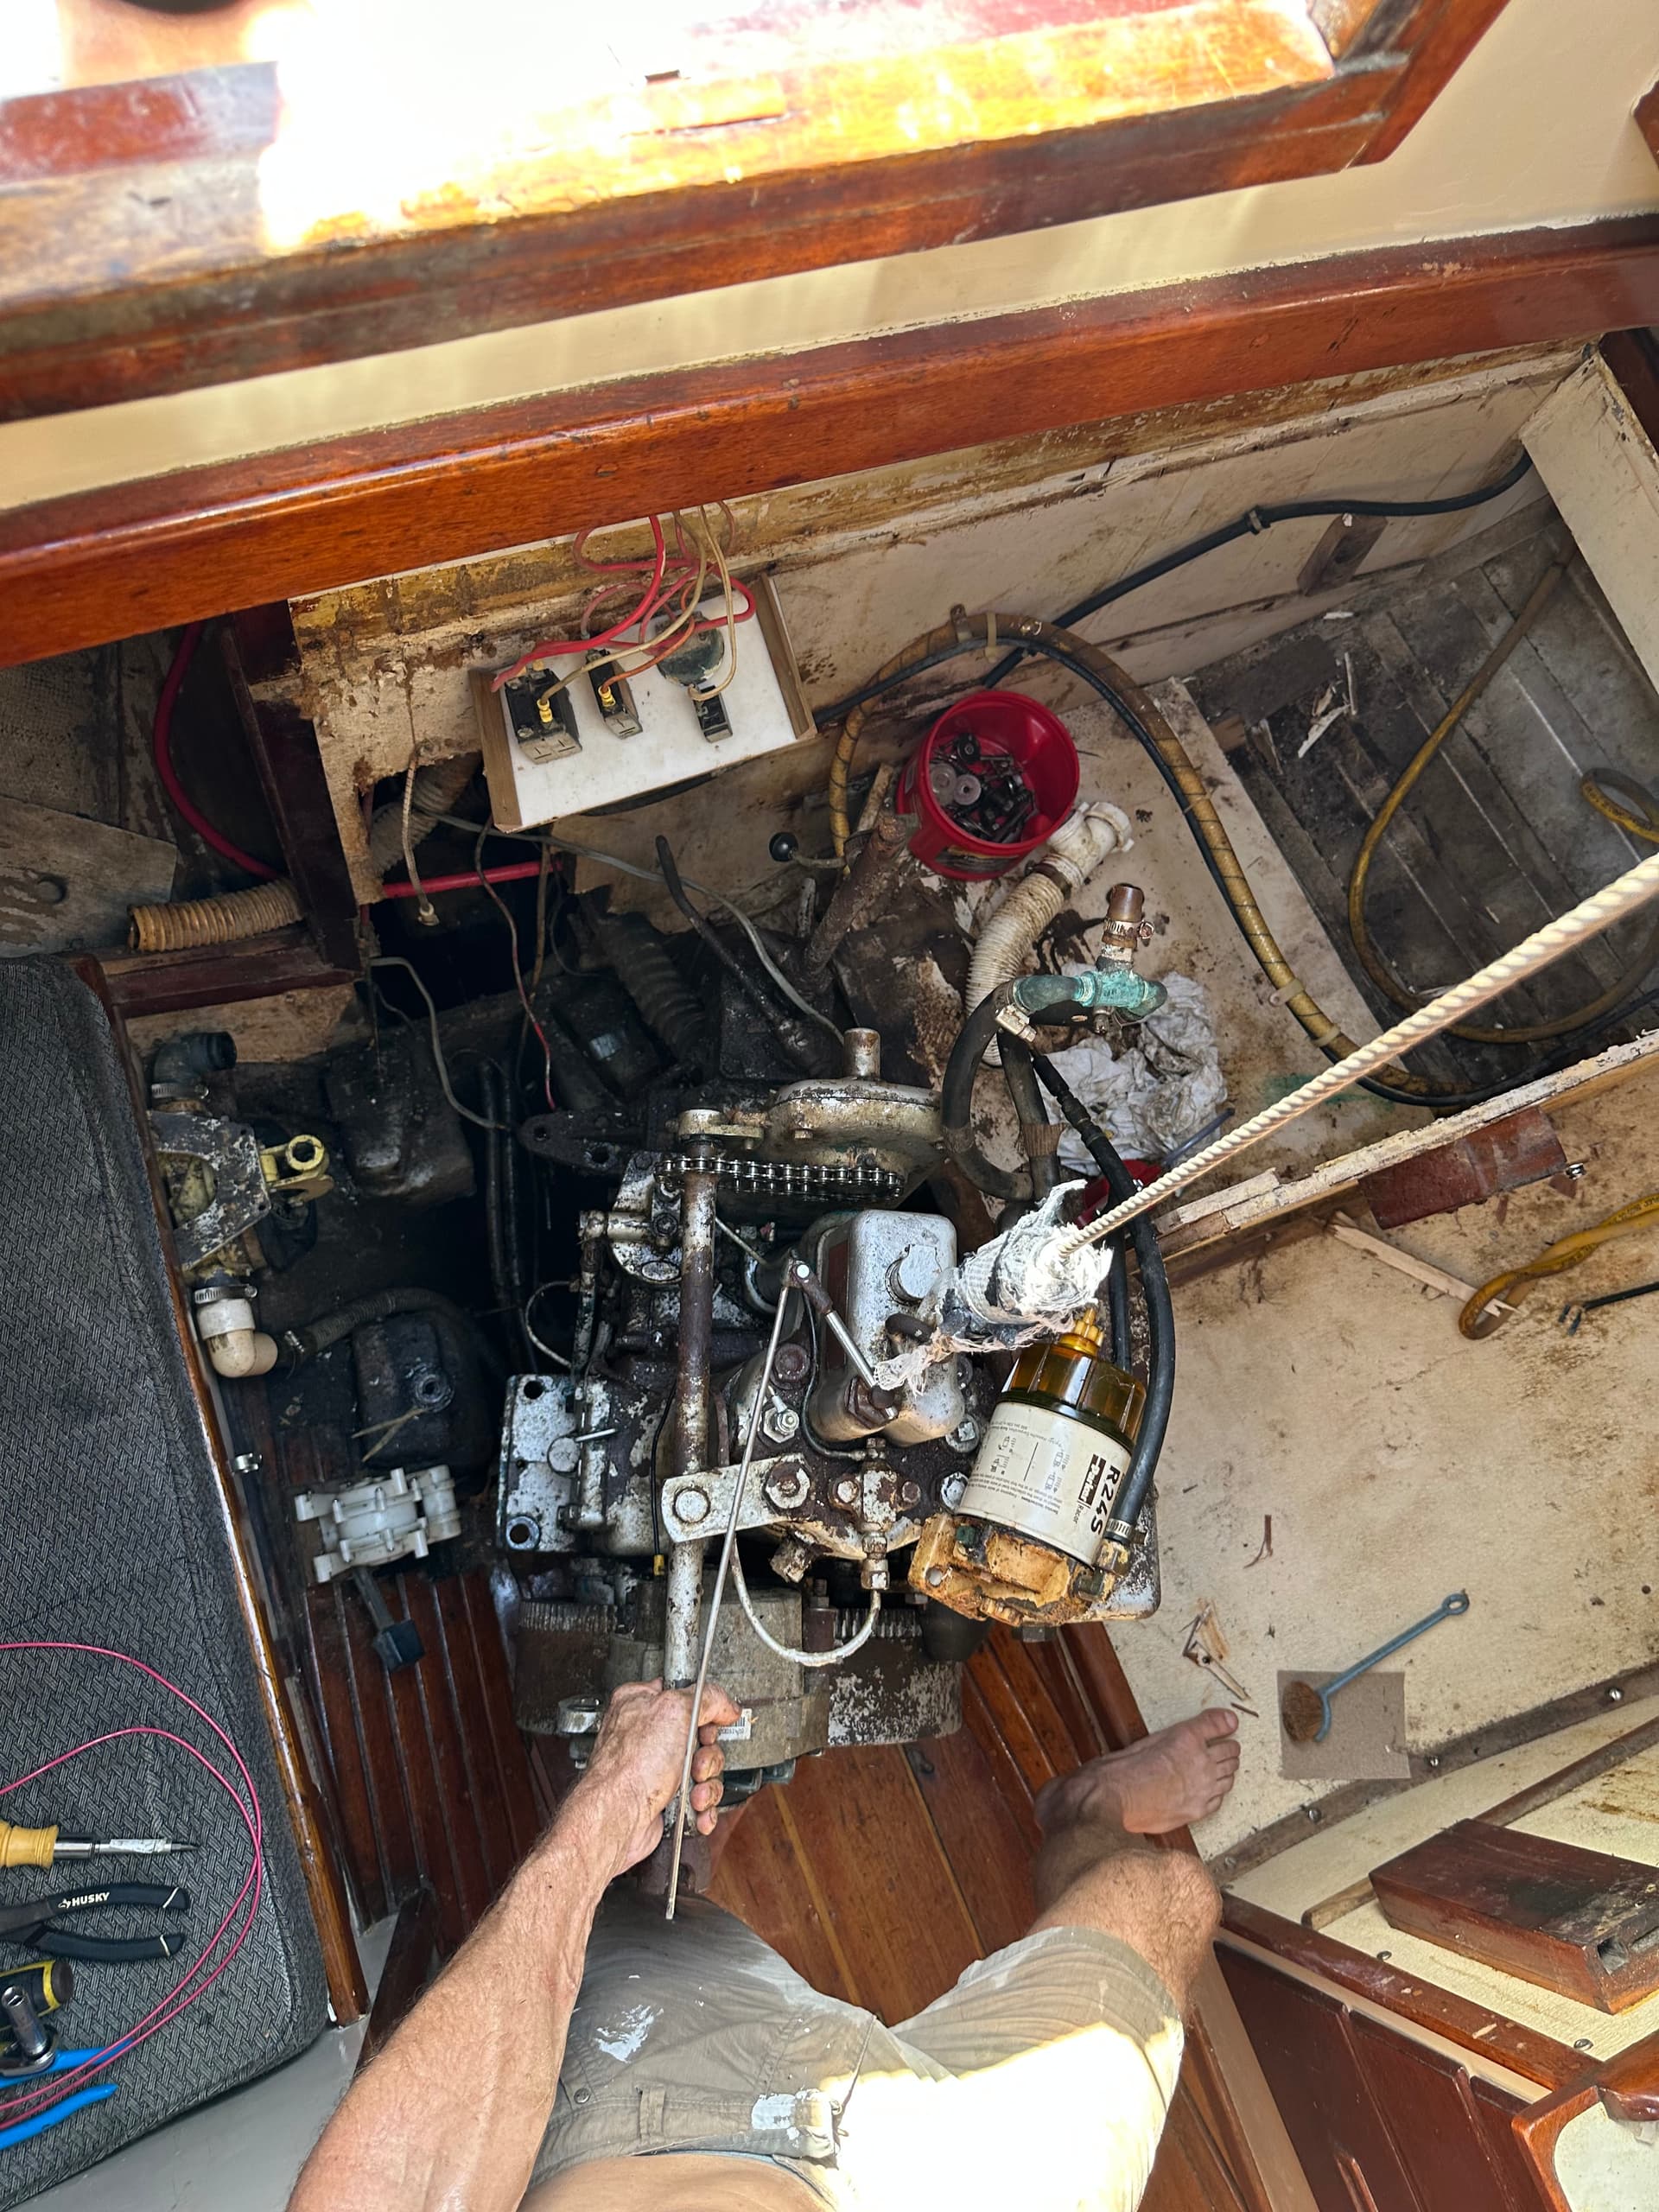
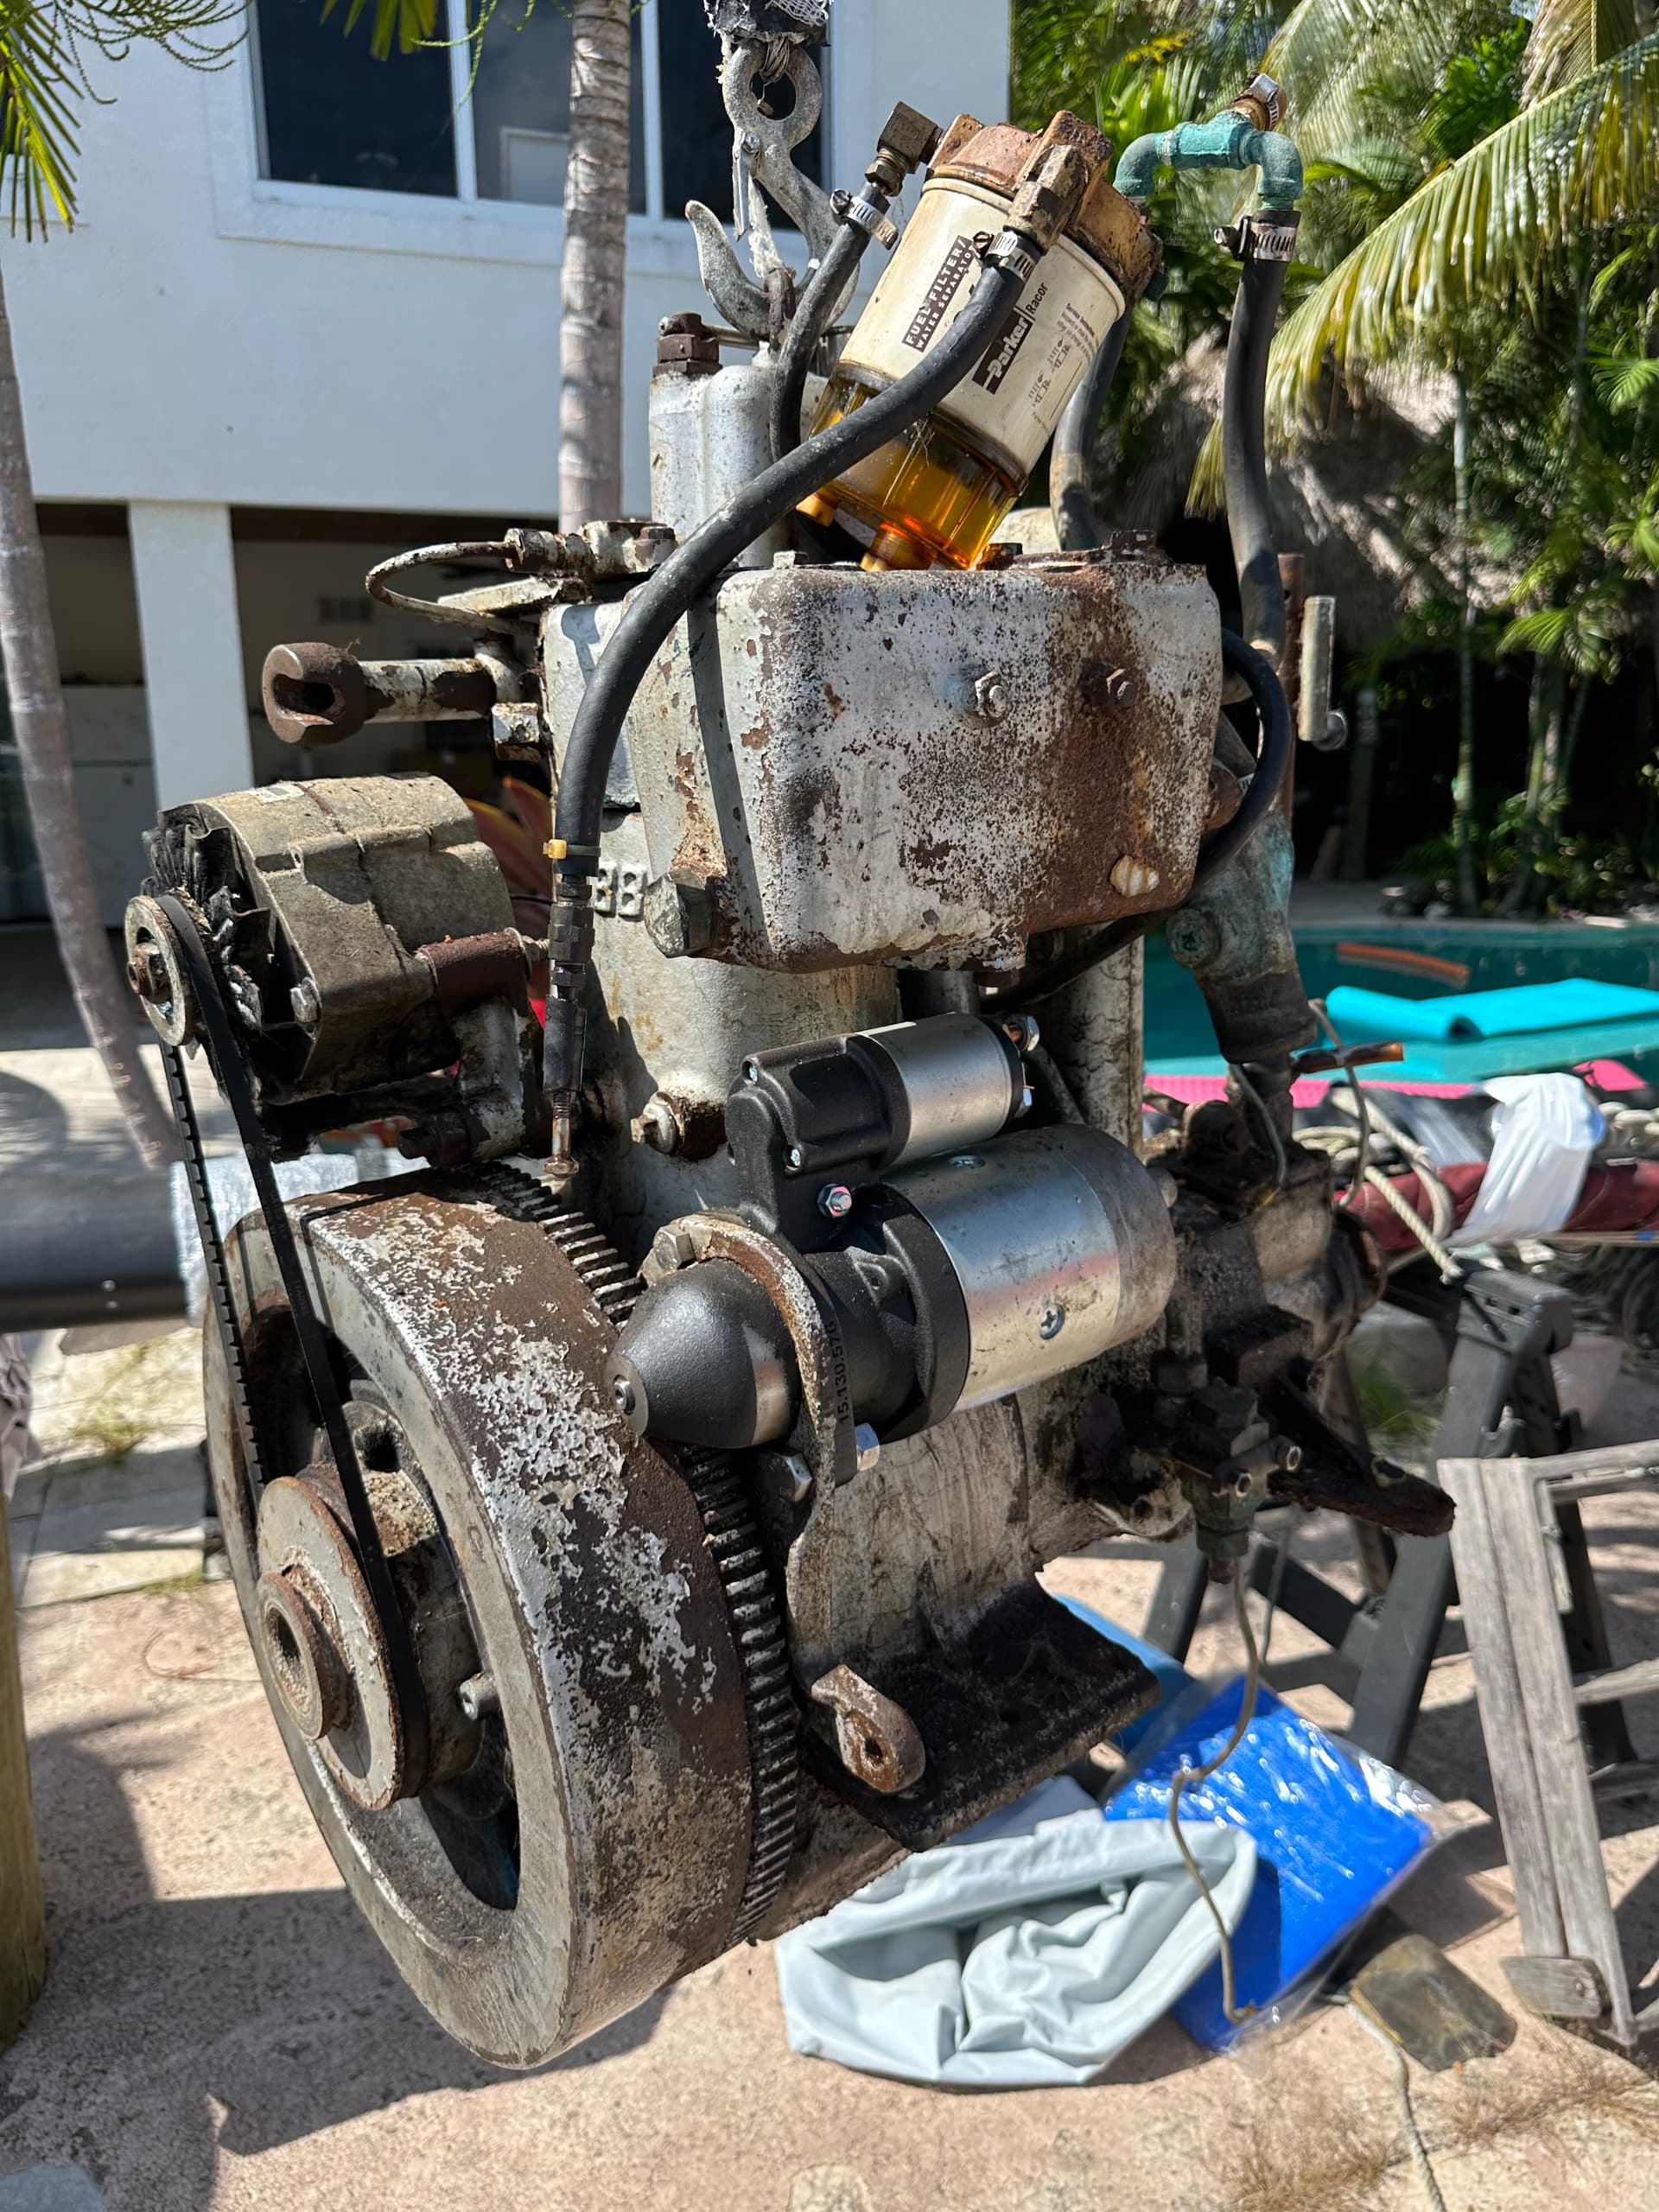
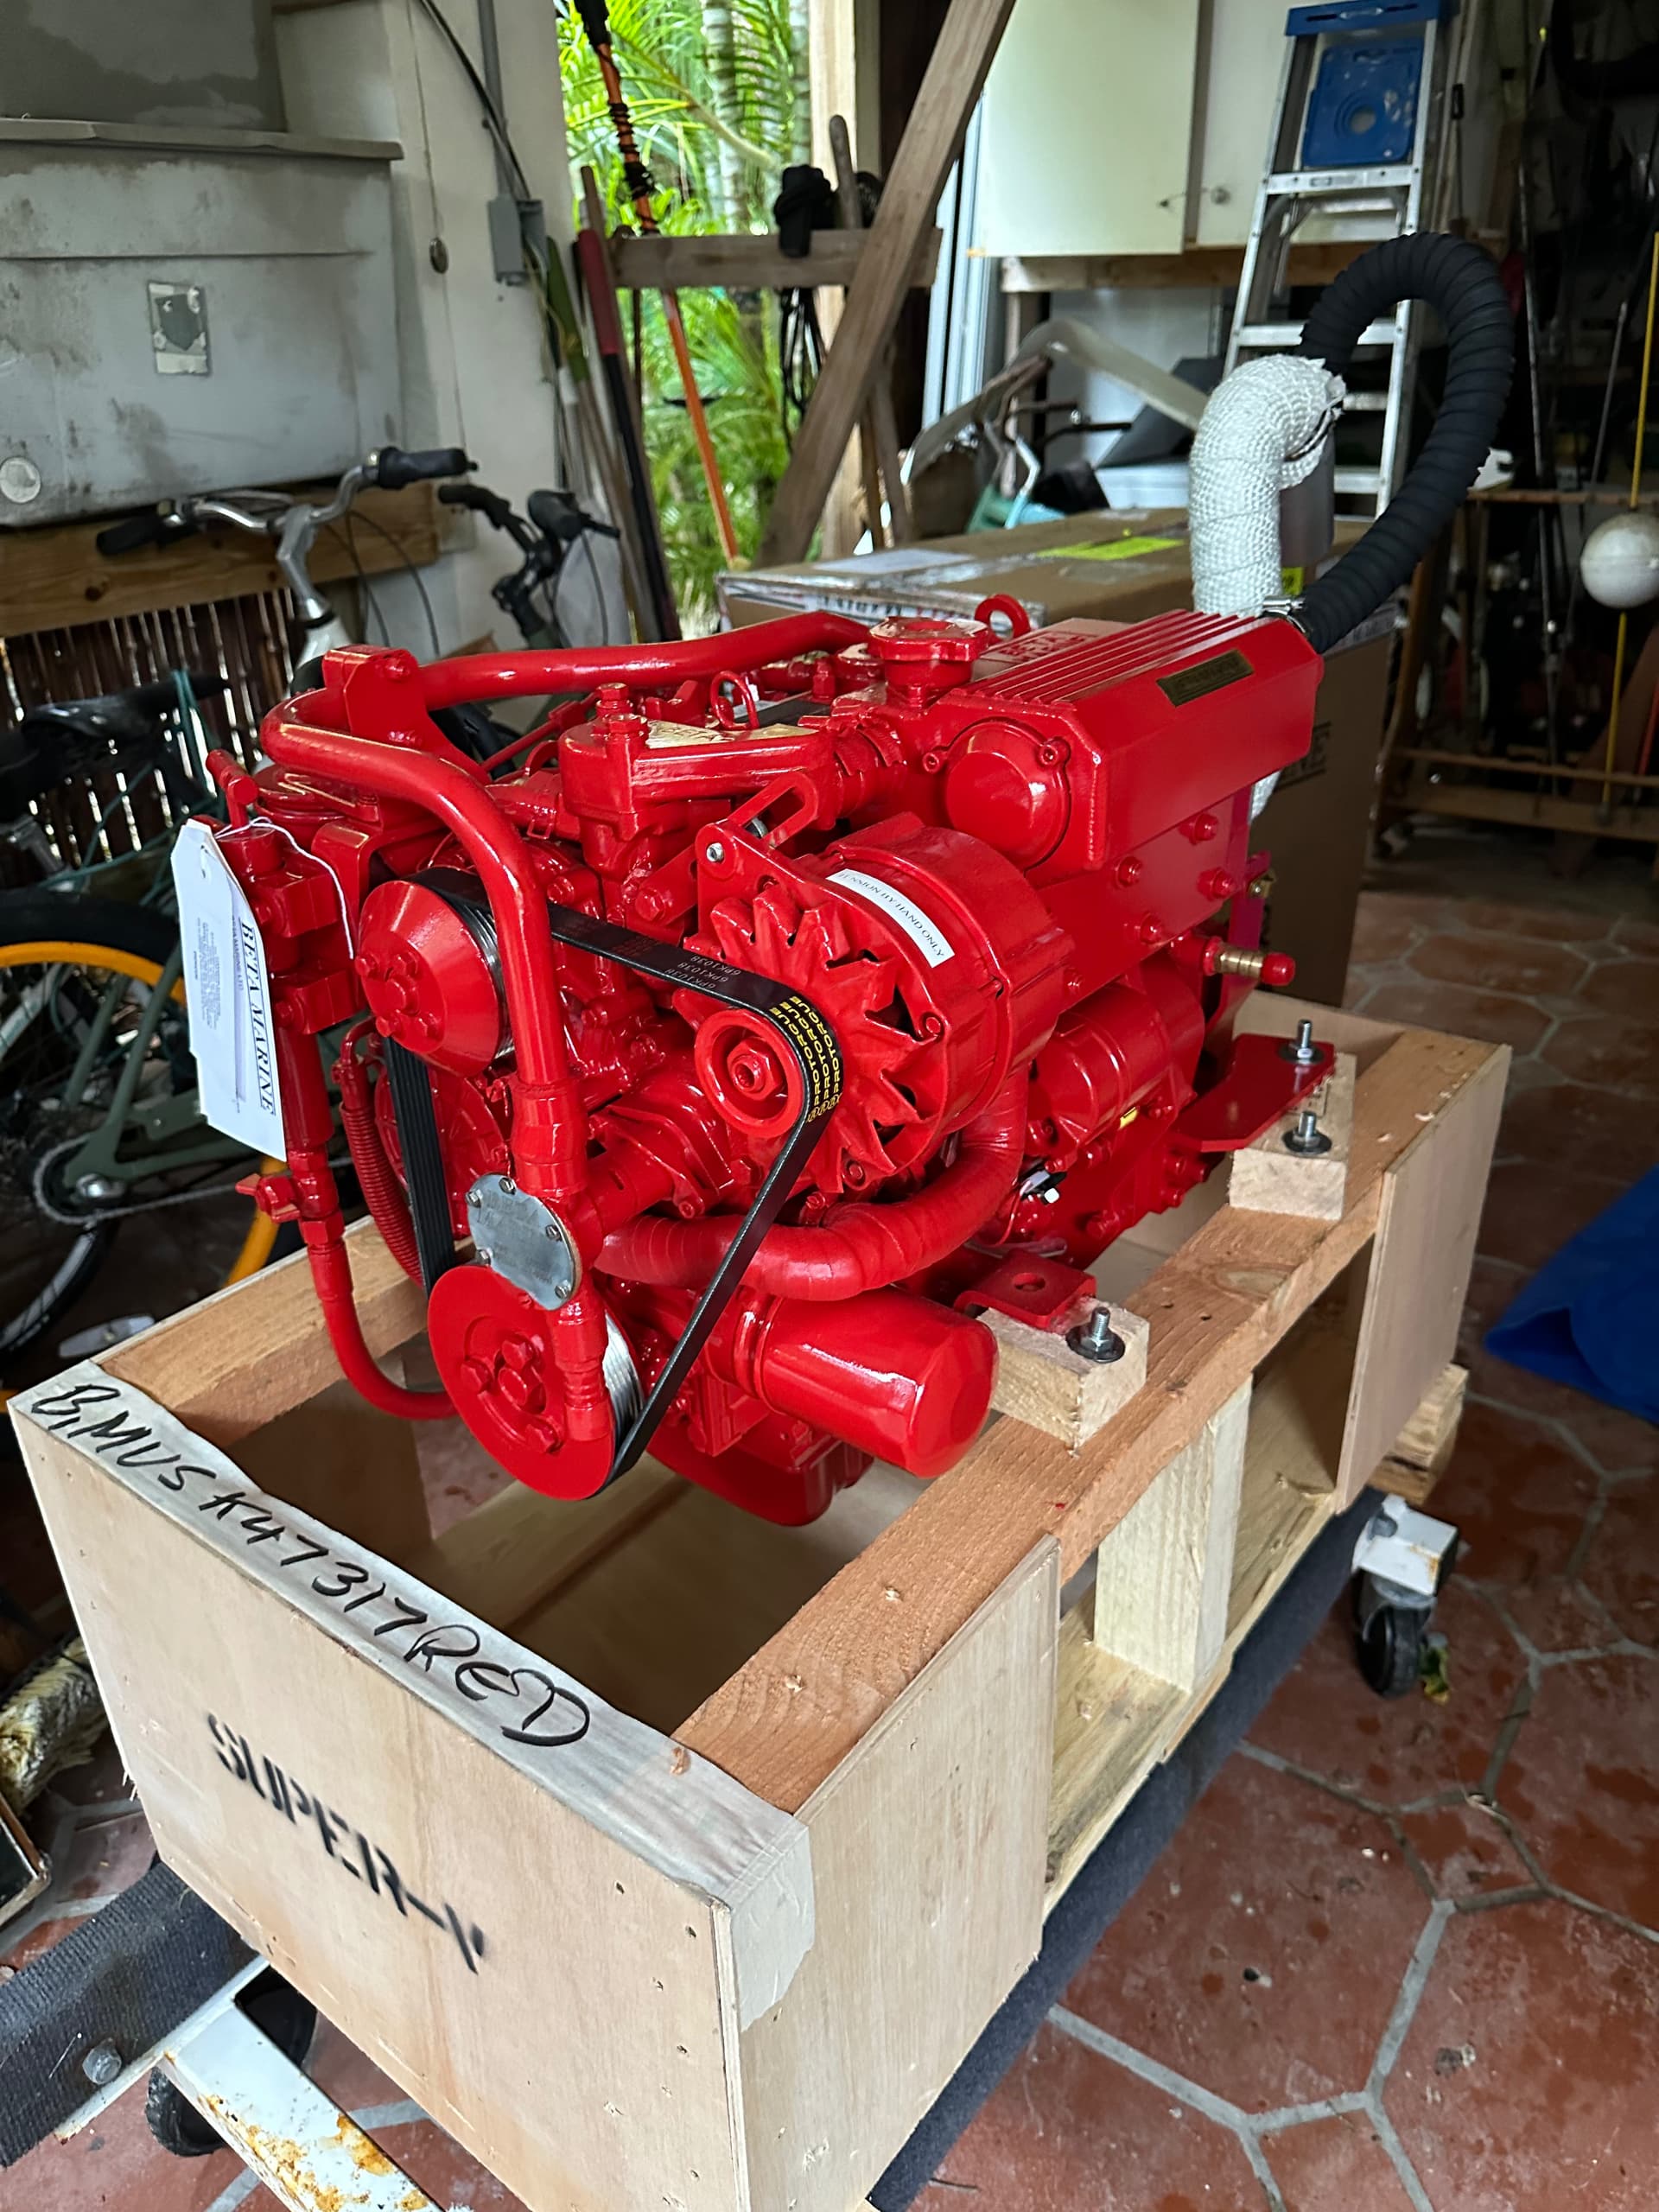
Although the Sabb ran great, it was a mess, the bilge had decades of grease grime and diesel. The motor was really loud and shook the boat pretty bad. I just didn’t think restoring such an old motor, even though these motors are bulletproof, a repower was the best option. I decided to pull the motor and replace with a new Beta 30.
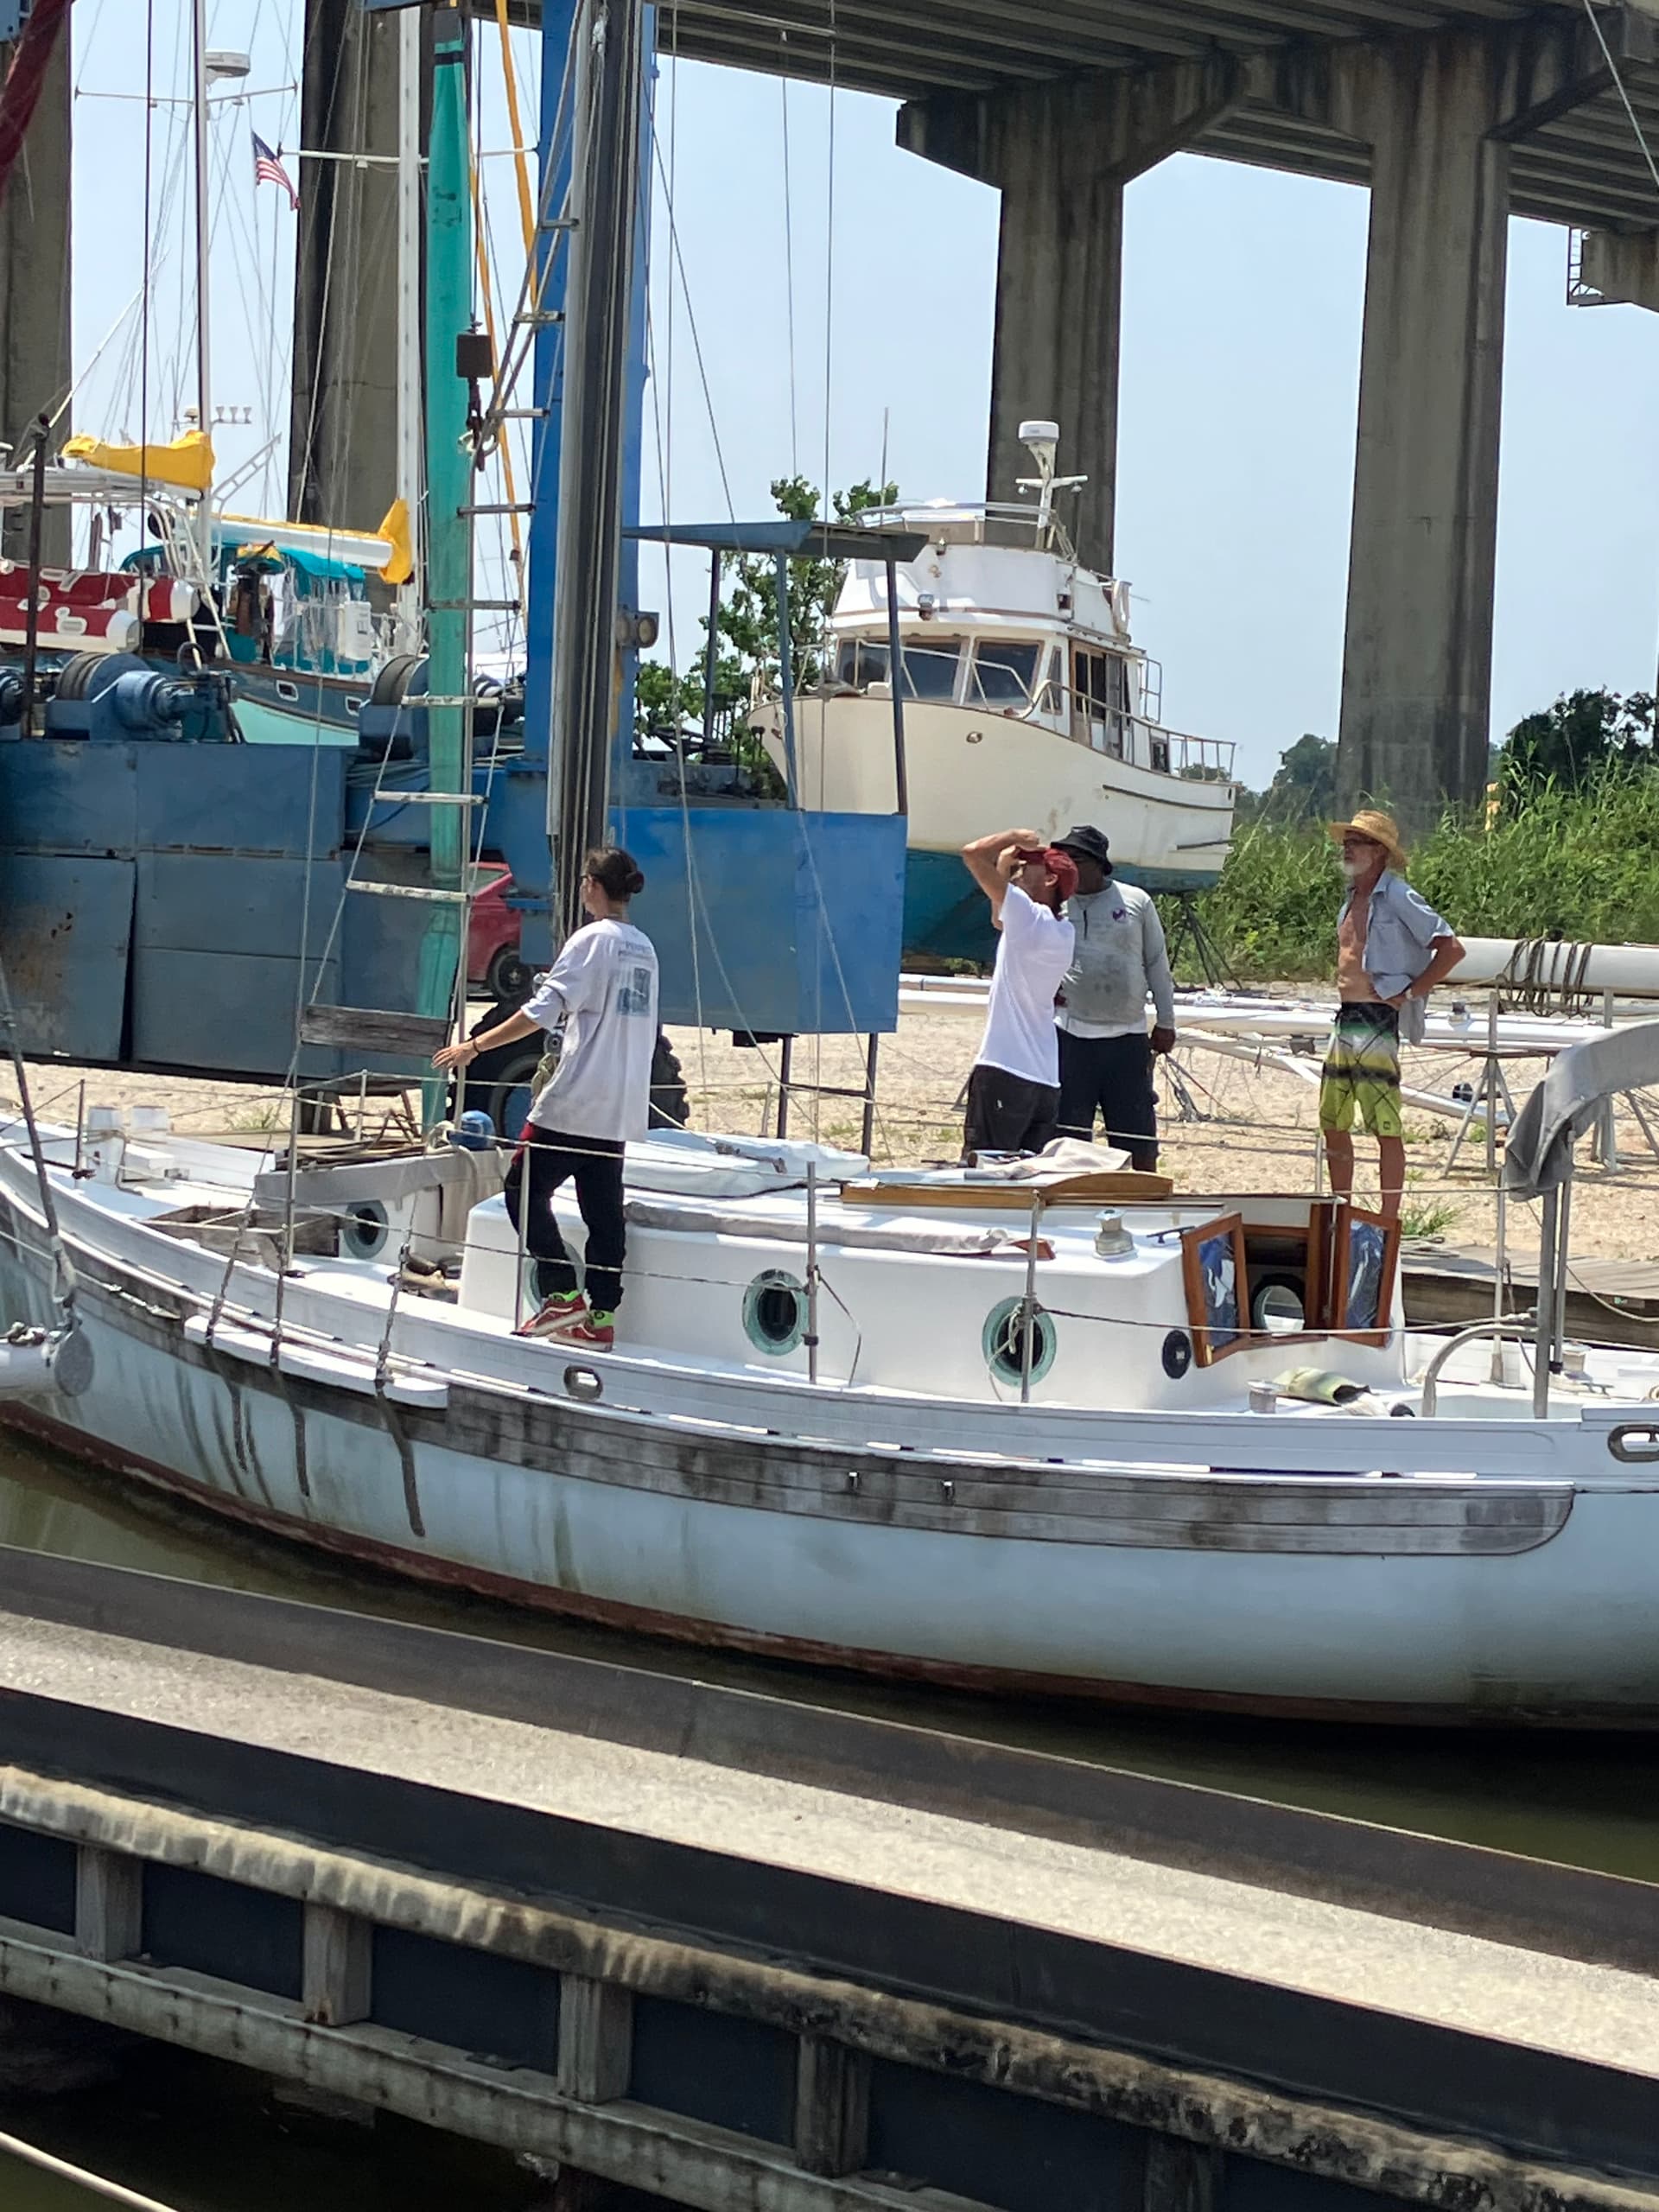
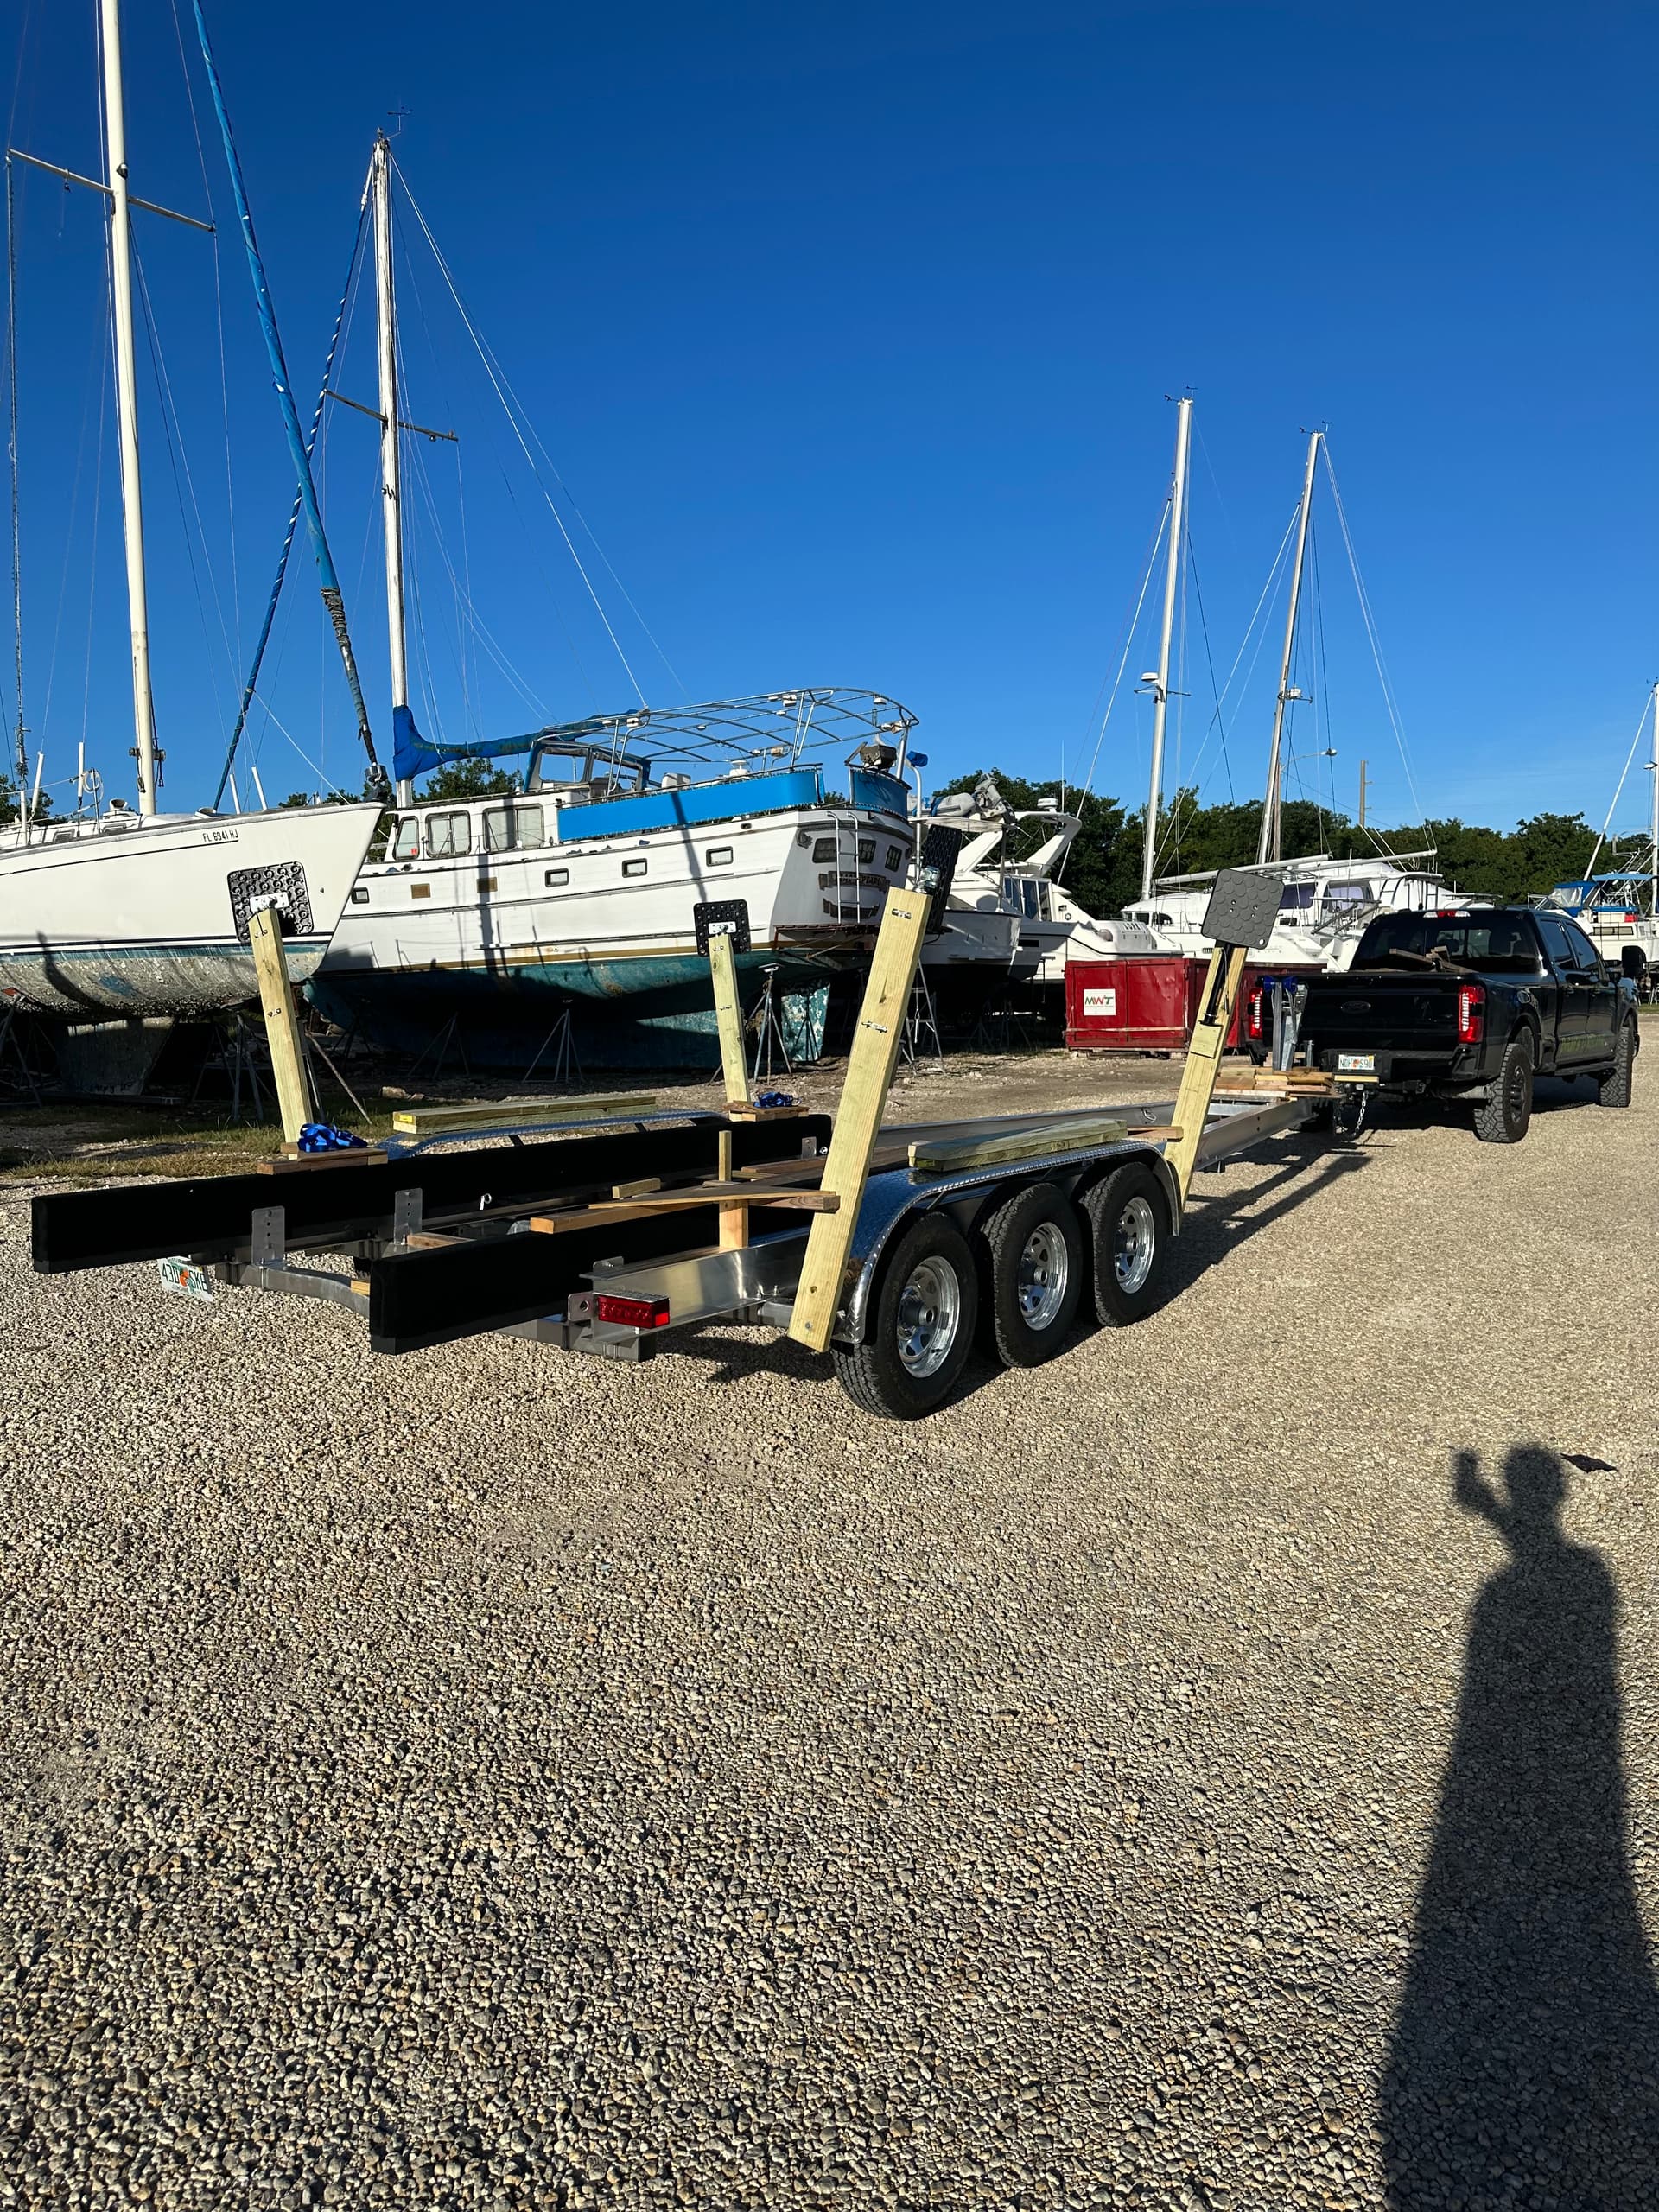
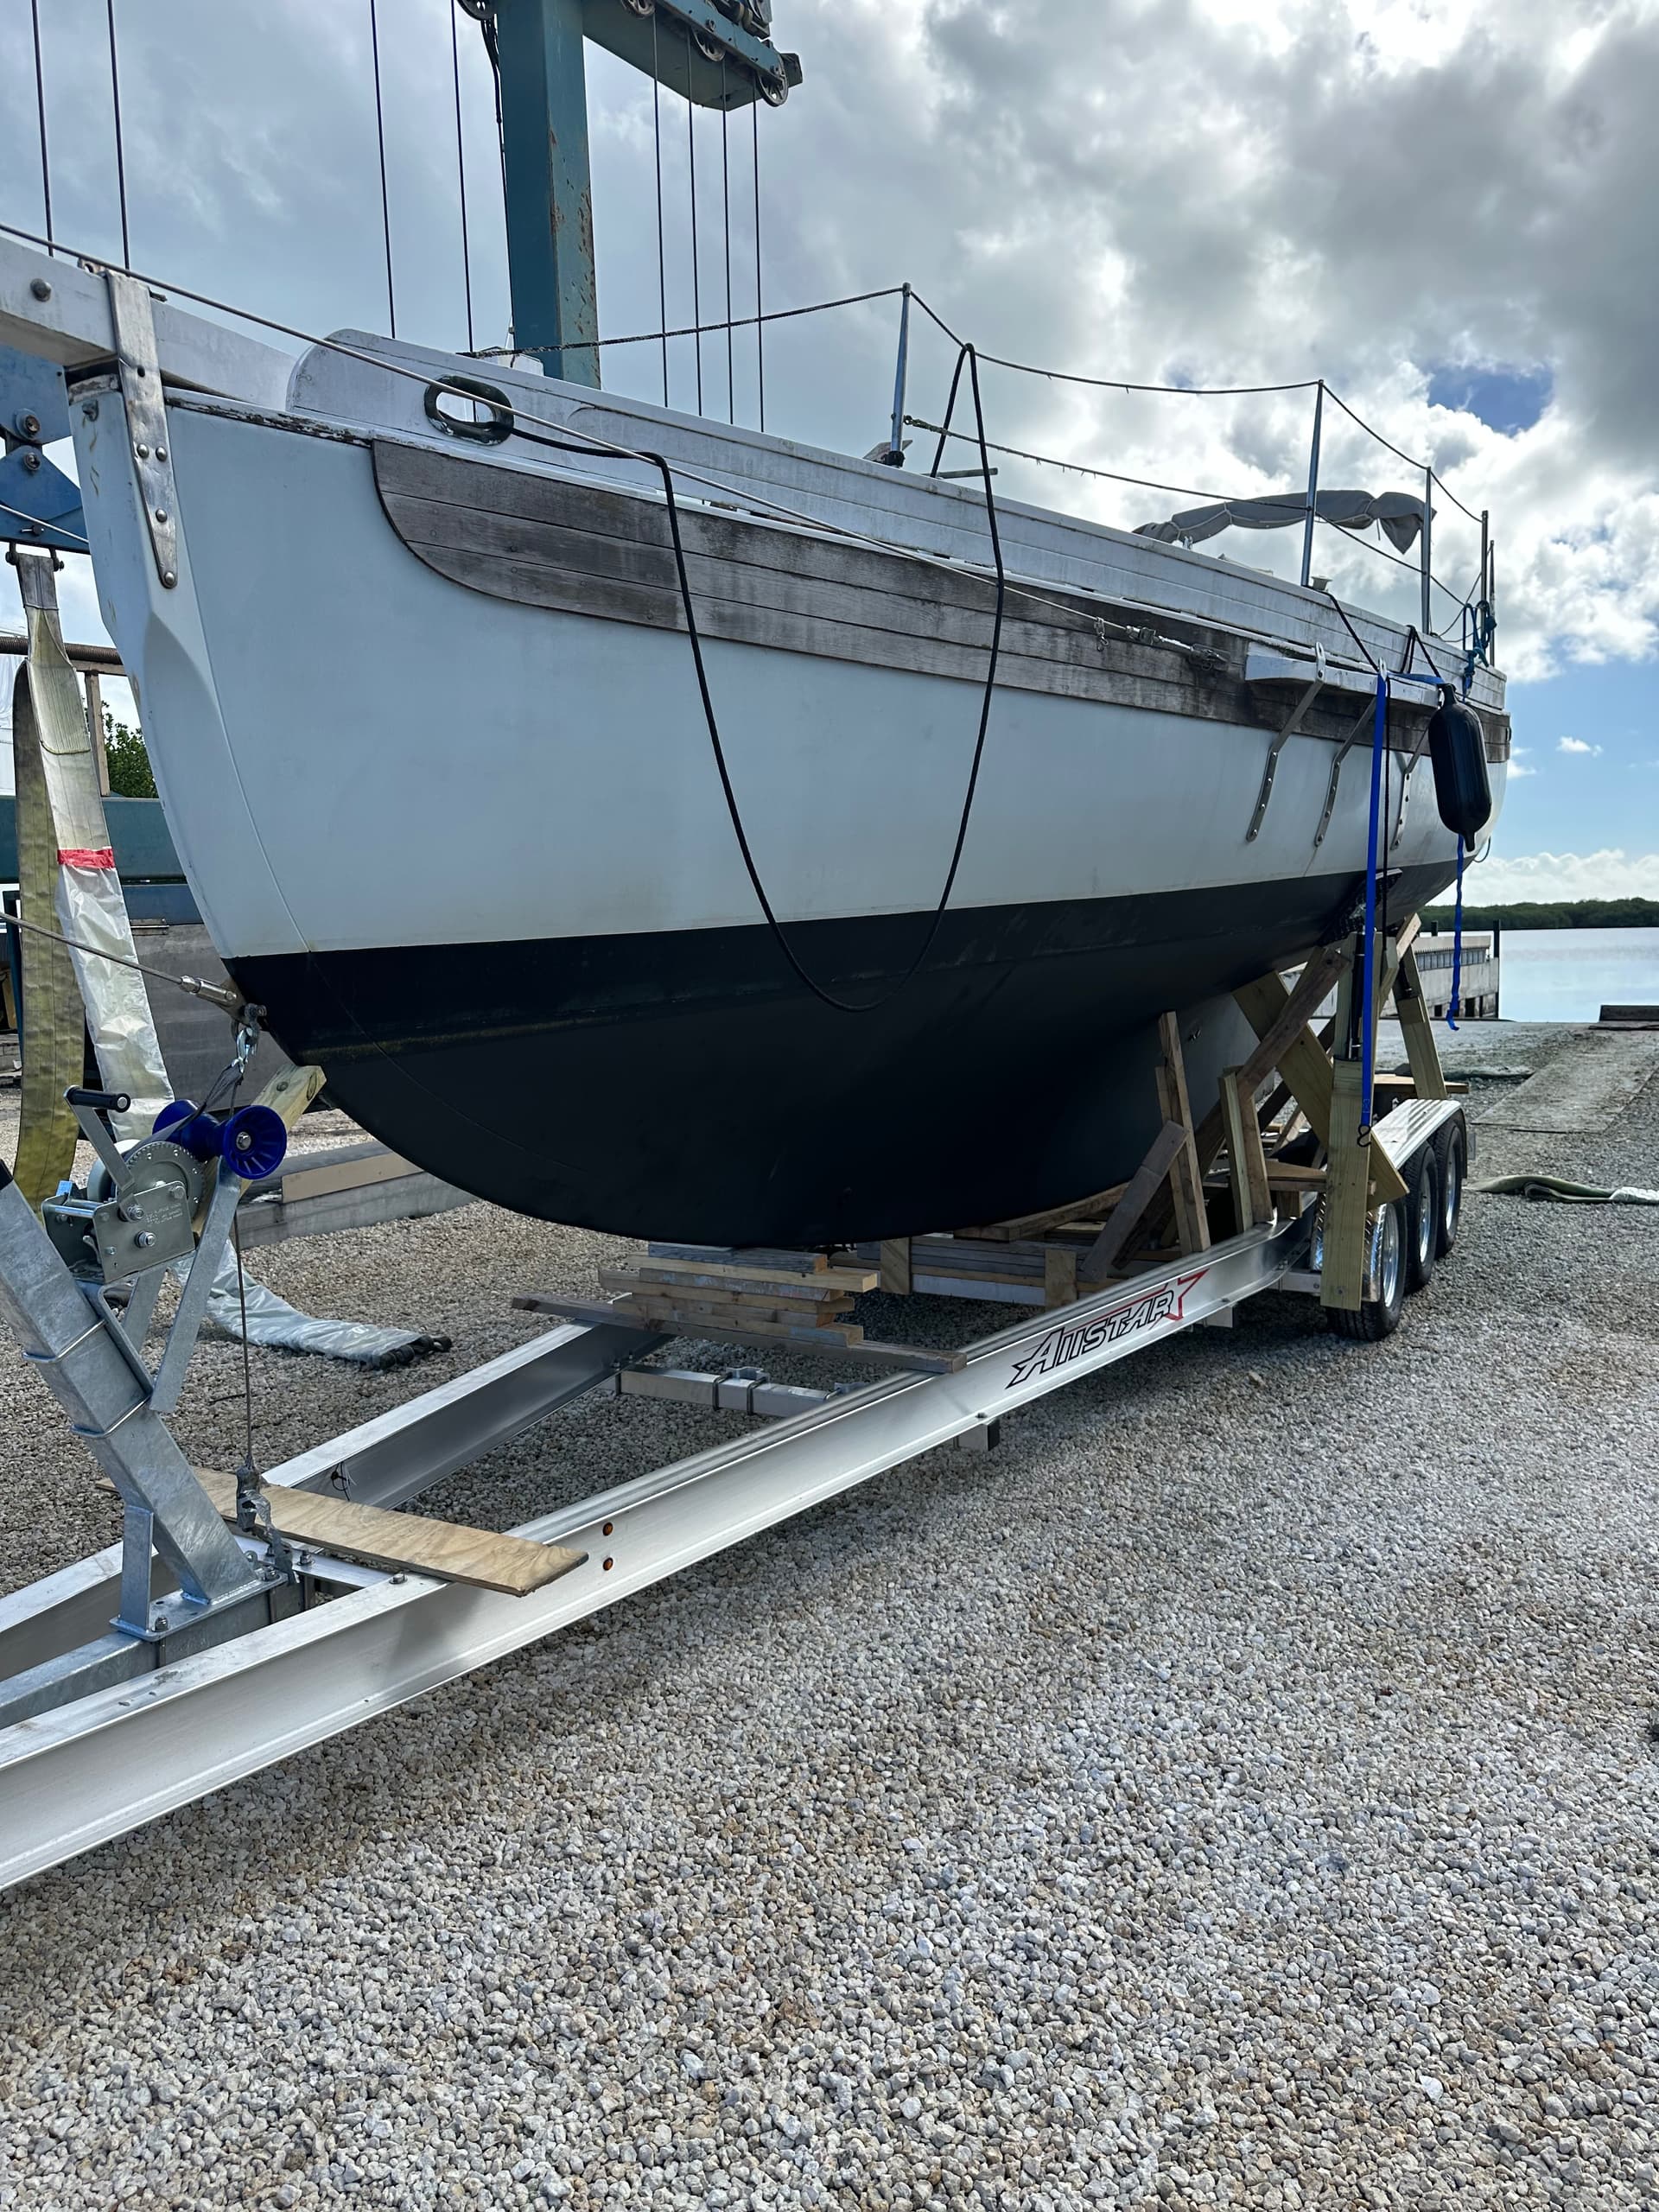
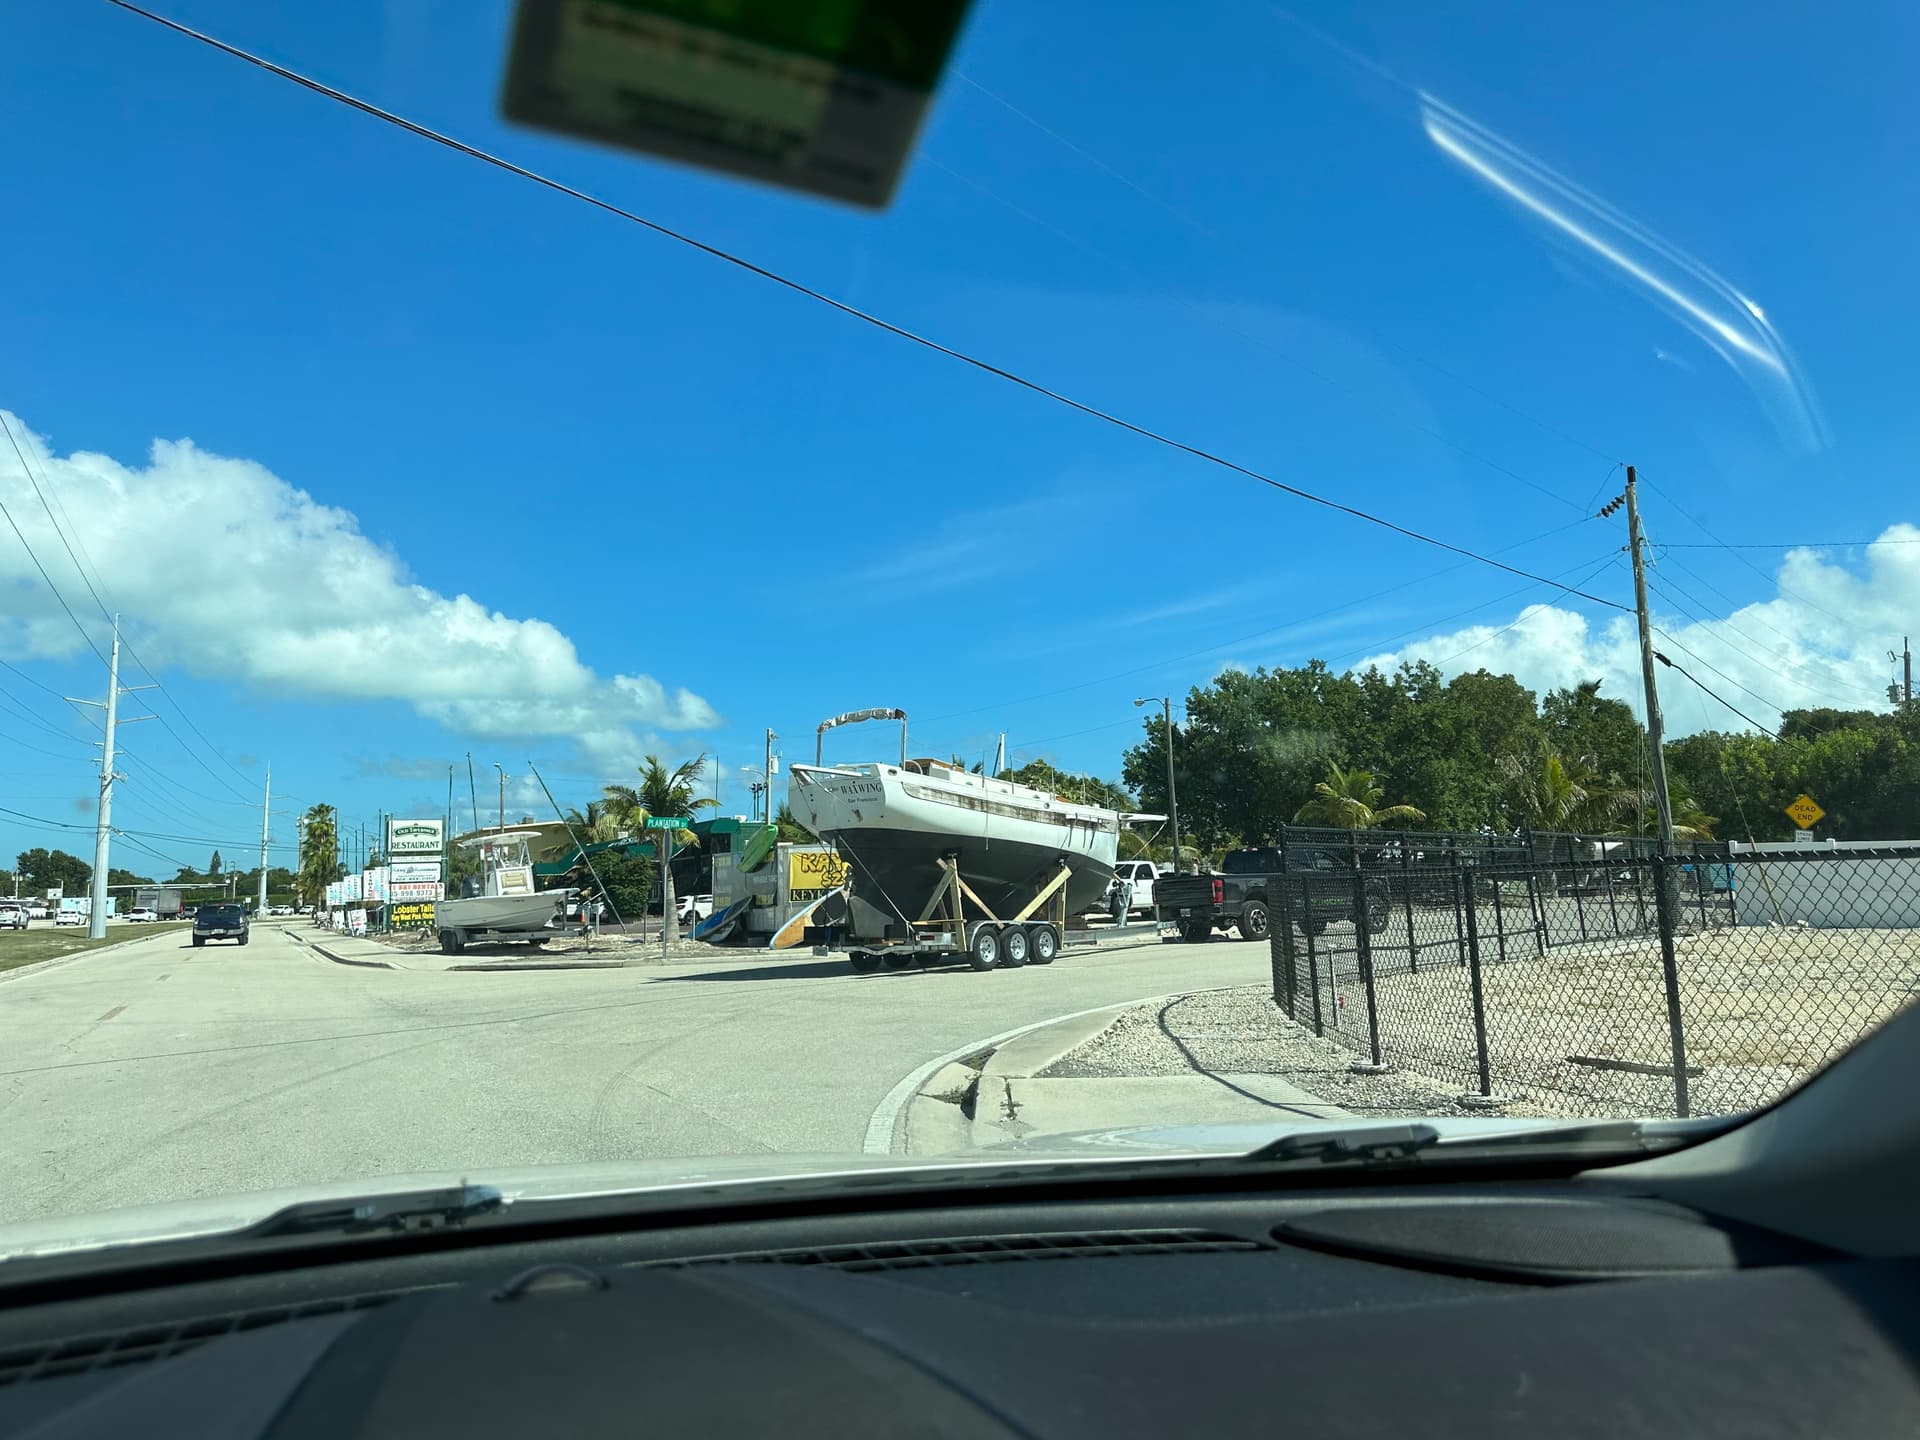
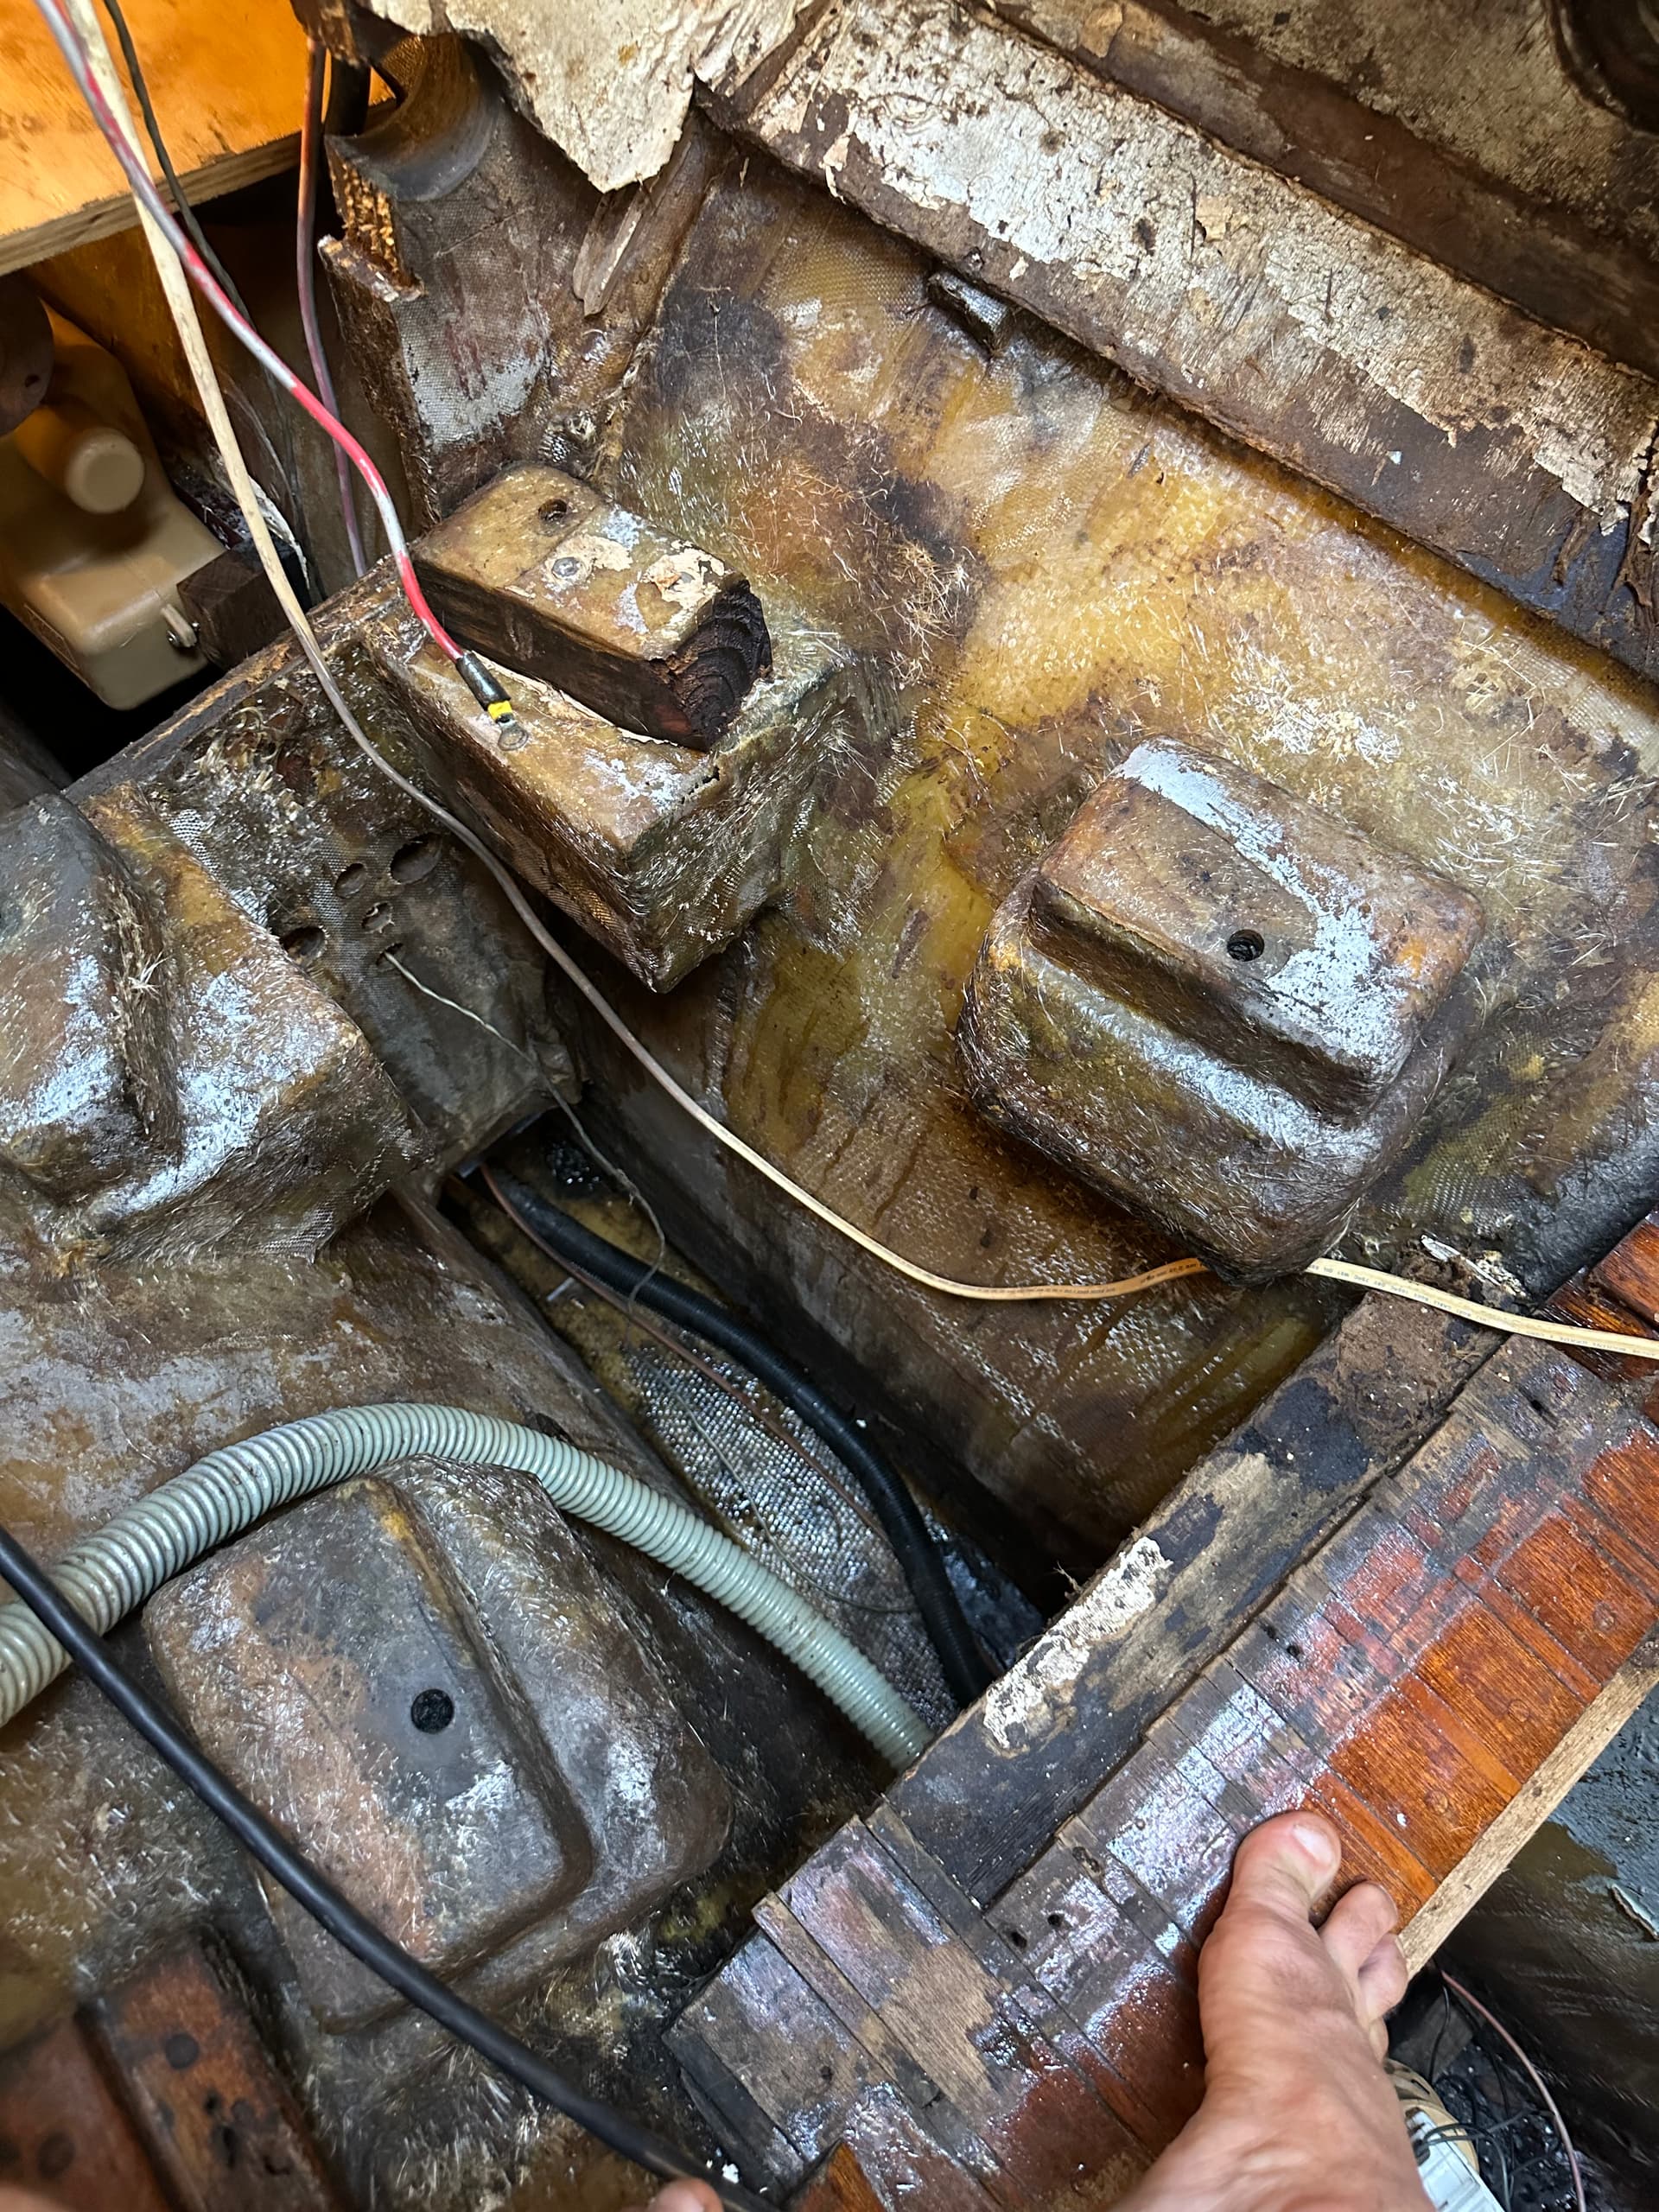
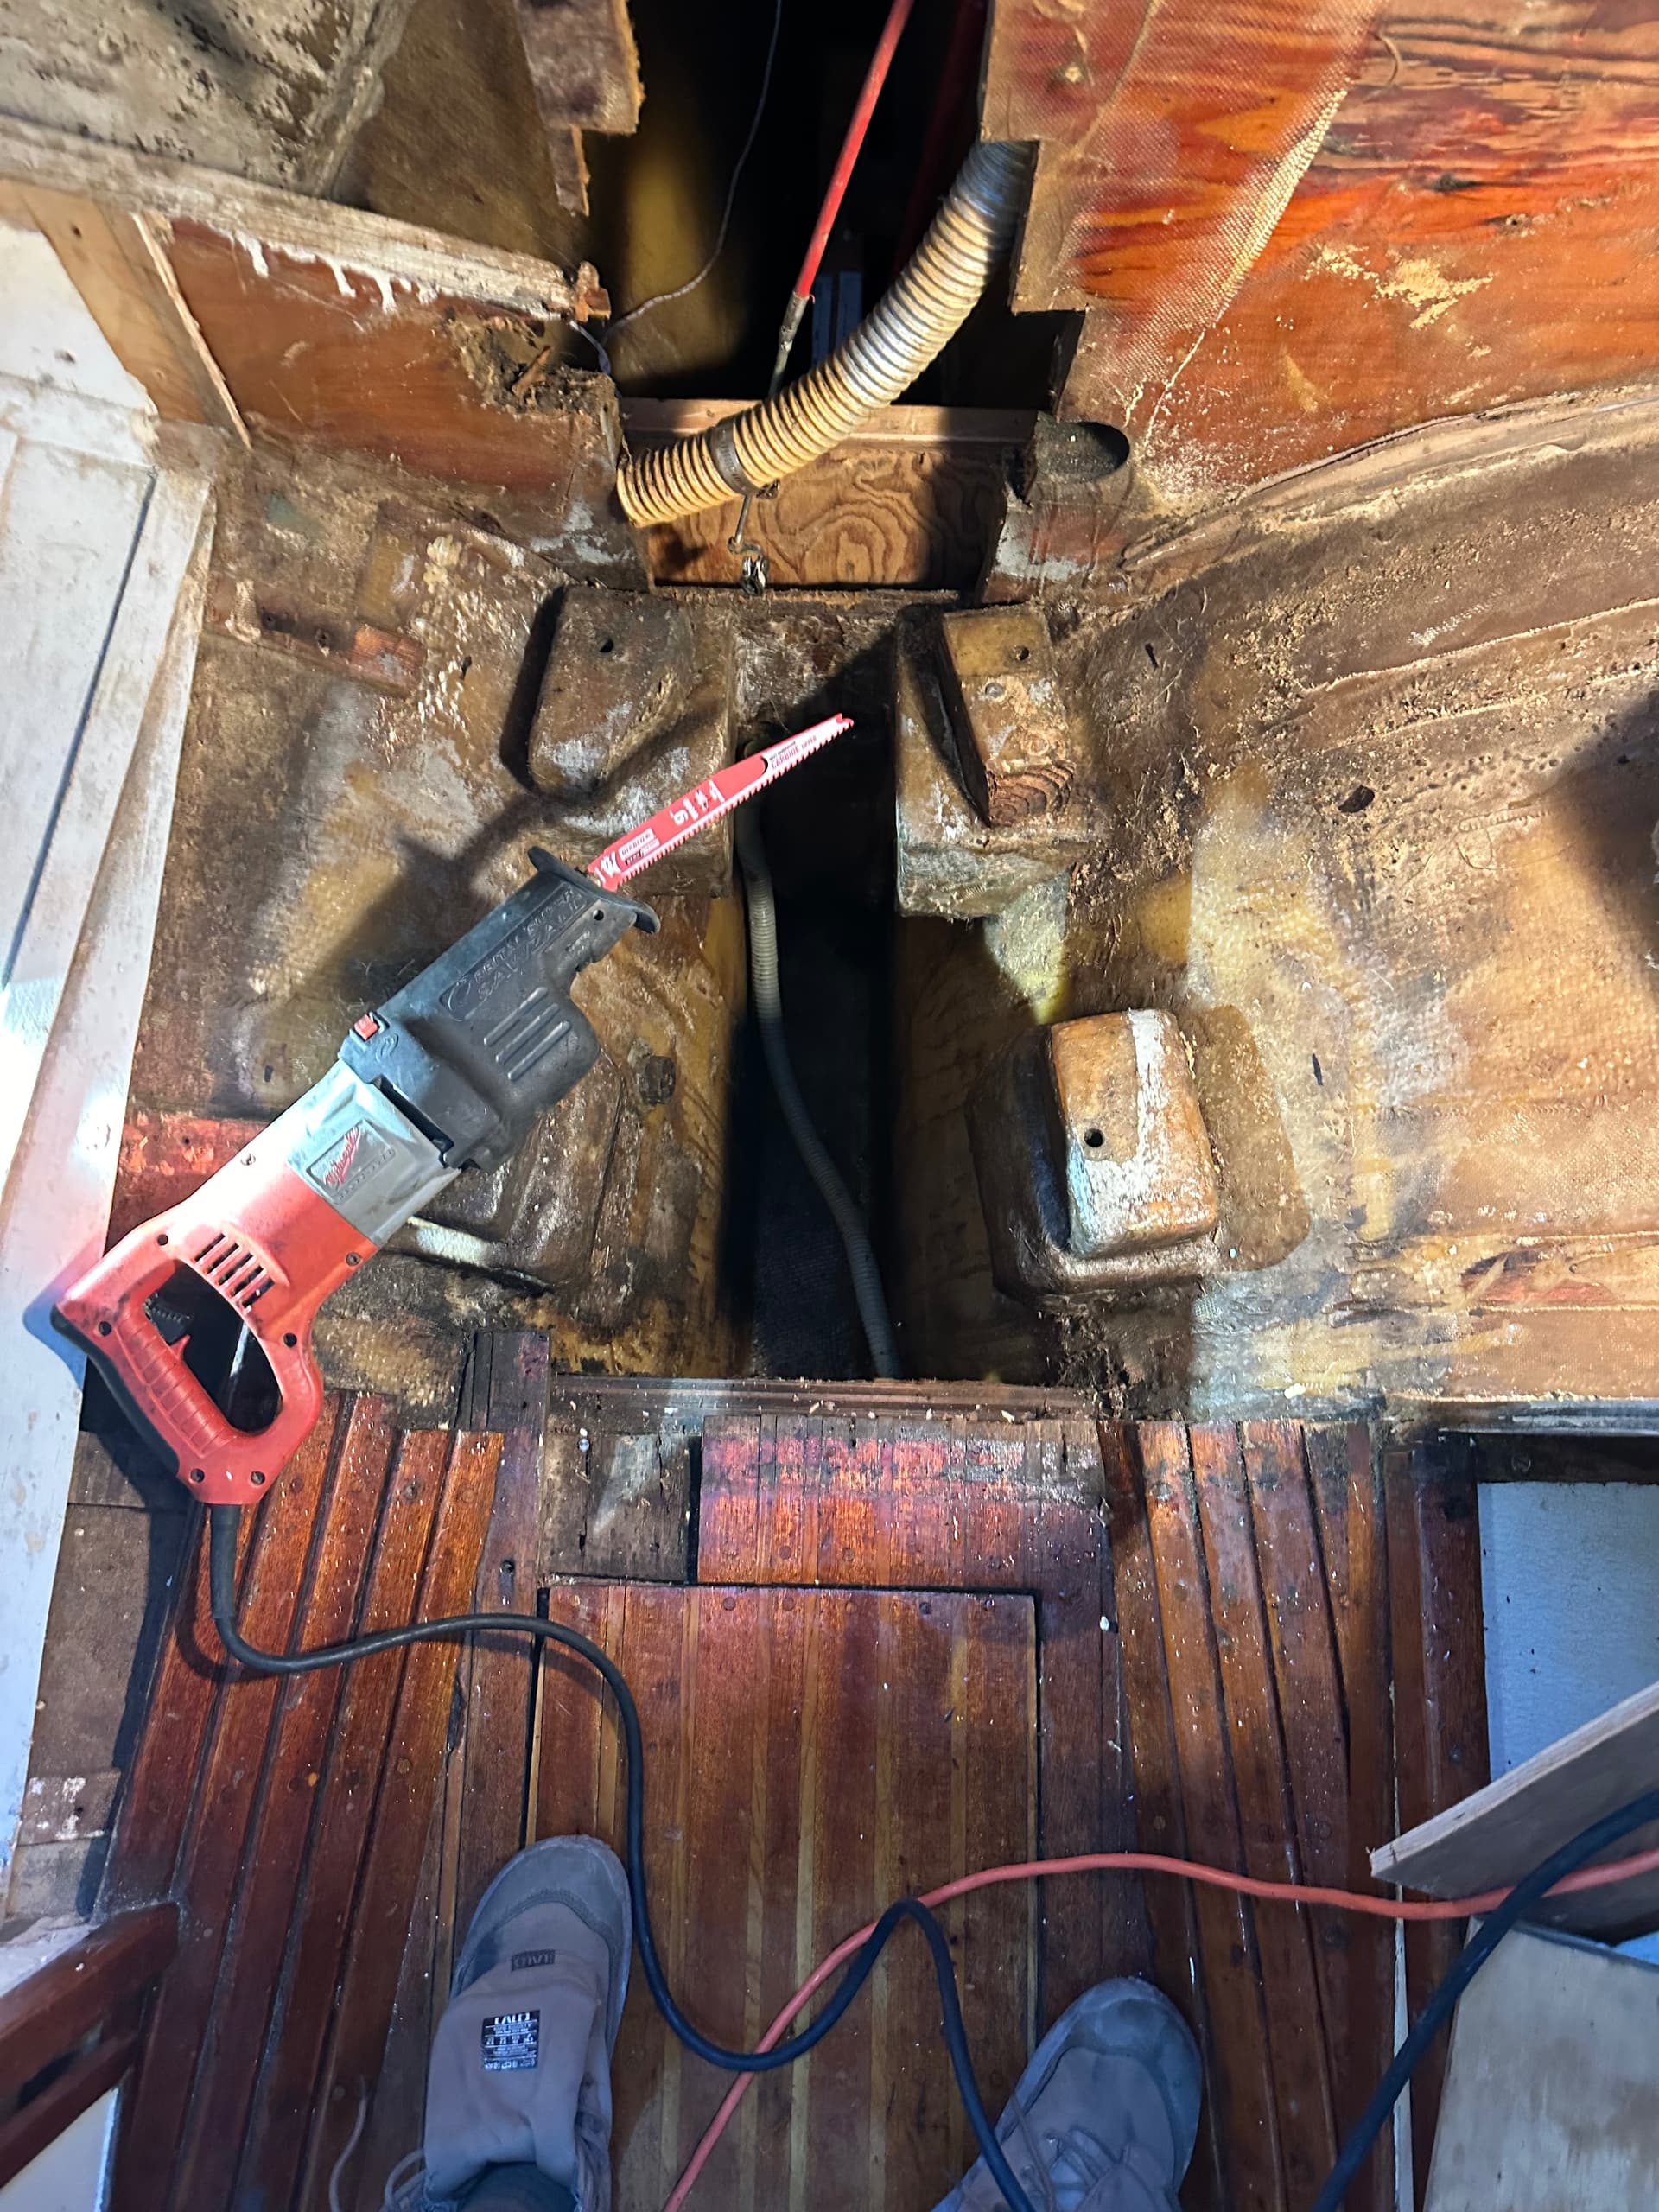
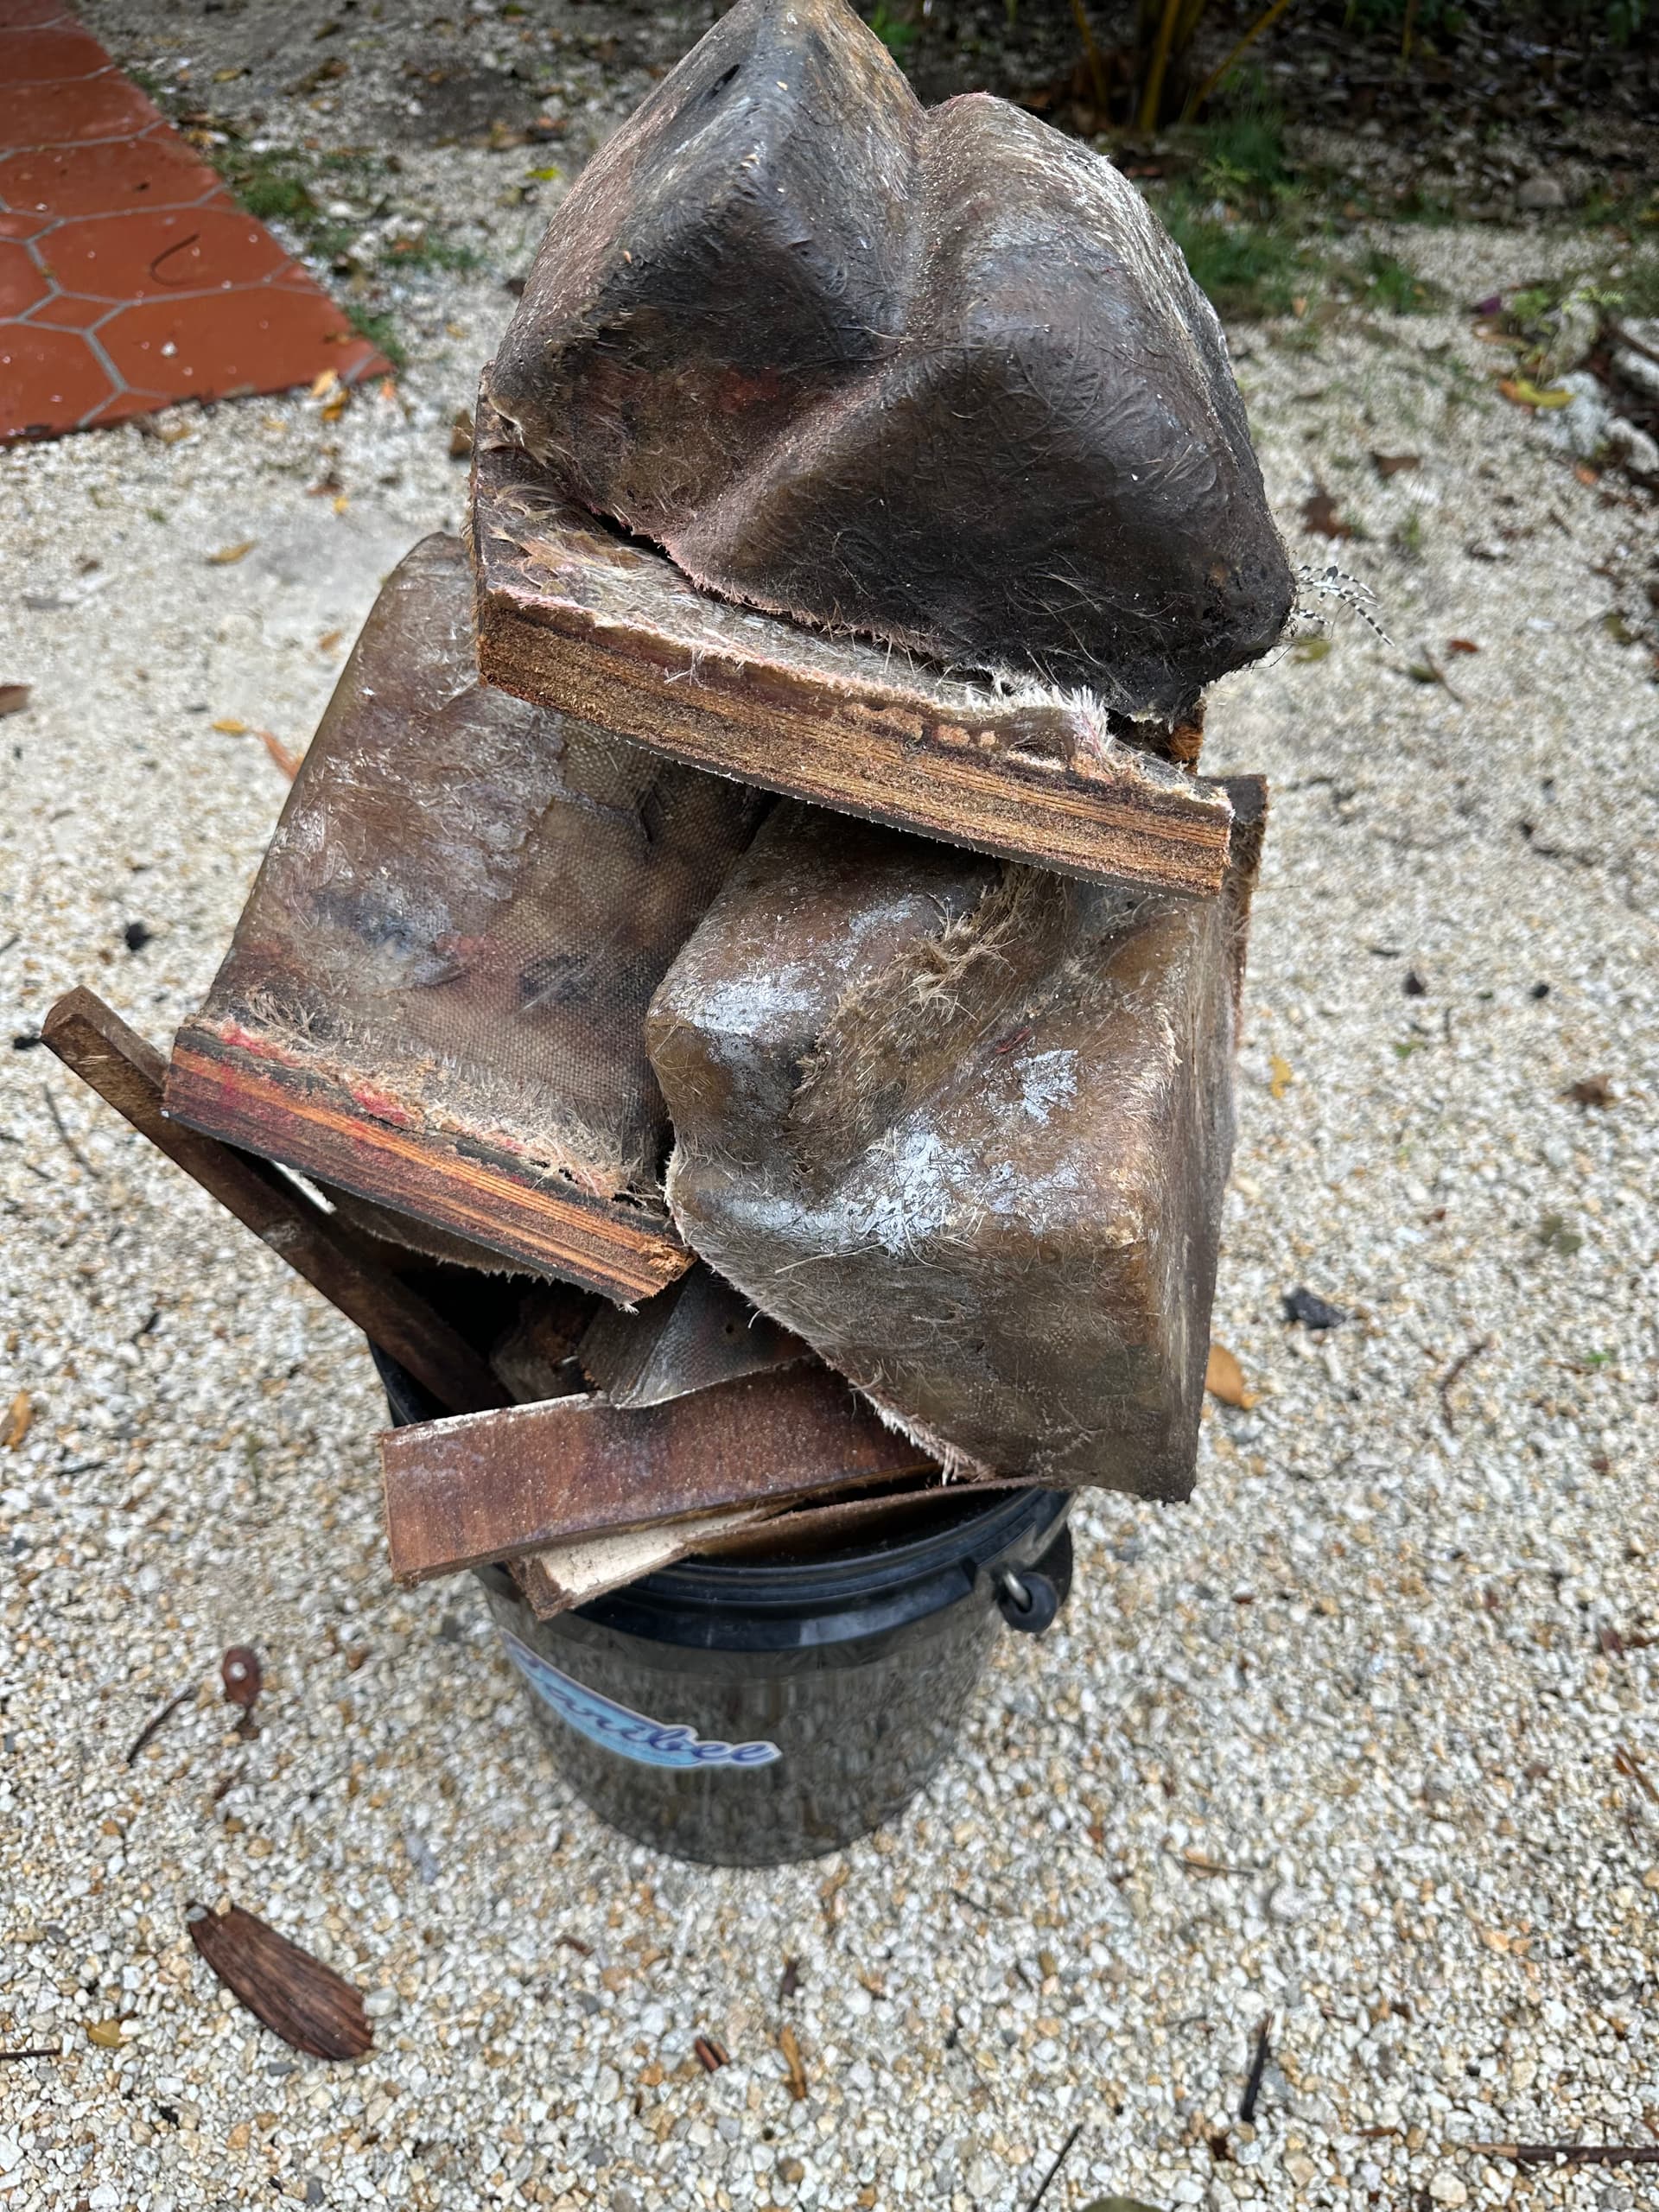
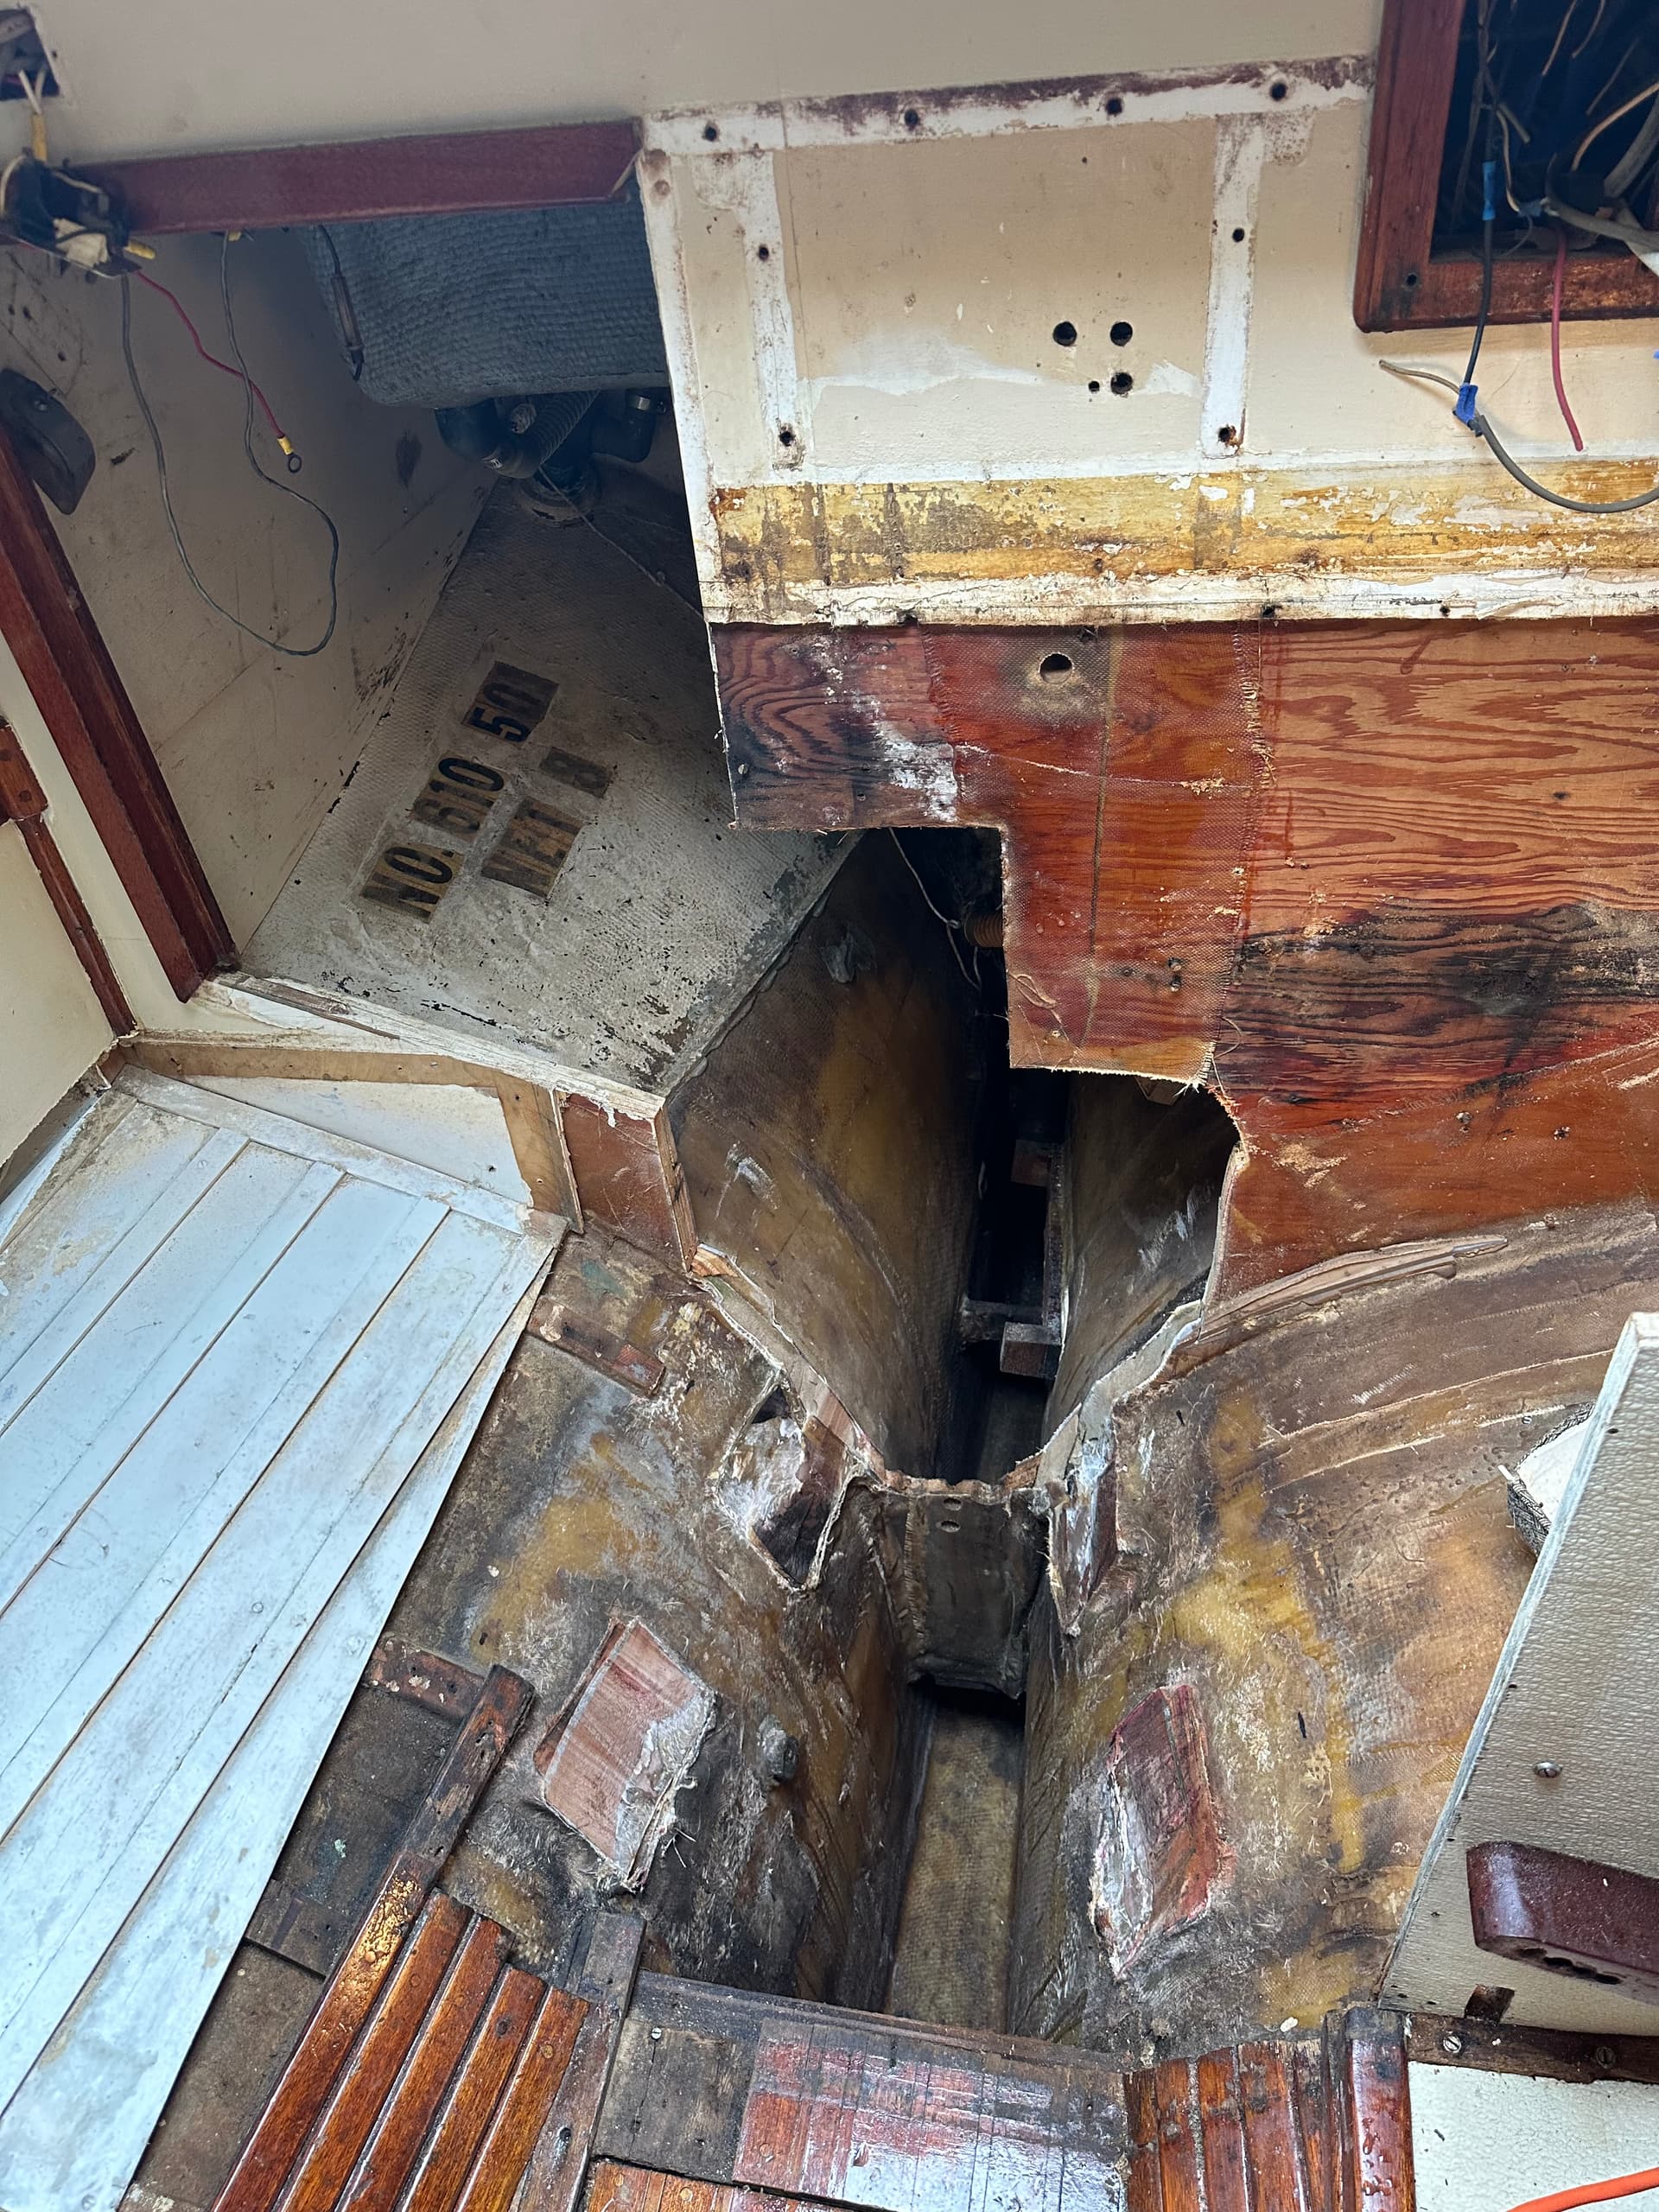
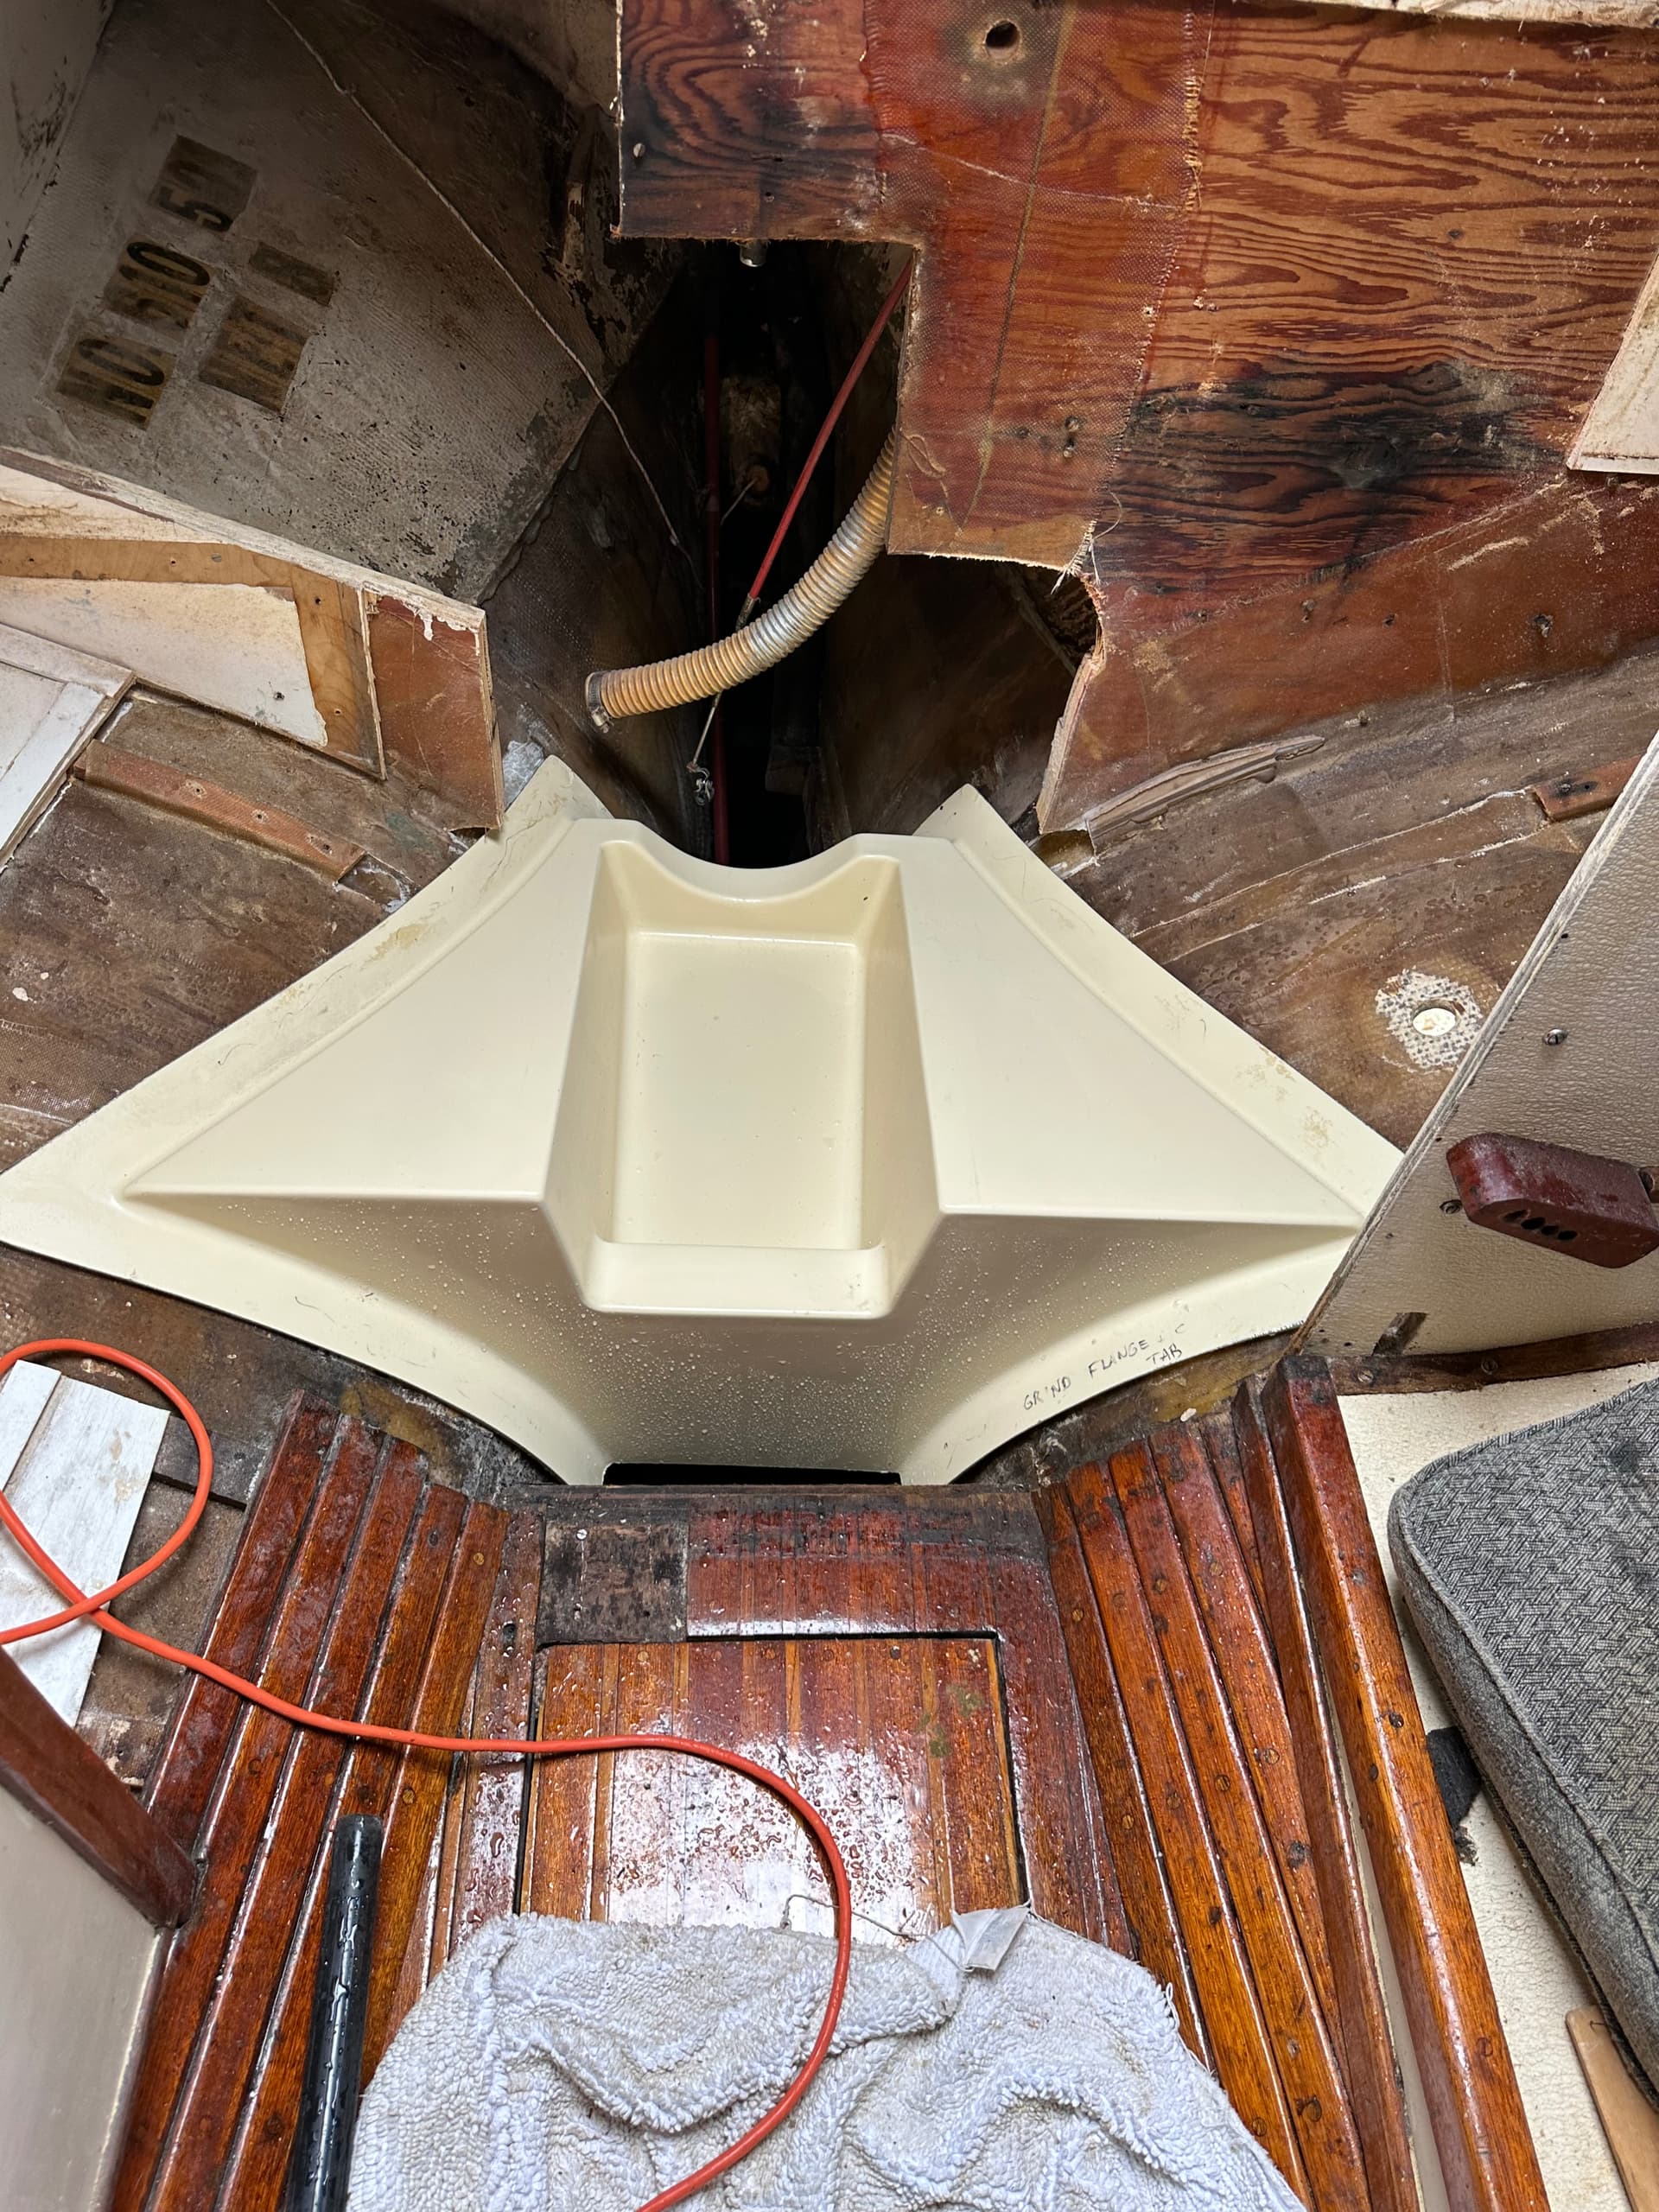
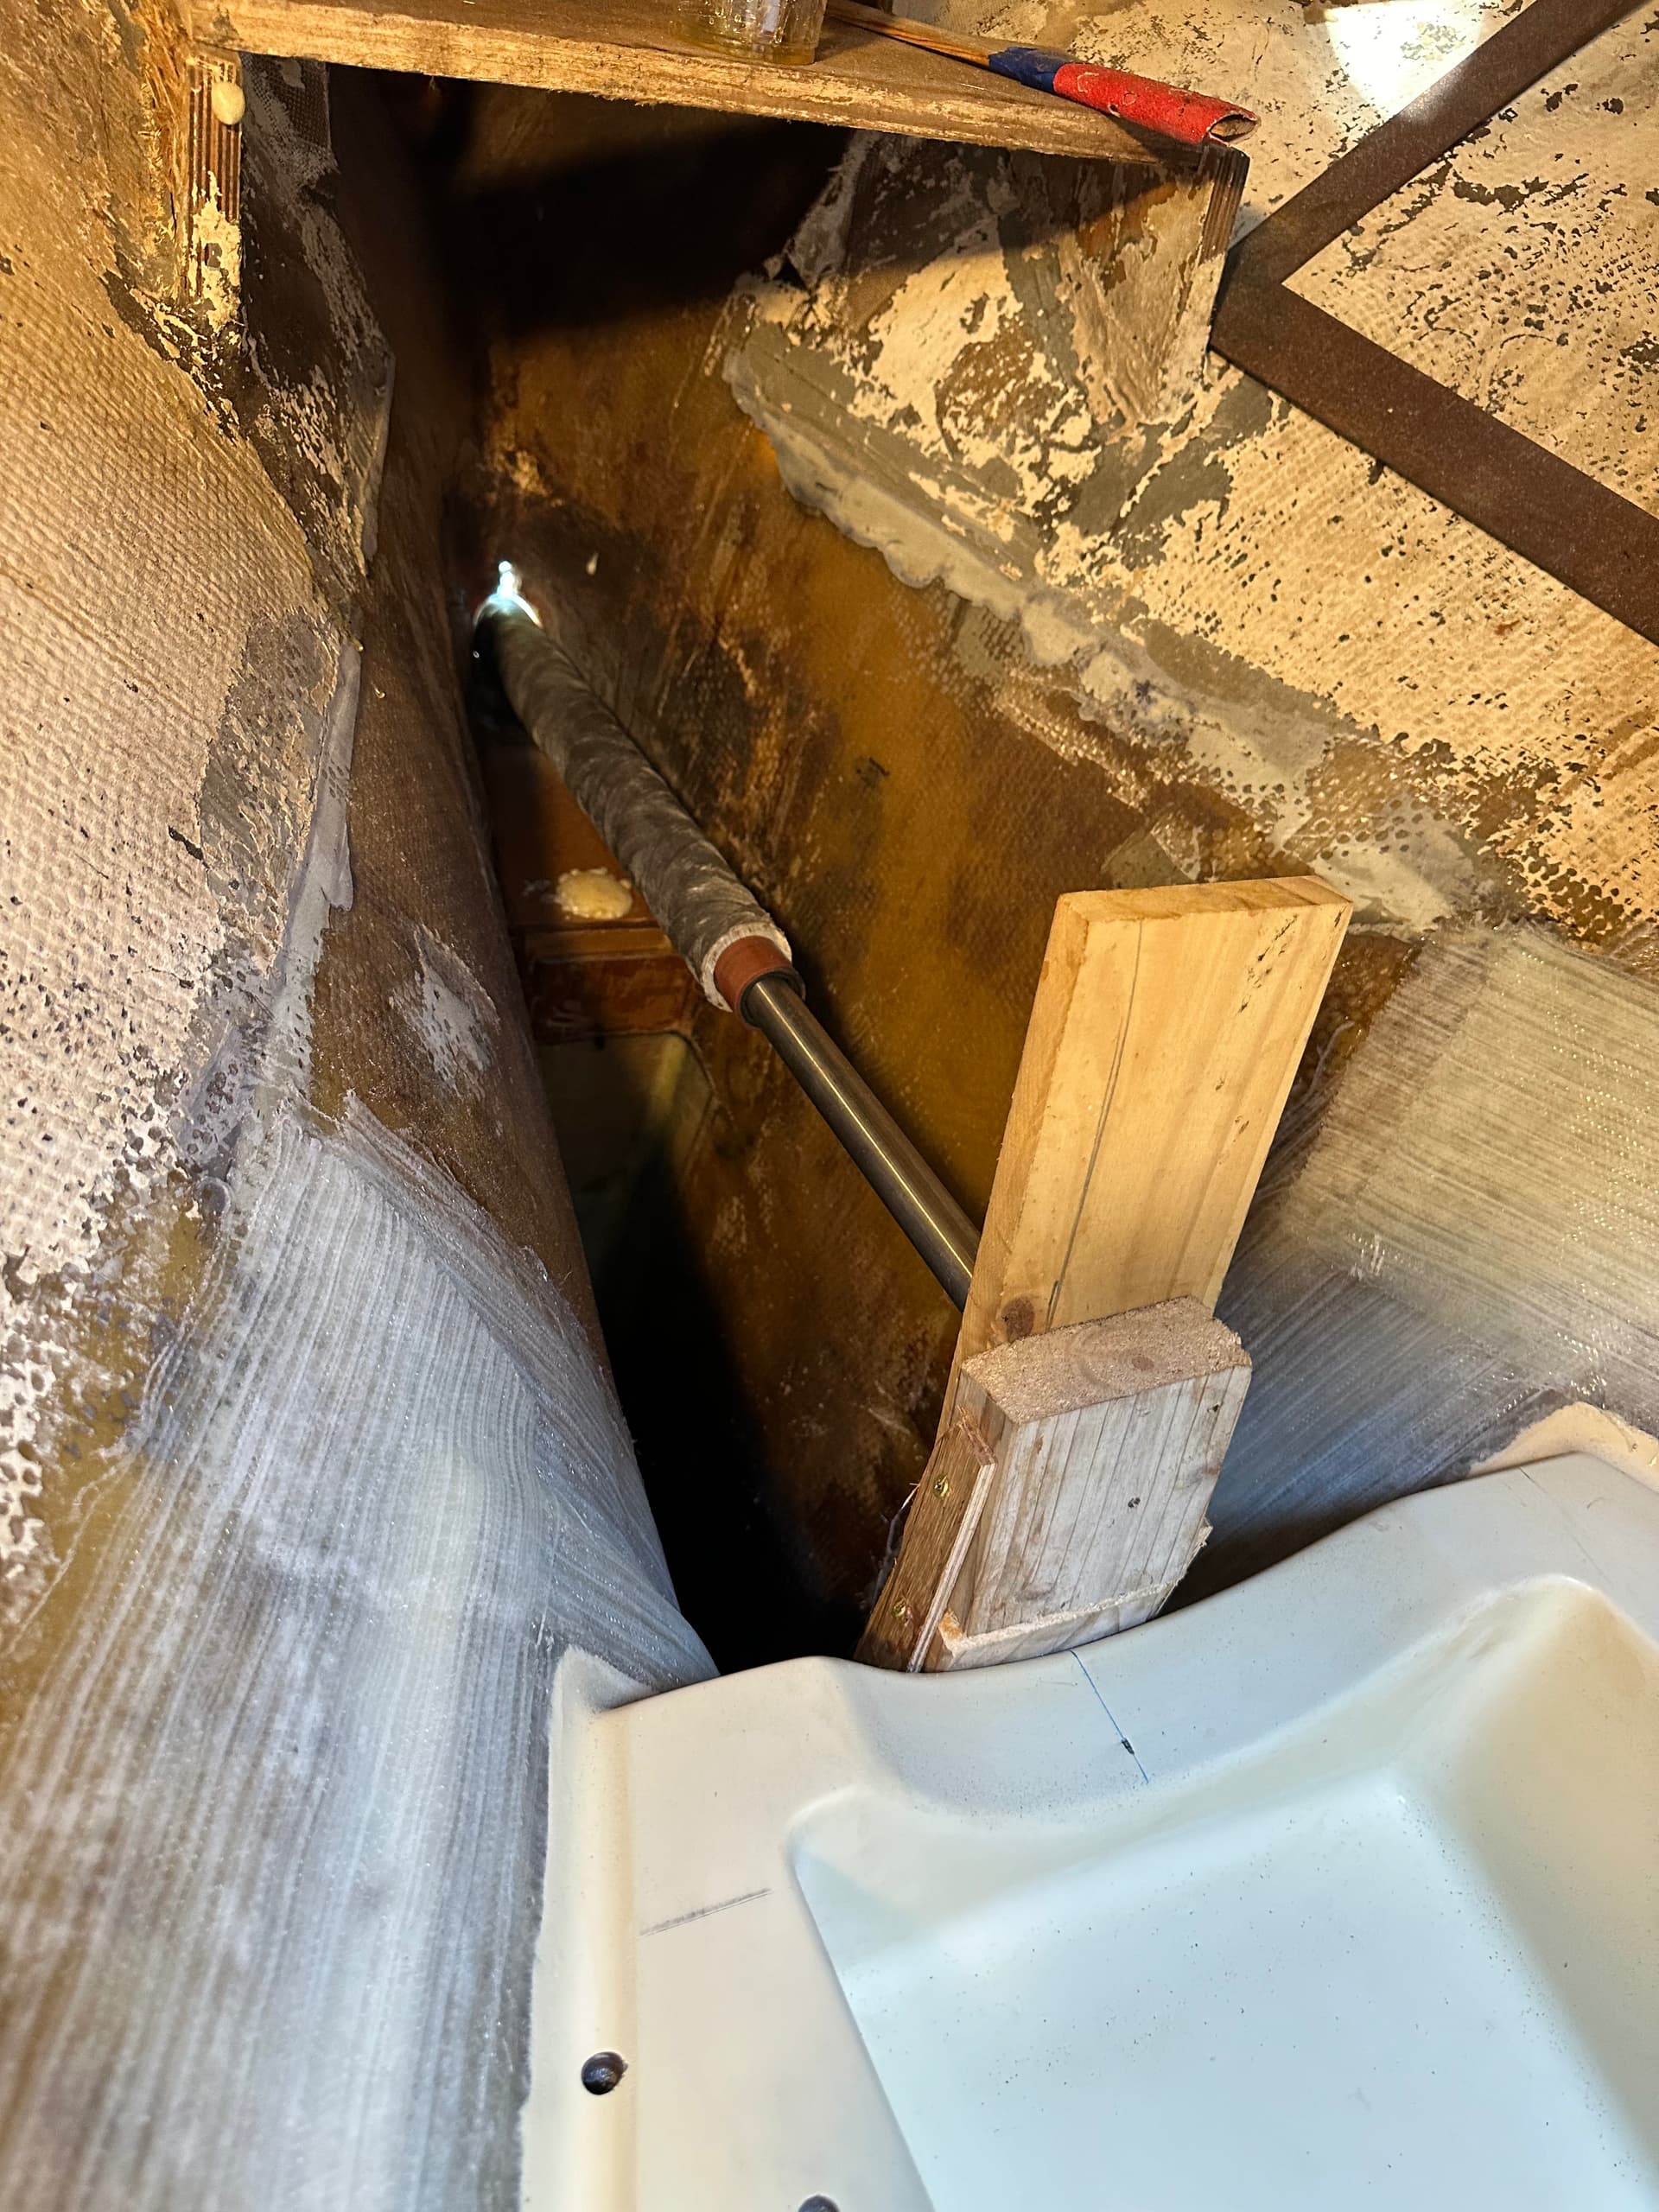
After the motor was out, I started cleaning the bilge, I bumped into the raw water thru hull and it broke off, completely corroded thru. After using some of my old Navy damage control skills, the emergency was over. I decided that an in water restoration was not going to work. Plan B - get her into the front yard…
How do you install a new stern tube and a new engine pan and a new engine and have everything line uo perfectly? Very carefully!
First I went to set the engine on the pan to see where the transmission center would sit. Hmmm, there was not enough clearance for the motor to sit on the pan. Turns out Todd puts the Beta 25 in his builds, the 30 was just a little to big for the pan. I need to raise the motor up 1 1/4" for it to clear.
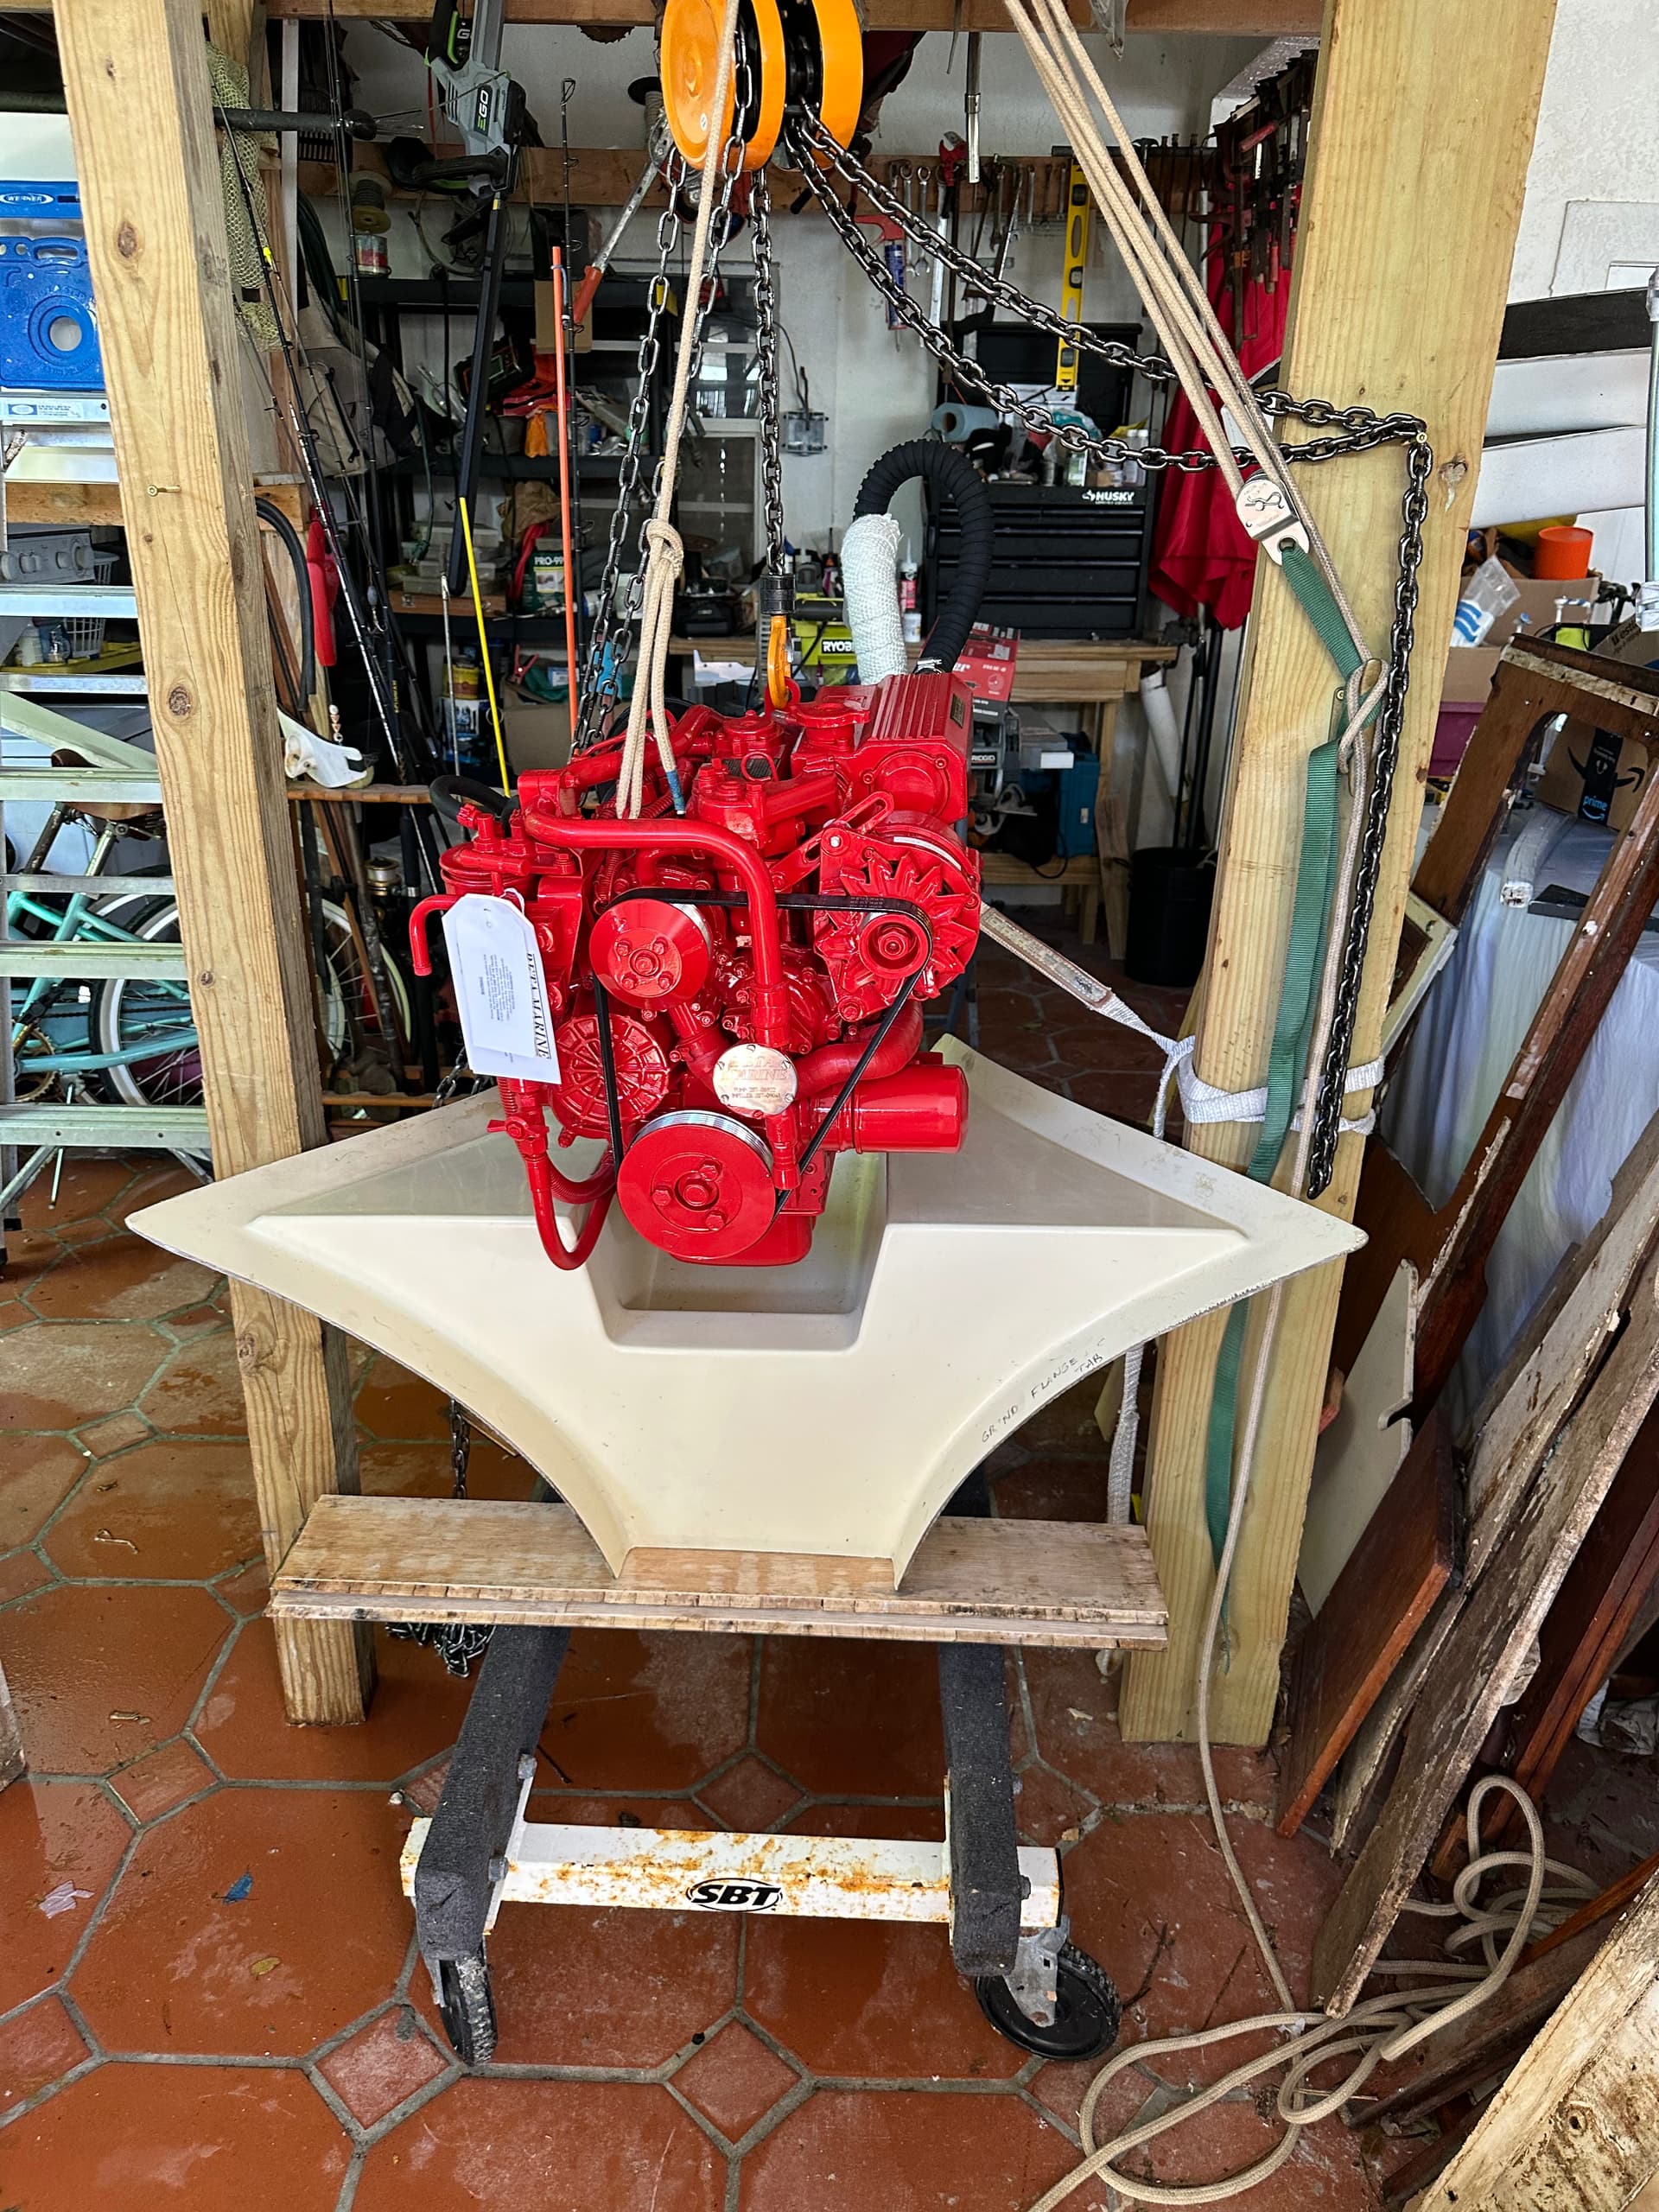
With the motor now sitting on the pan on its new 1 1/4" aluminum spacers, I had a rough idea where the transmission center was. Now I moved the pan into the boat to see how things would line up.
Now that I had the motor bolted to the pan, I knew extactly where the transmission would be. Wherever the pan ended up in the boat, I would just have to line up that center point with the new tube. I decided to make the pan itself the jig for the engine transmission center. I bolted the engine to the pan, then fixed a piece of ply to the pan and marked the center of the transmission on the ply and drill a 1" hole there. I made sure the ply could not move by bolting it to the pan.
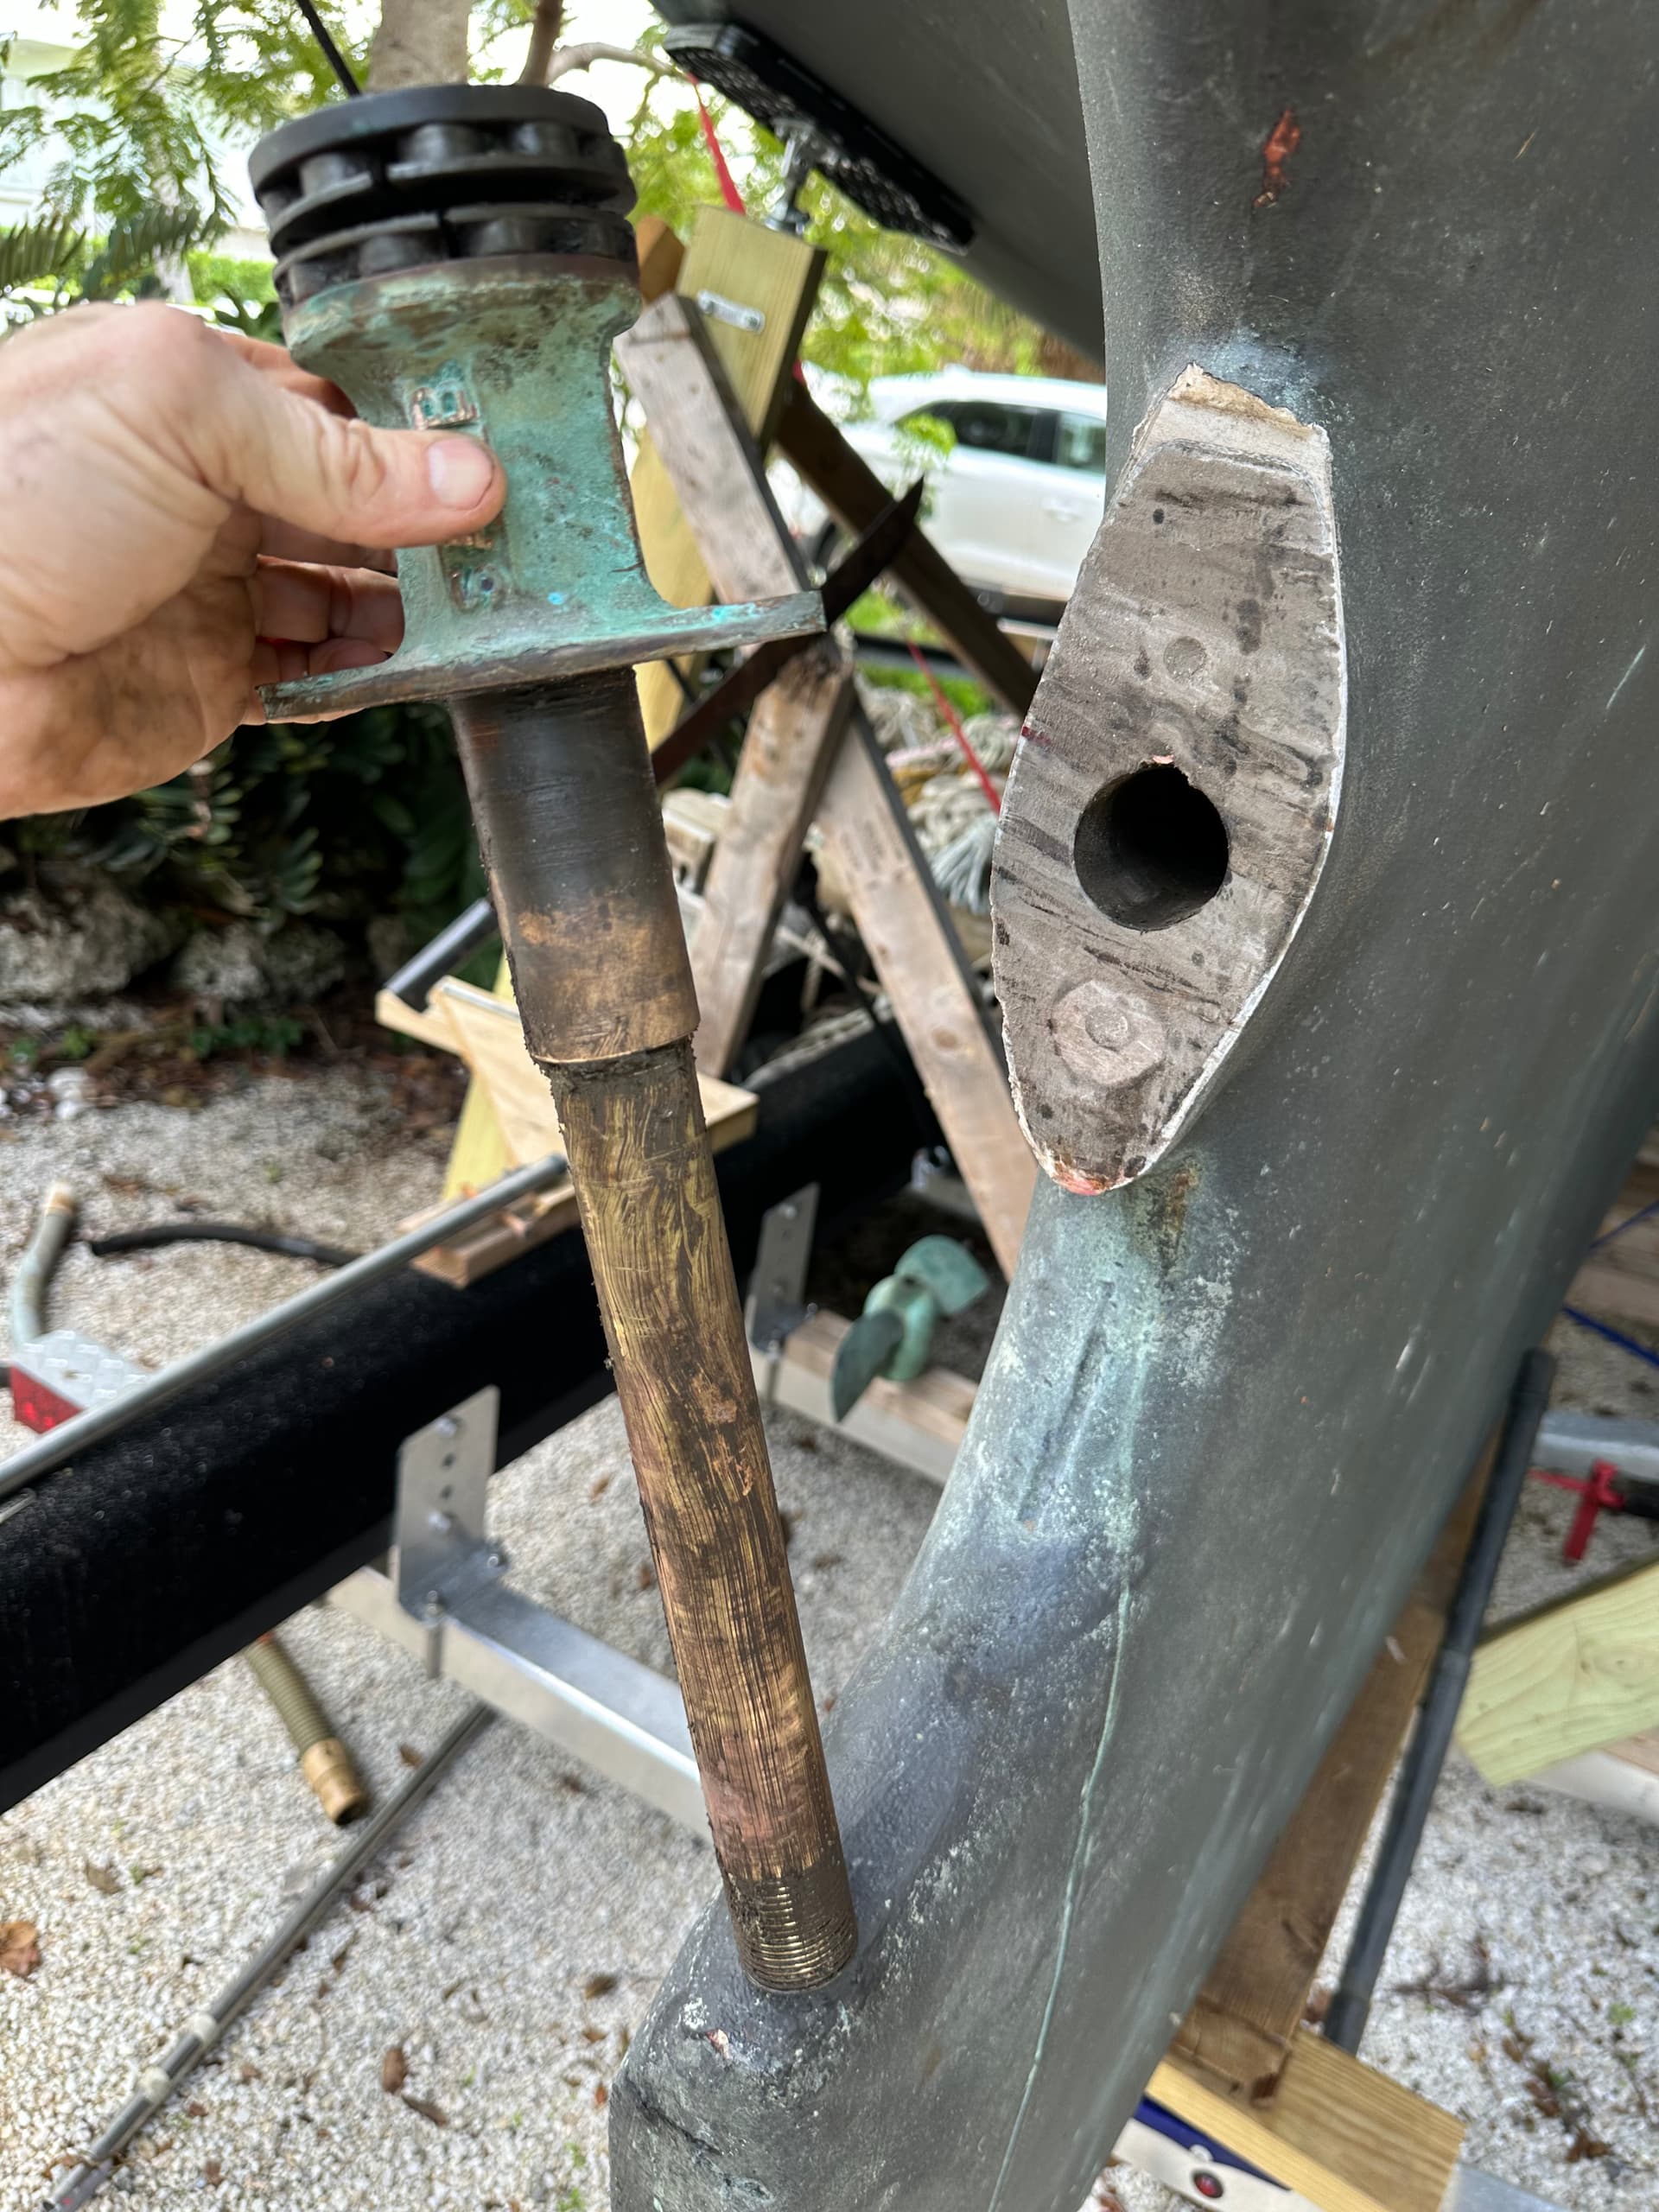
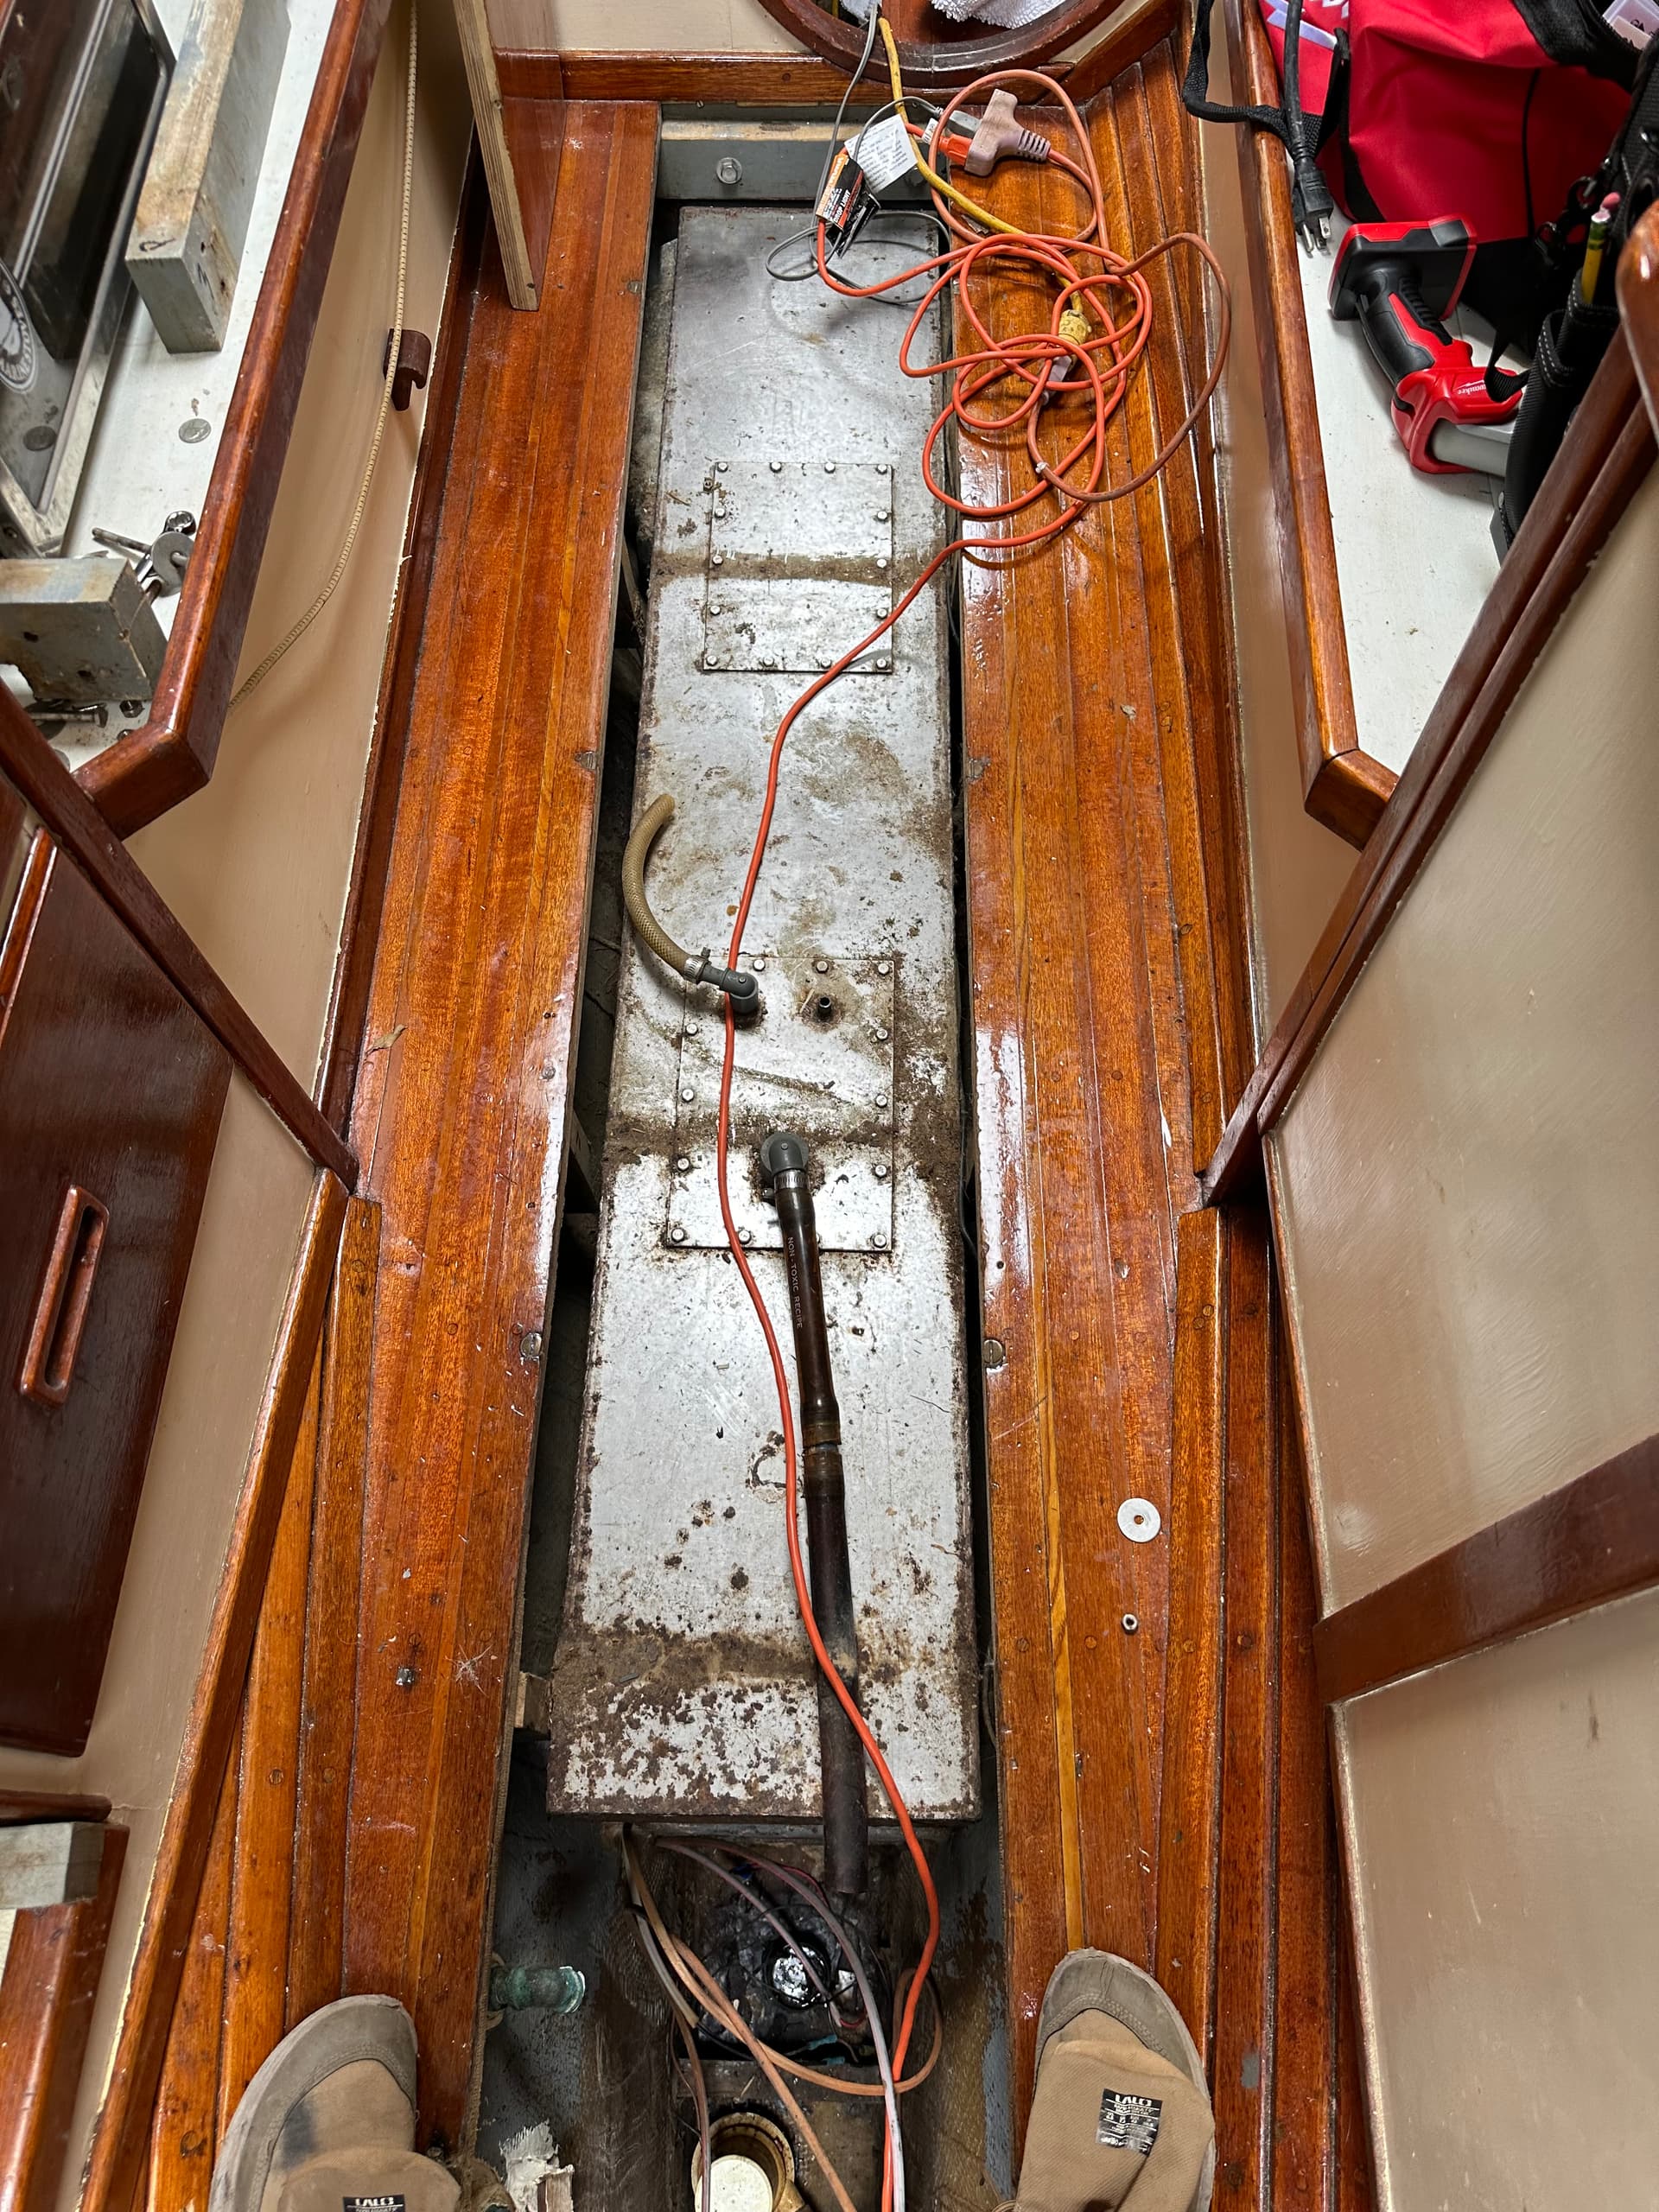
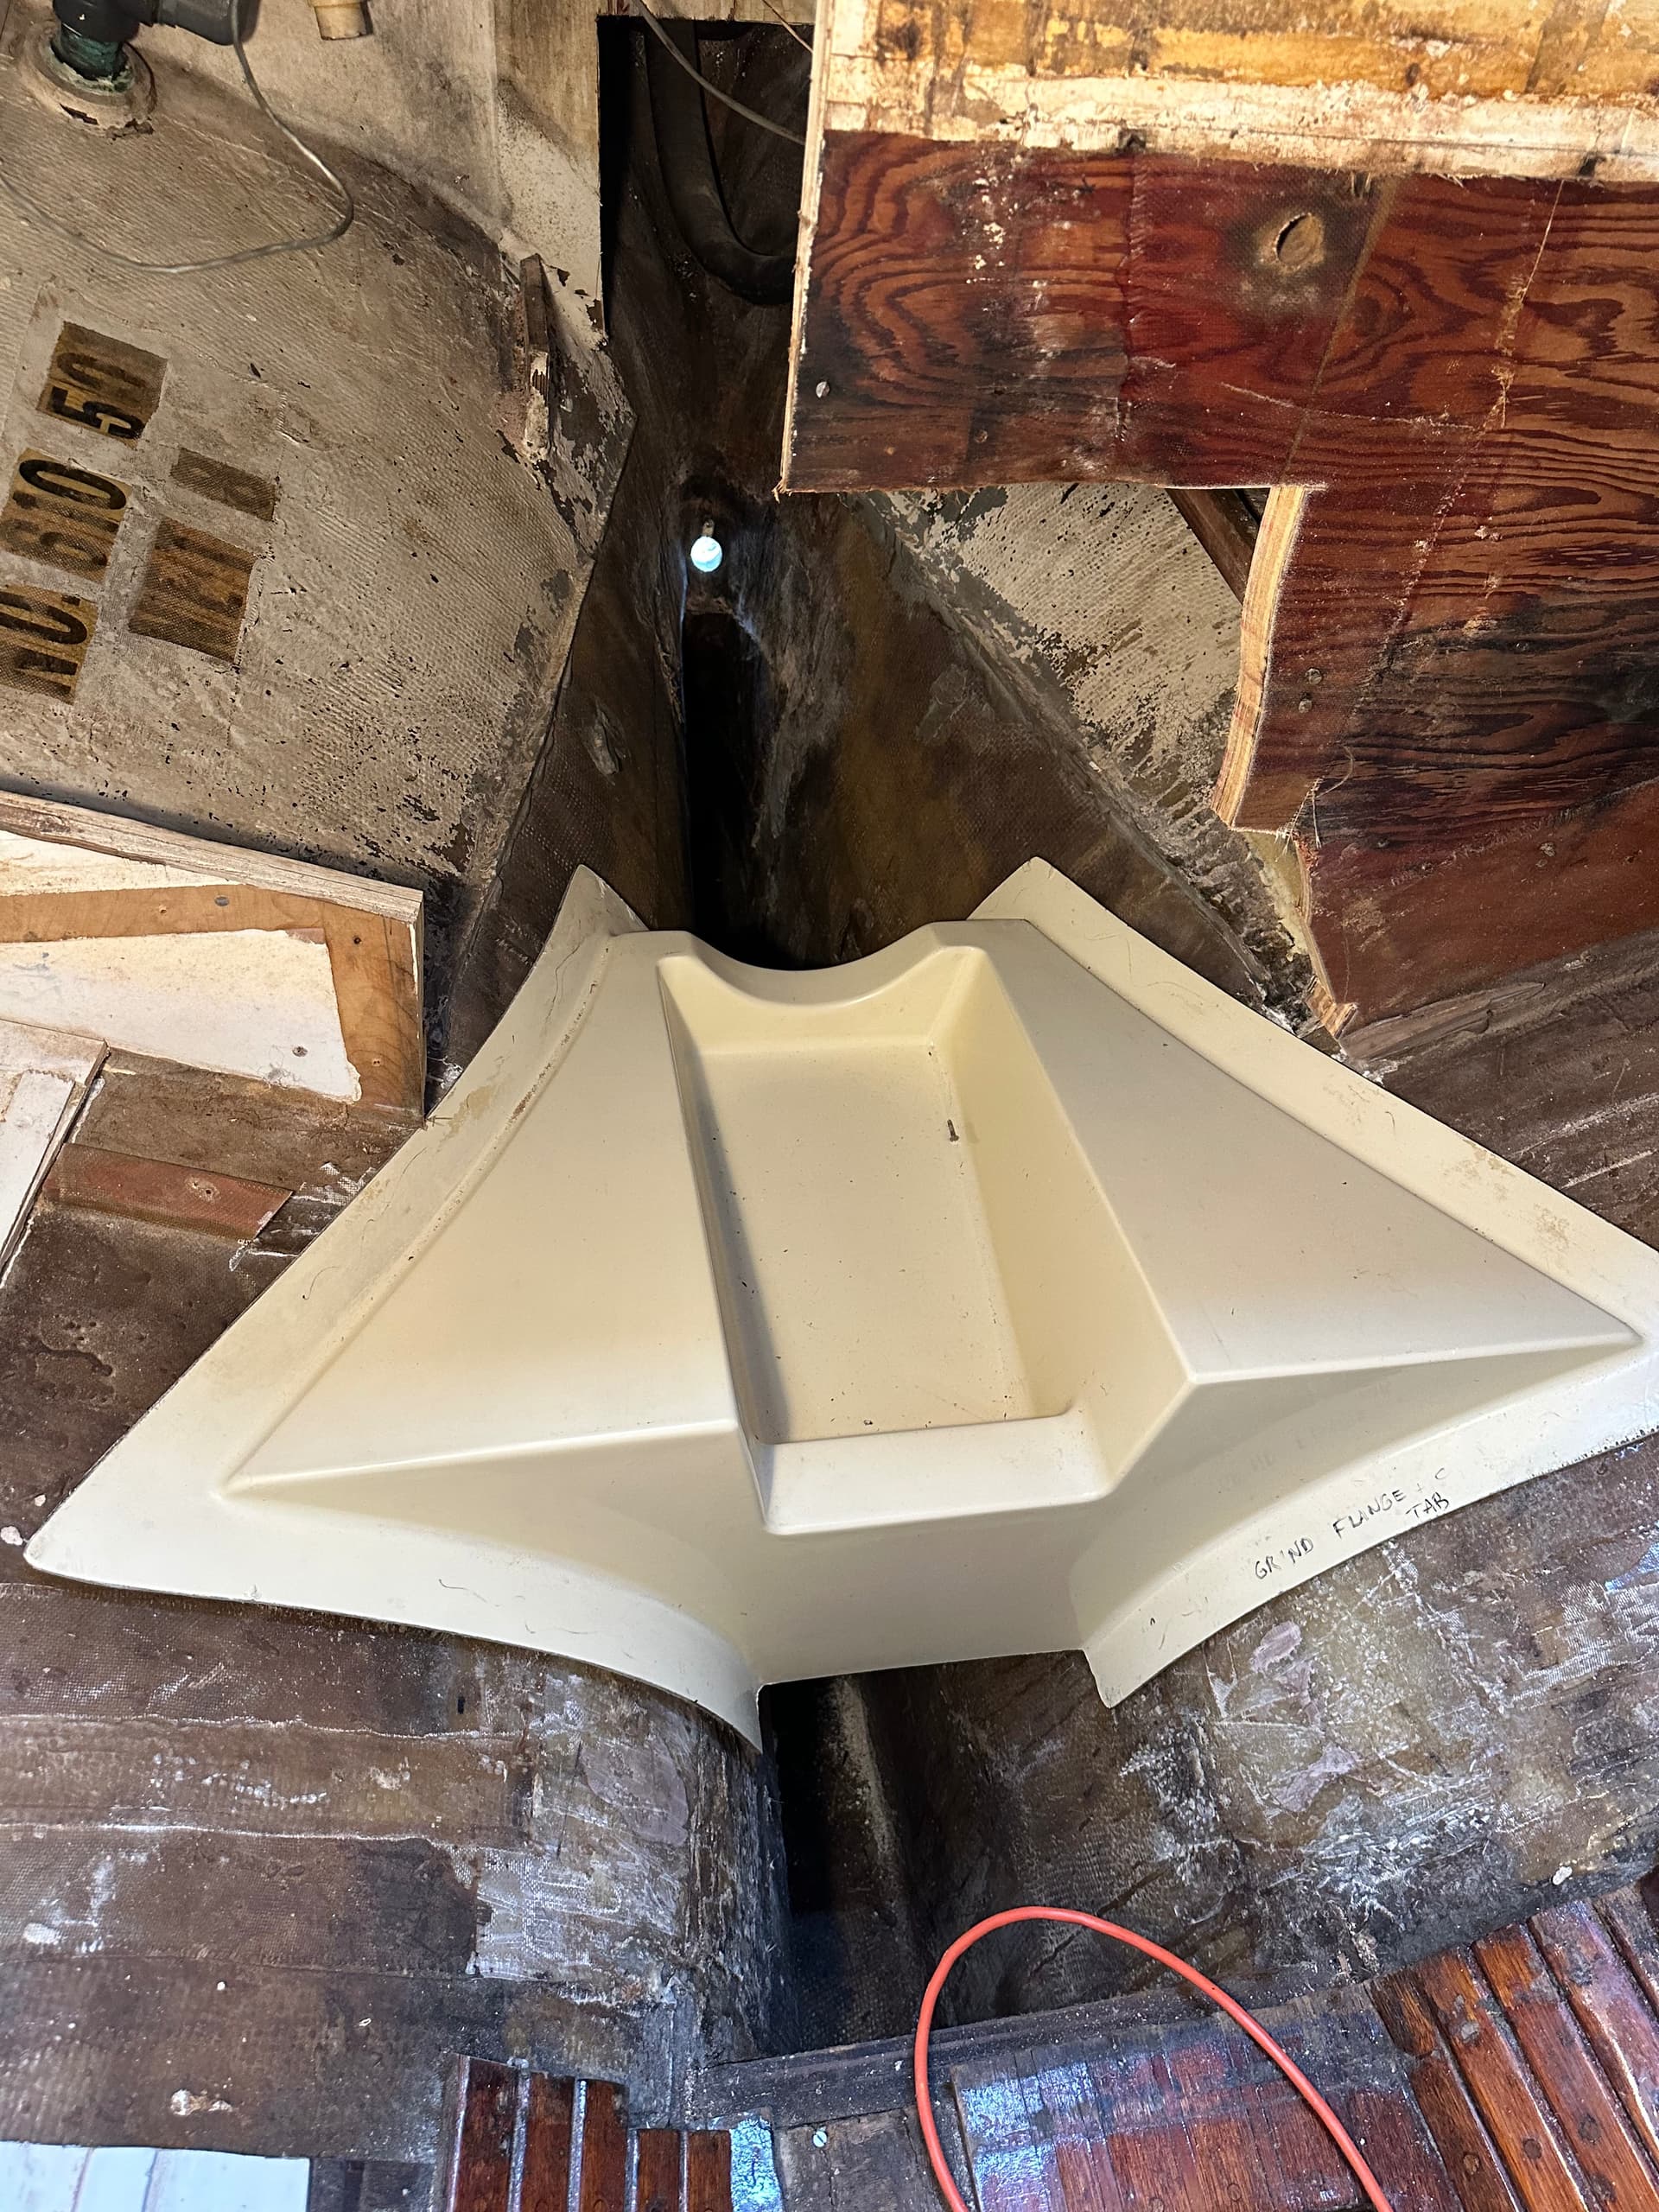
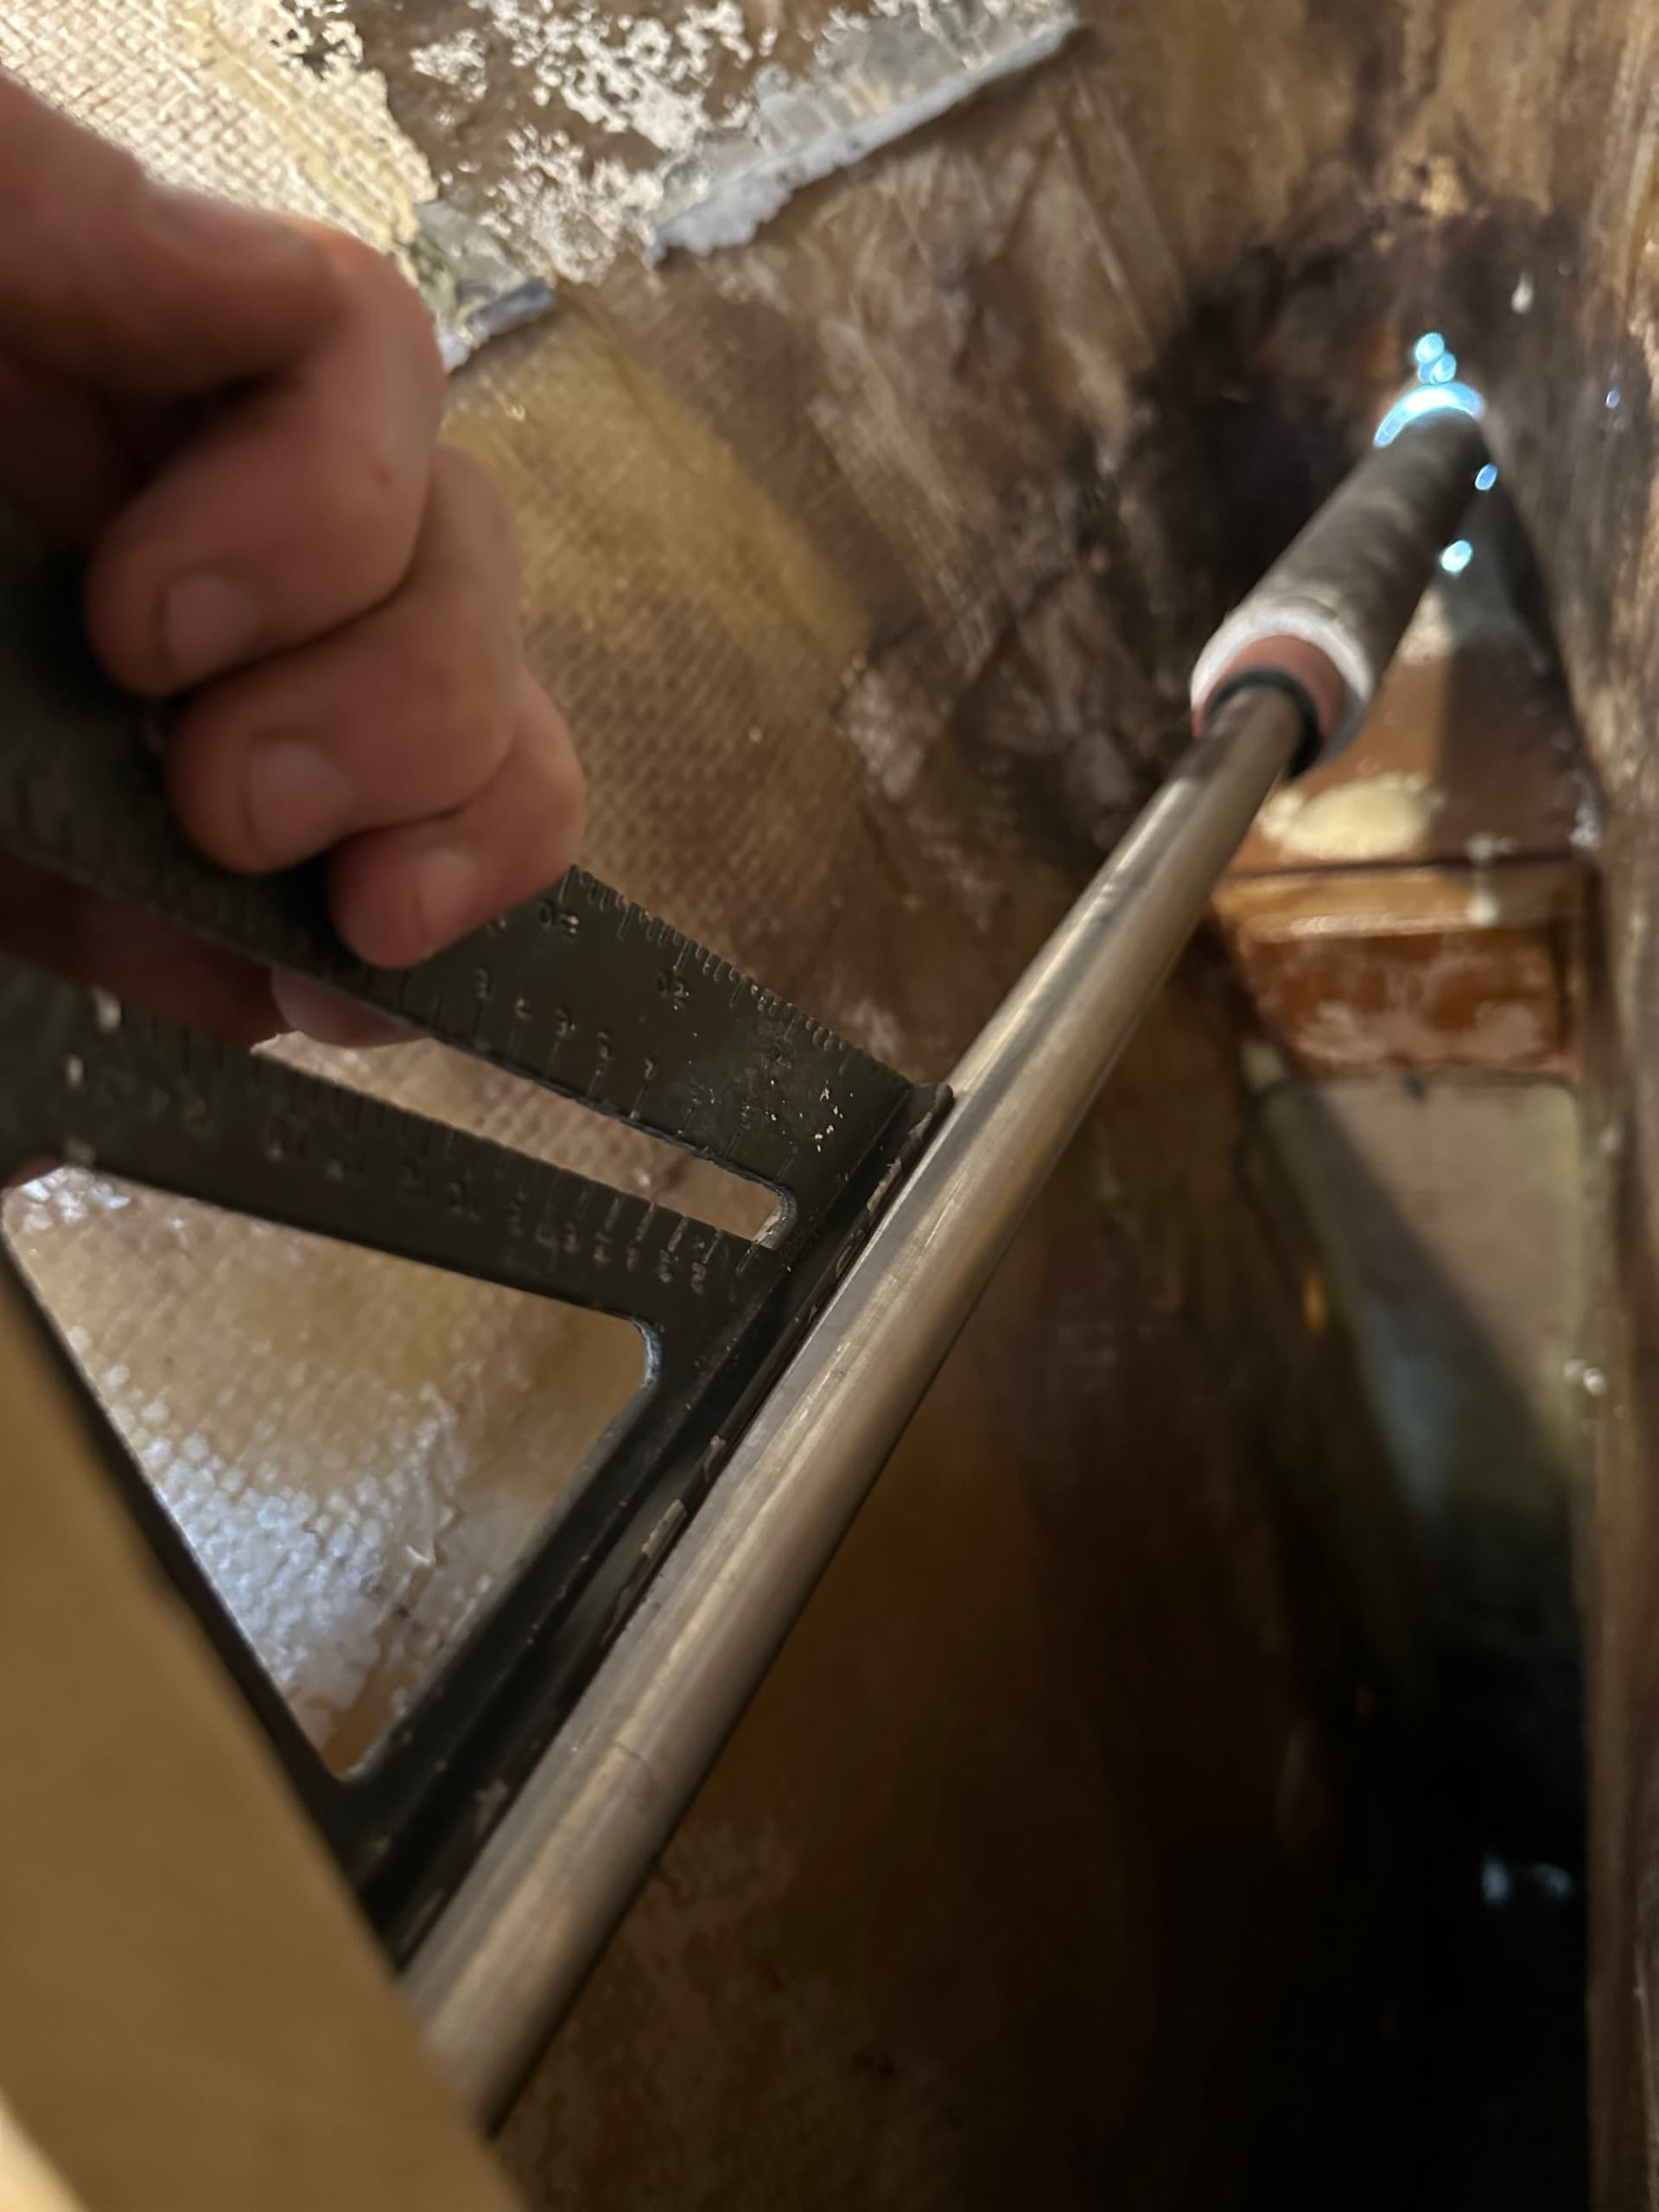
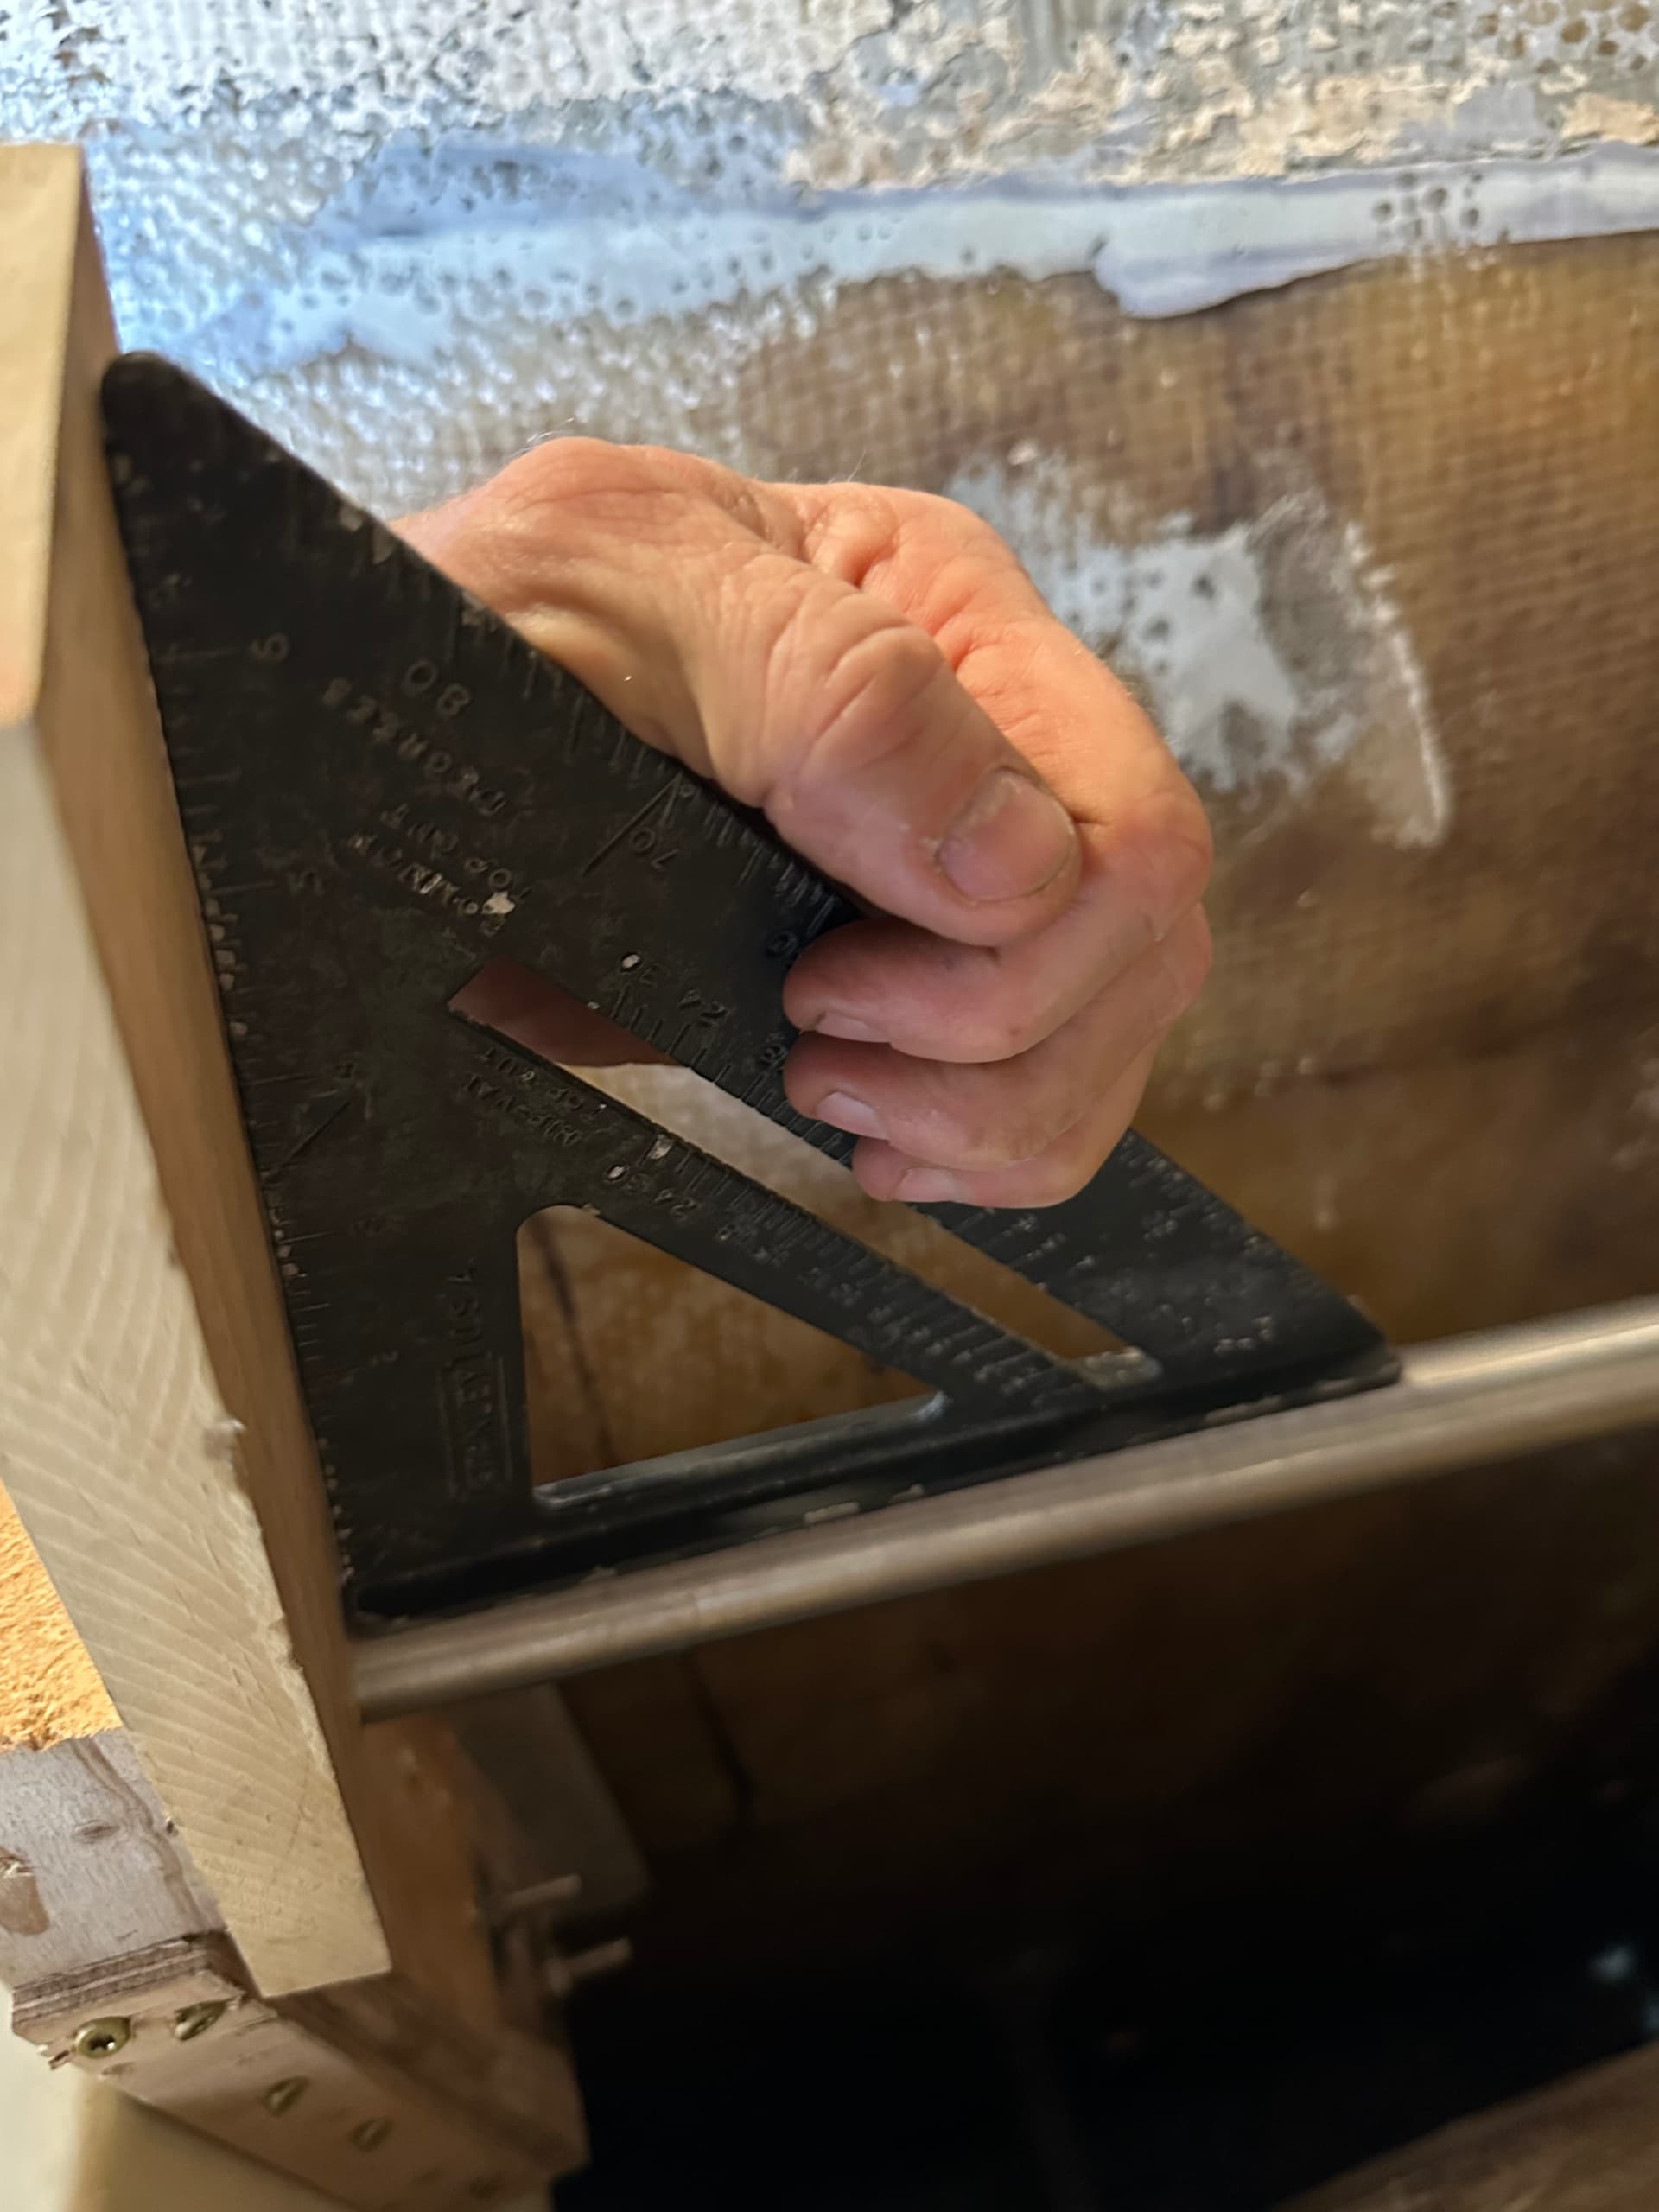
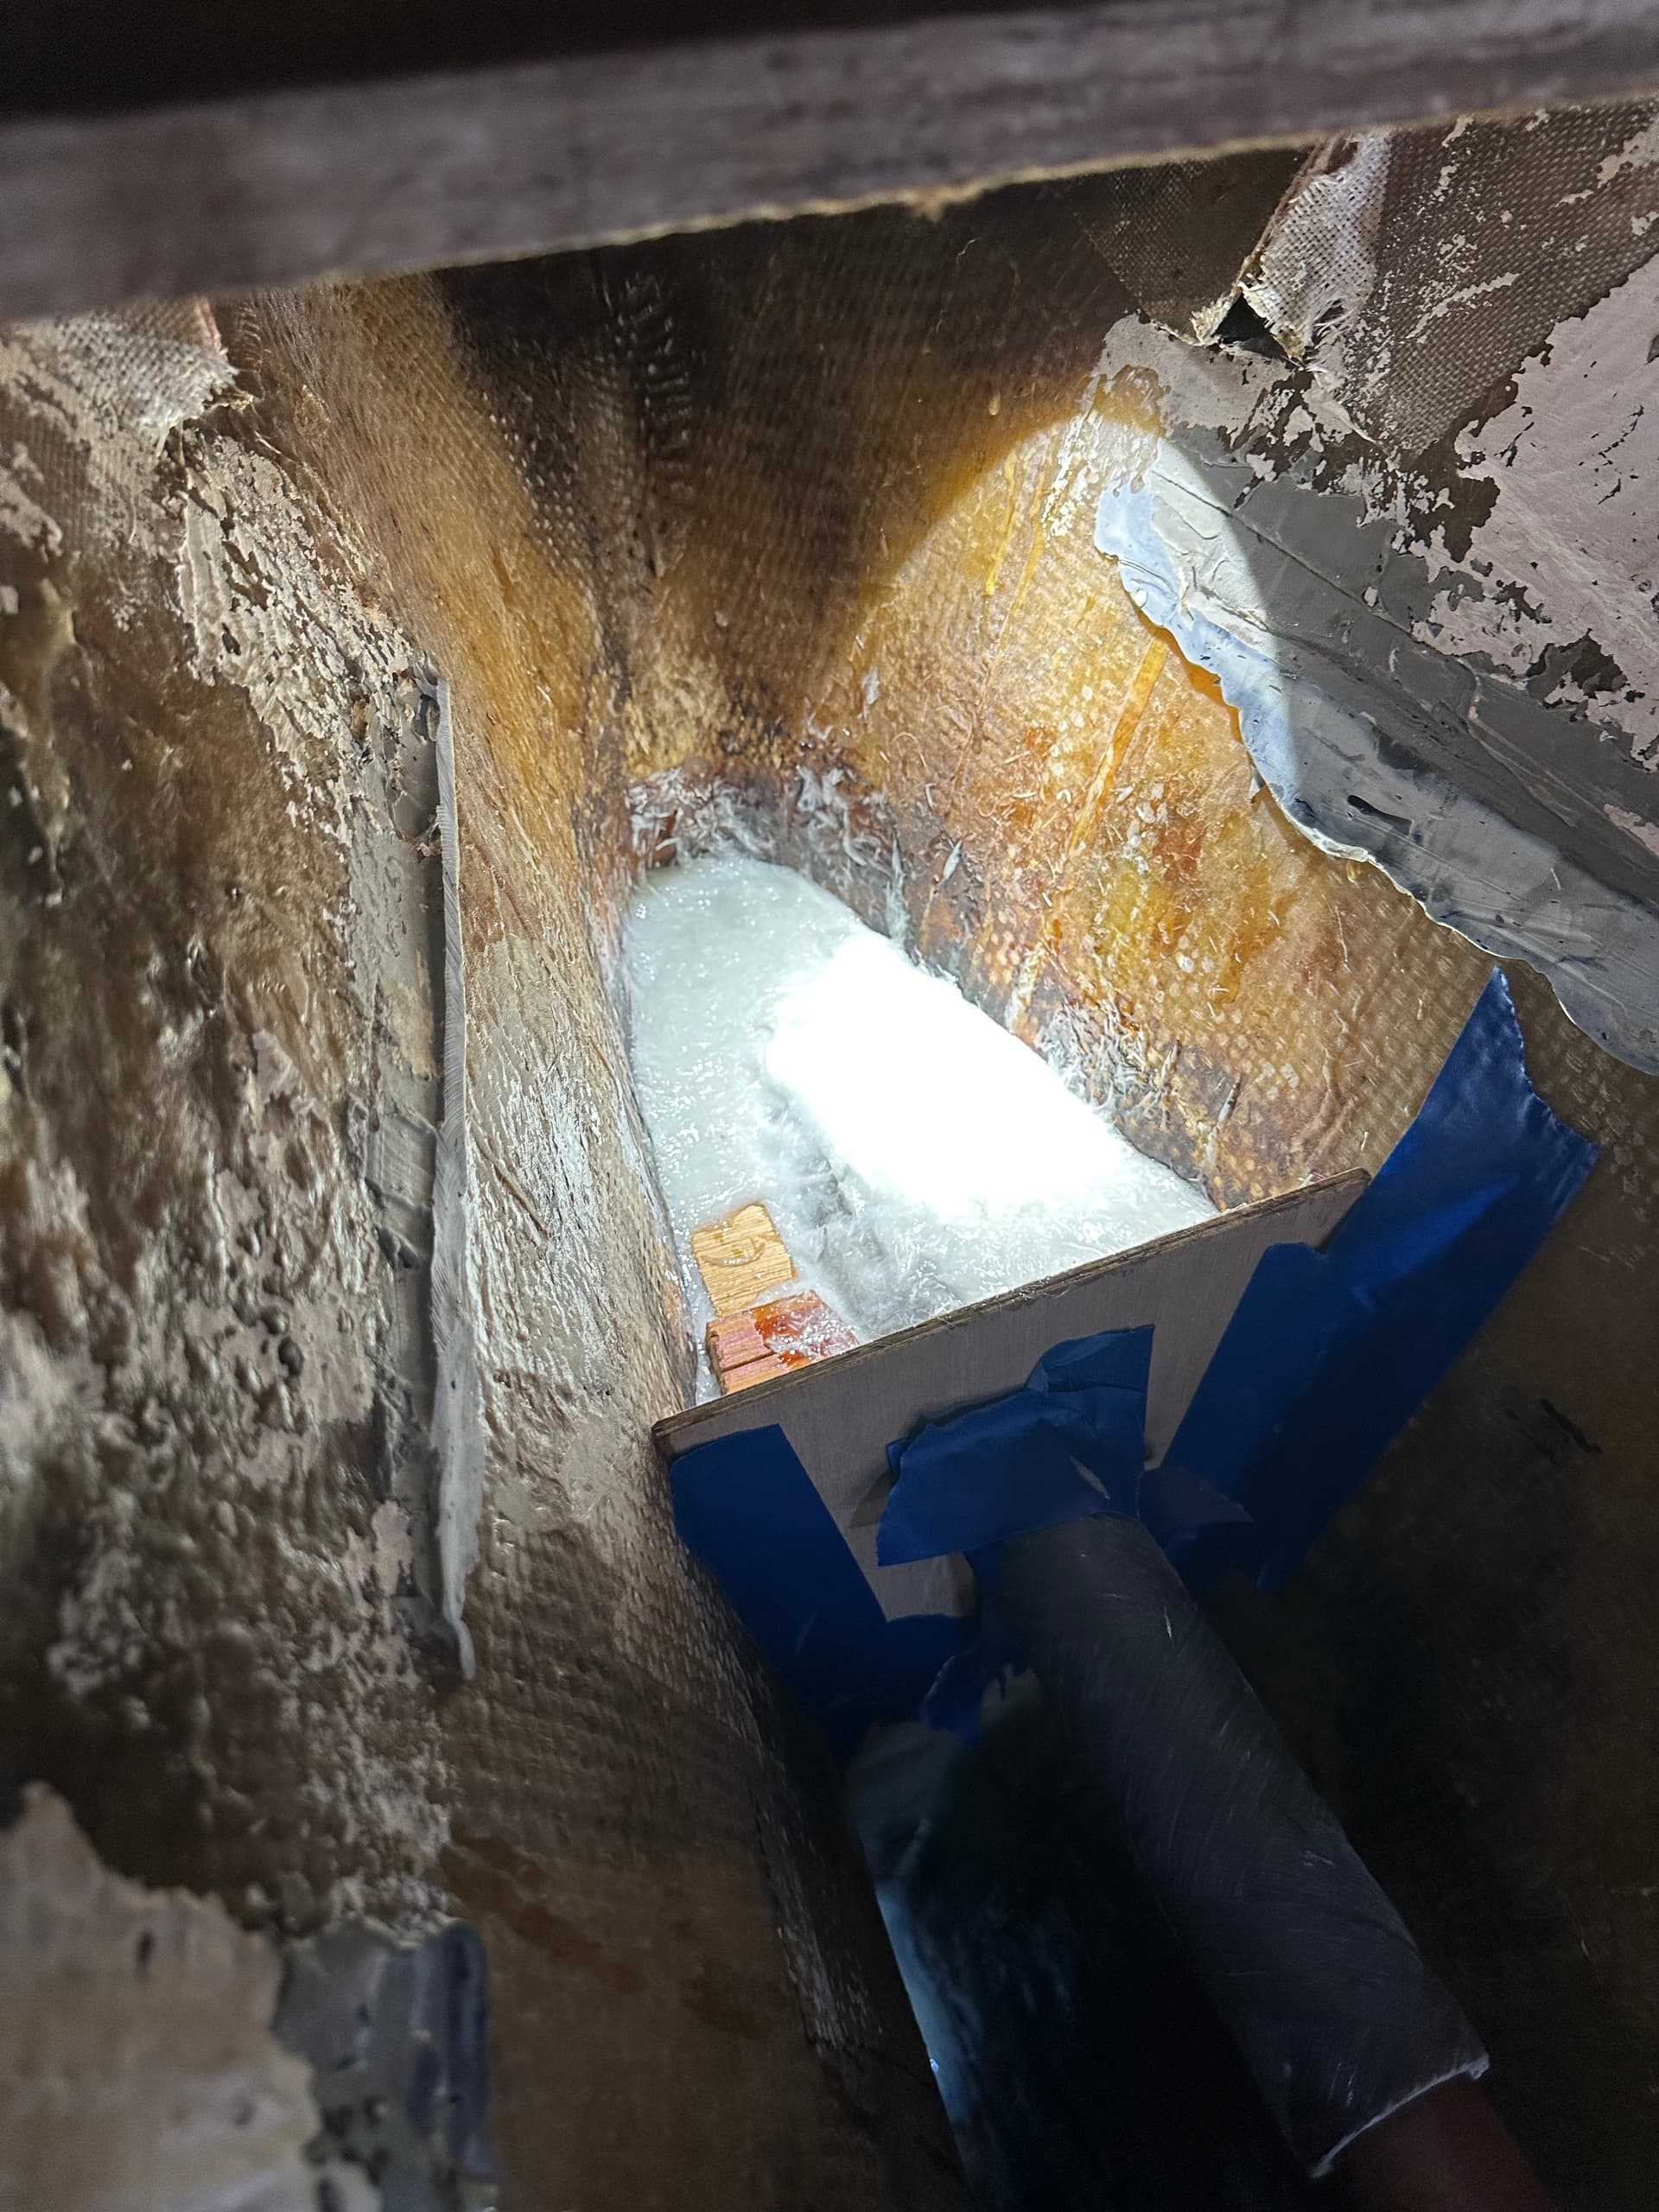
Next, I got the new stern tube (centek 2" od, 1.5" id) and 2 new cutlass bearings from Glide (1.5" od, 1" id), using one bearing in back of tube, one inside the boat so the shaft sat in the center of the tube, I put the pan in the boat with its ply jig attached and put the pan in the fore/aft position where the angles lined up with the shaft in the center of the aperture.
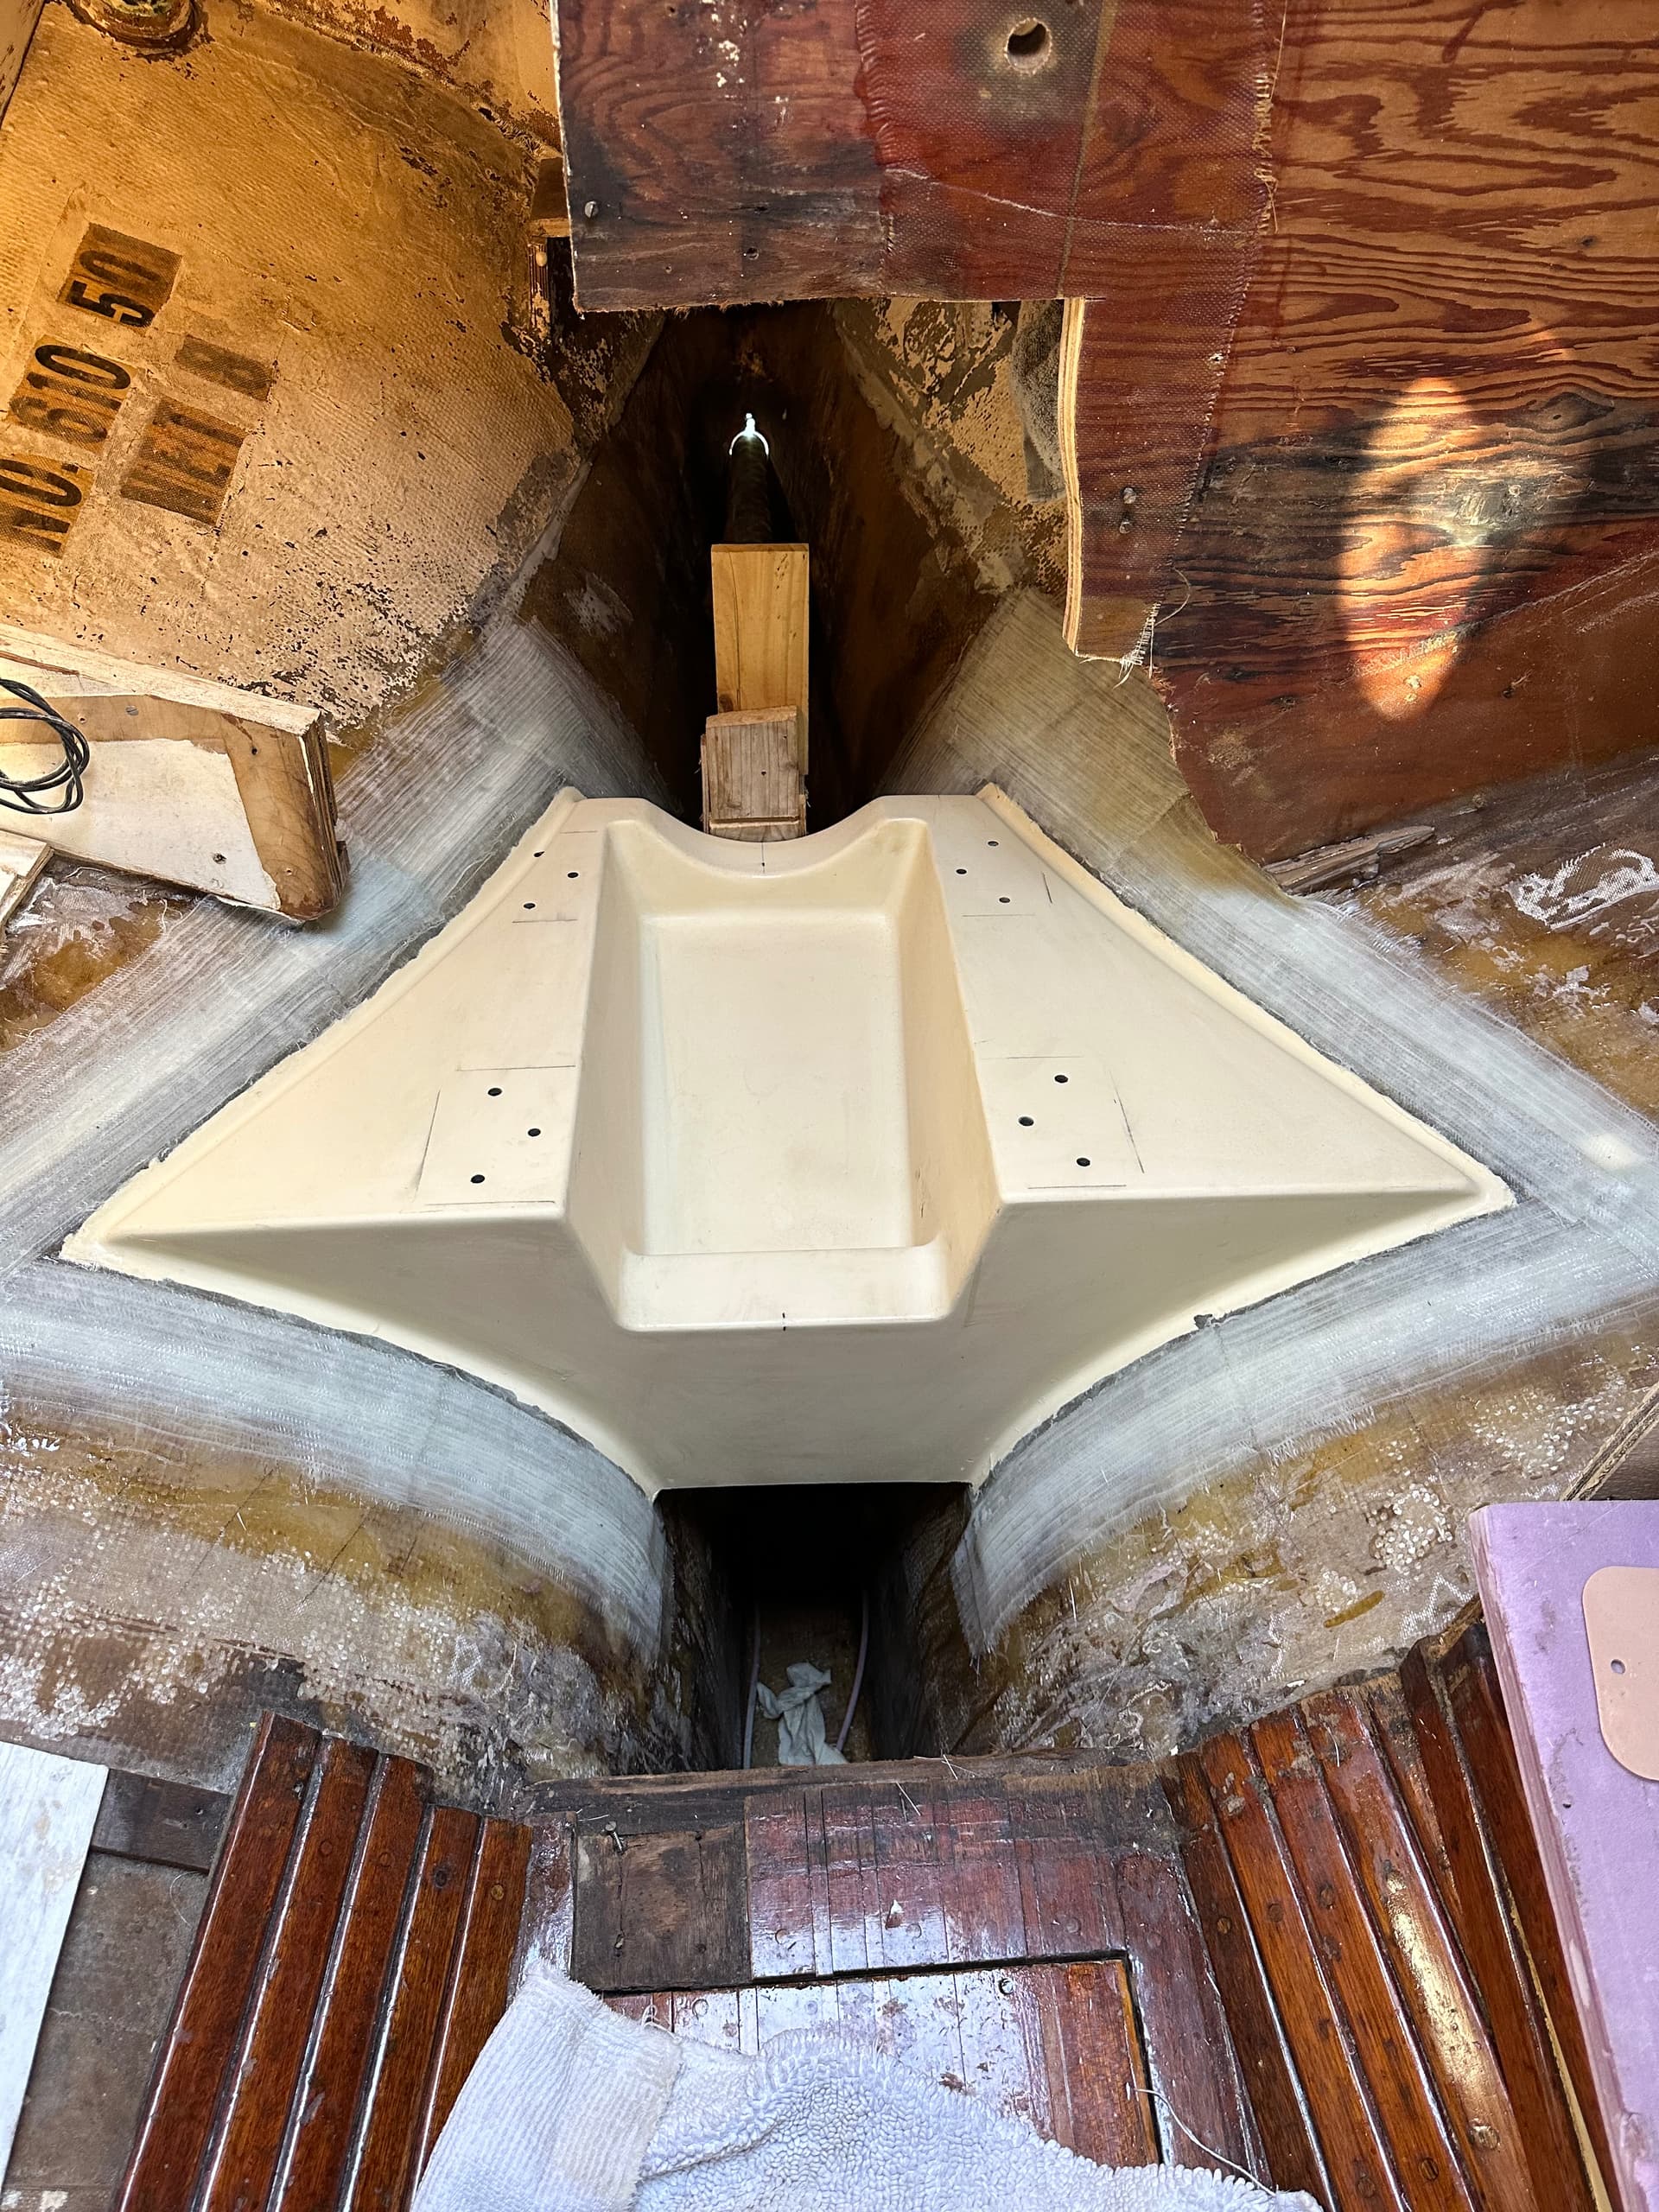
The area under the shaft tube is filled with two part Total Boat foam. A lower ply dam was glassed in place first, then an epoxy coated lid with hole drilled in it was filleted in place…
Next, made a new ply damn piece and I filled in around the stern tube with epoxy thickened with milled fibers and west structural filler. This got very hot! About 3/4 of a gallon of epoxy to get the fill about an inch above the tube and then I glassed in the top 5 layers of 1708 matt…
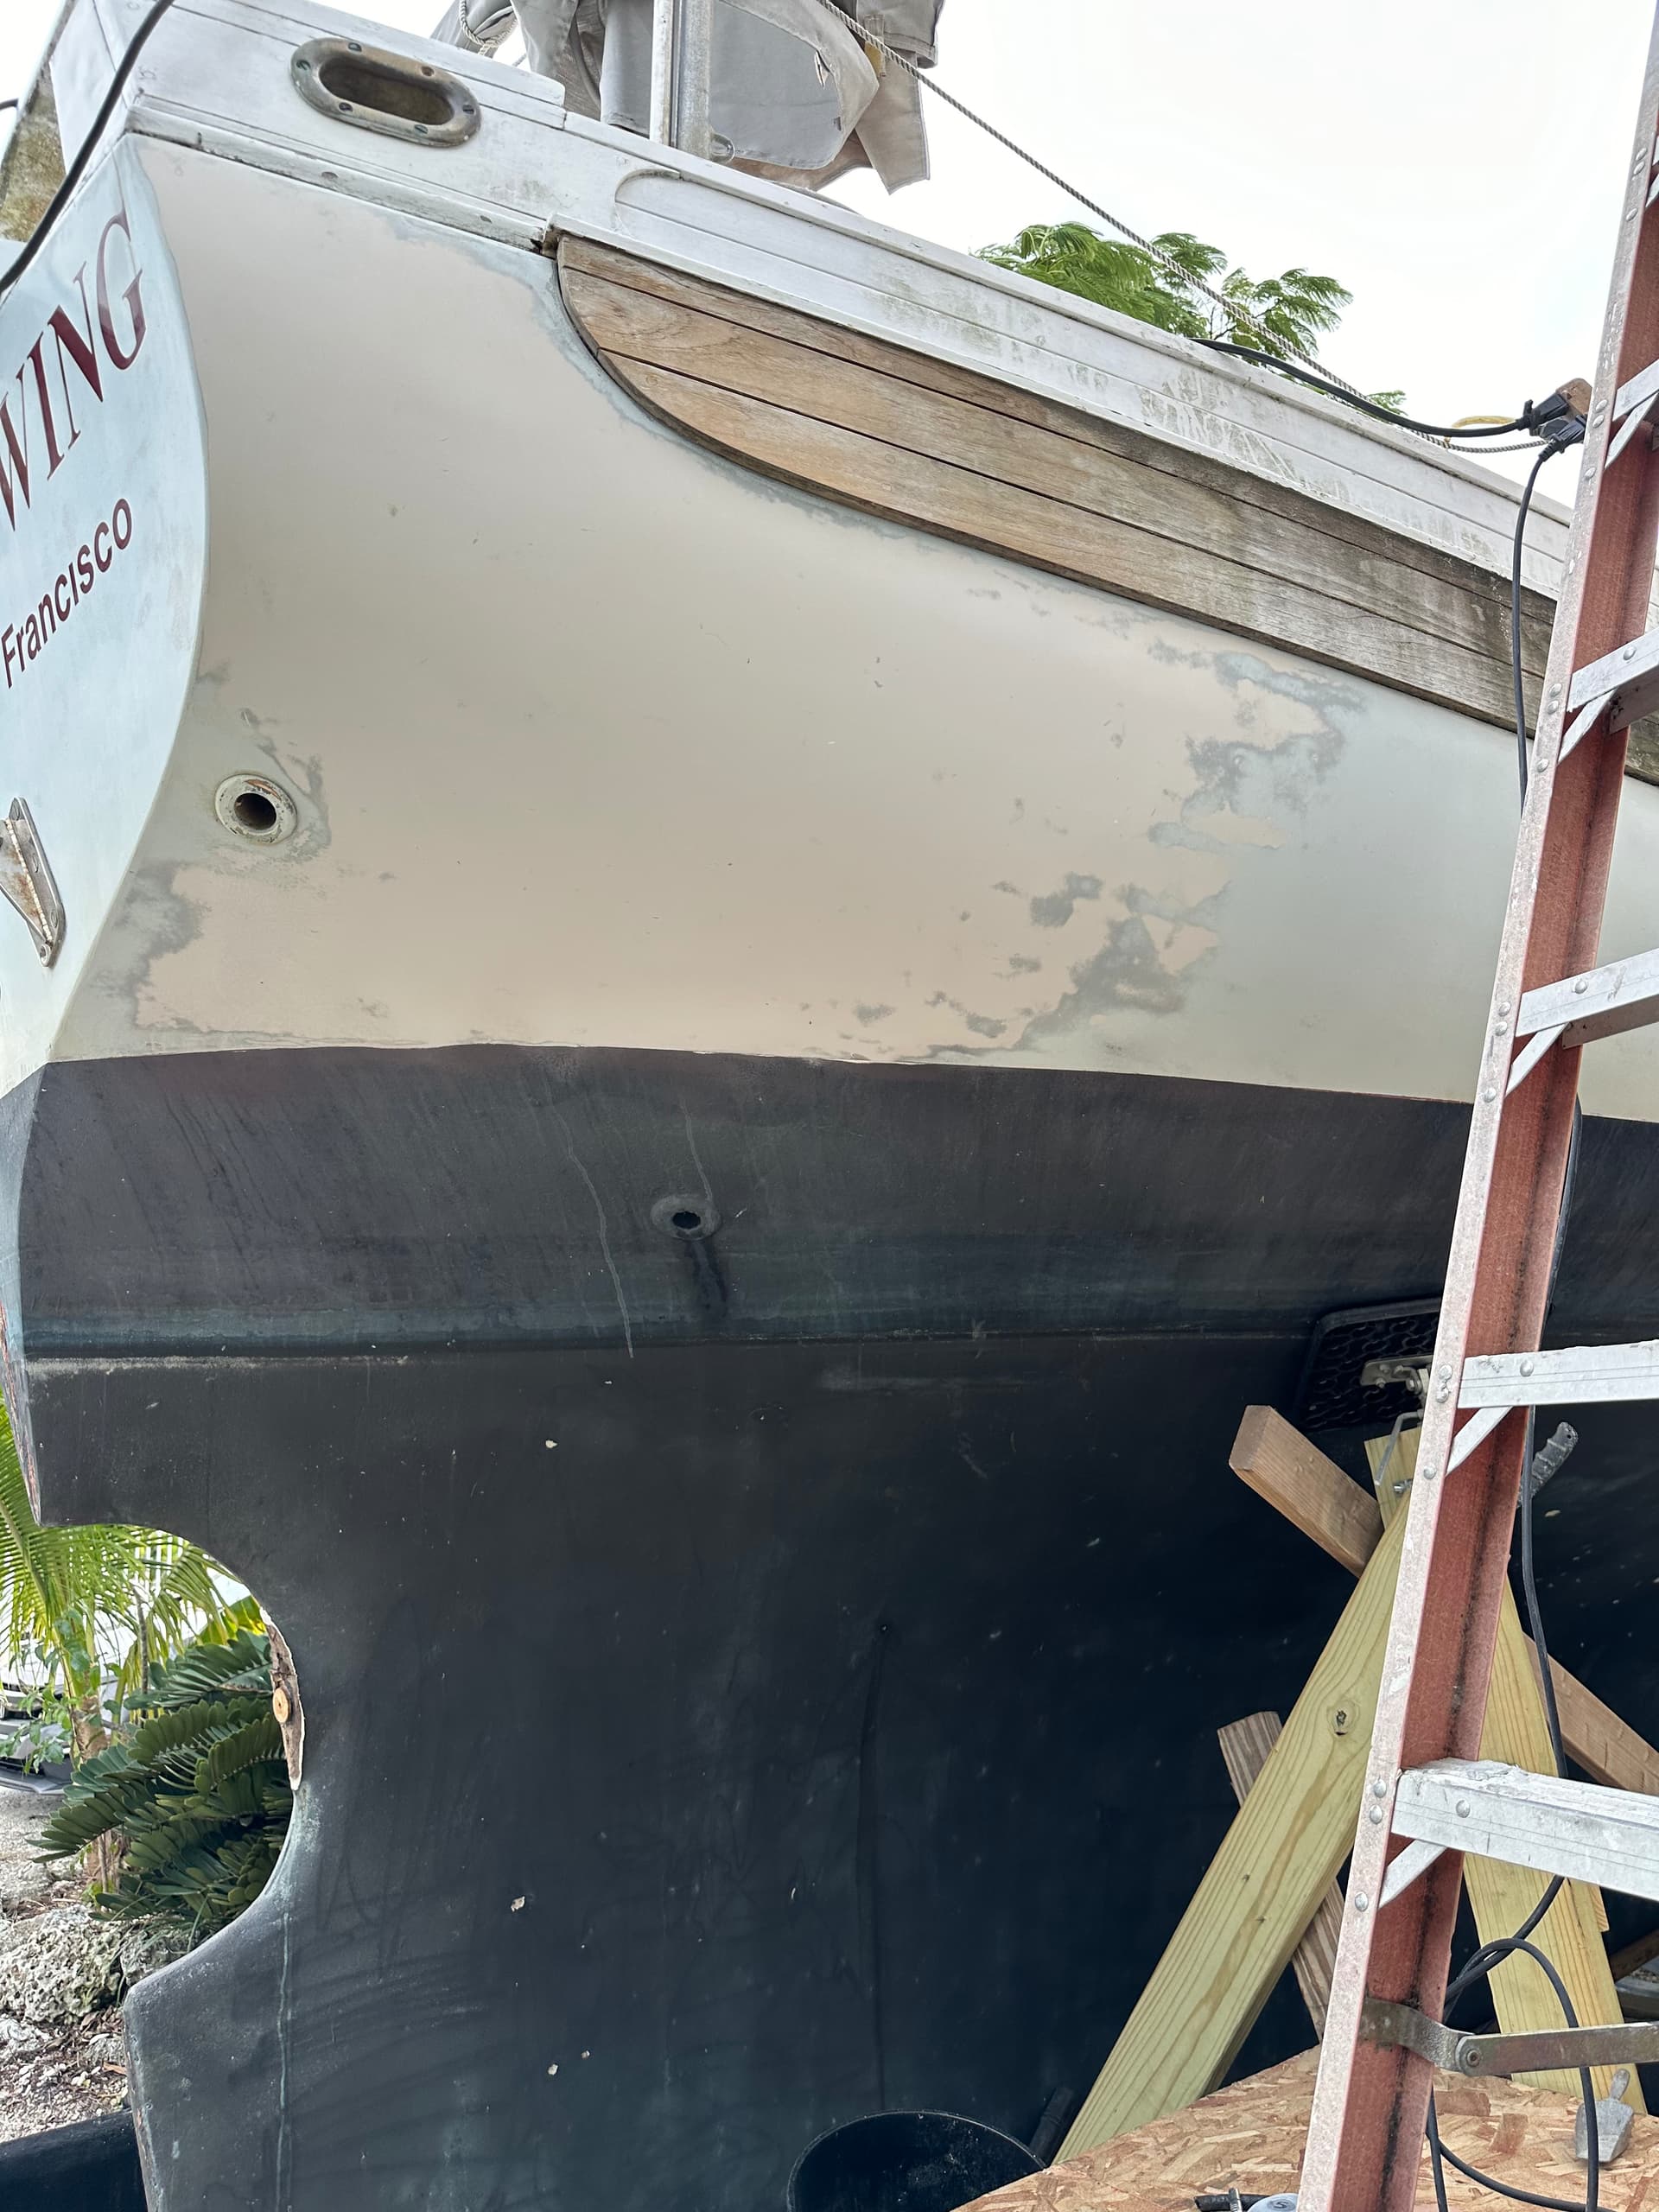
Painting the hull. WW had some extremely worn one part paint on her hull. I decided to repaint with Alexseal 501 Topcoat, Oyster White. Ive rolled two part paint with good success, but it’s been awhile. You can learn everything you need to know by watching Miller Boat Works on YouTube and get paint from there too.
Sanding - took two days to sand all the one part off down to gel coat. Can’t put a two part on one part. Turns out her original gel coat was in great condition. Just a few dings here and there, but no cracking.
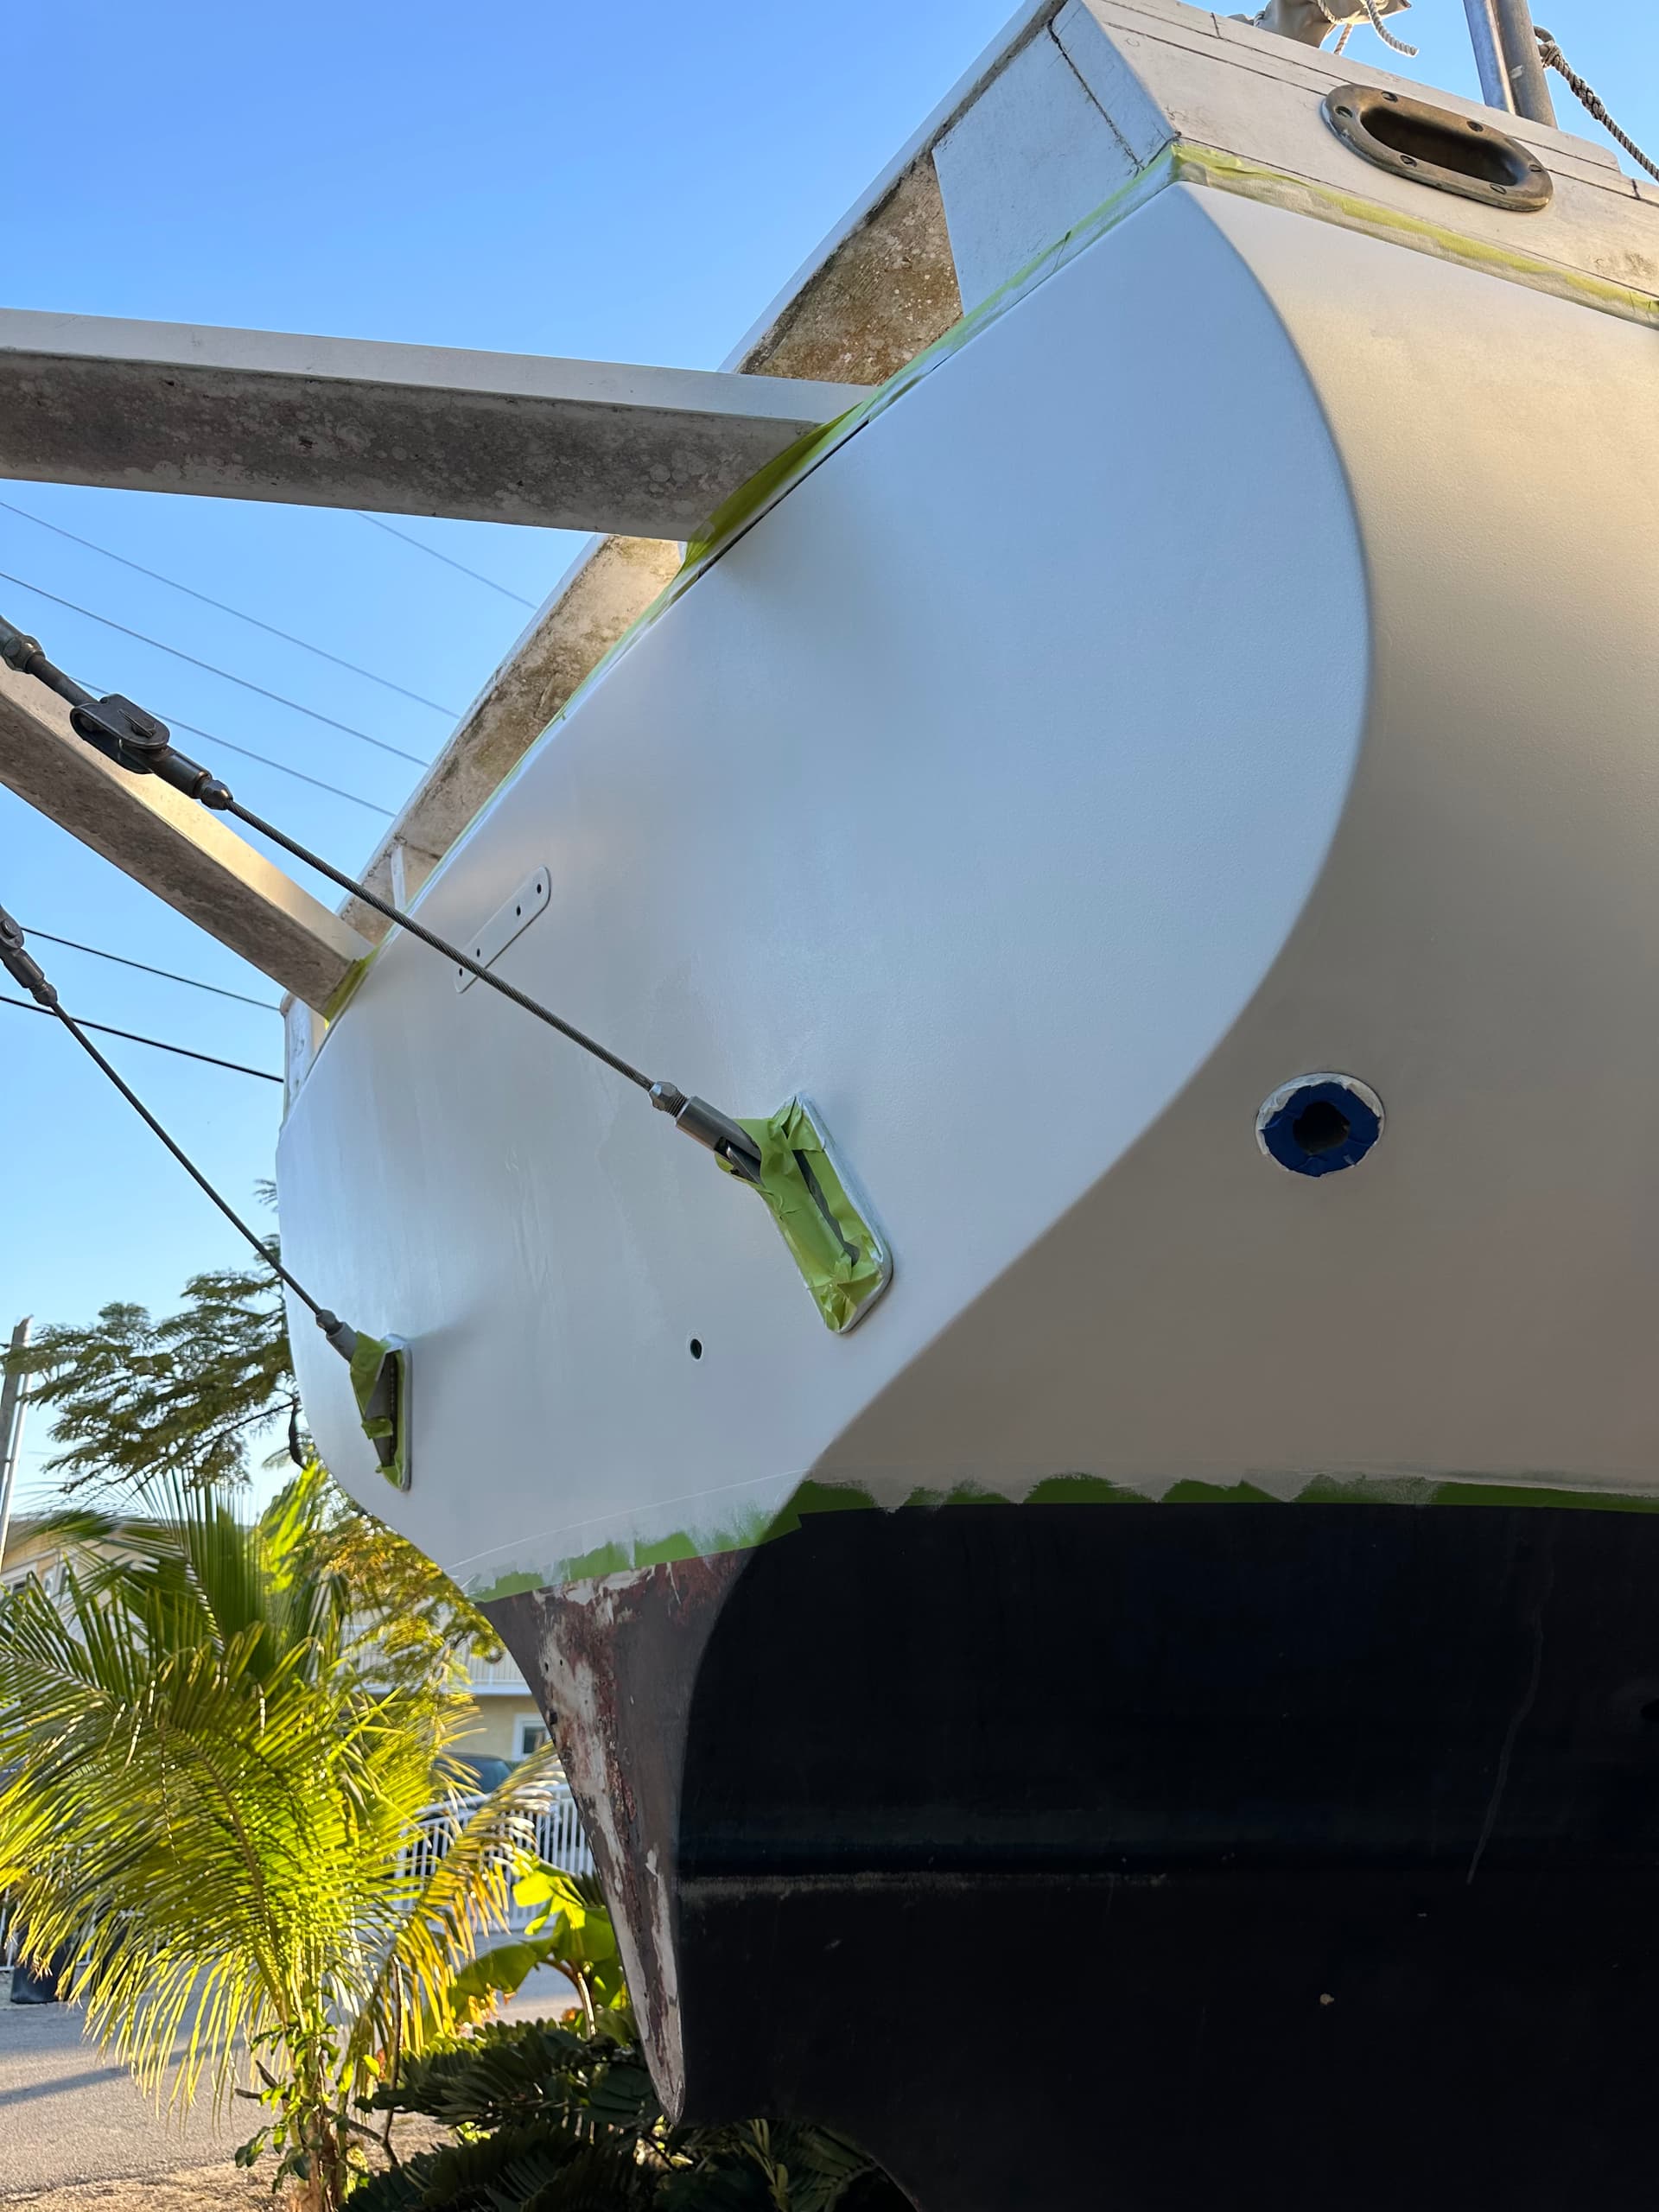
I ordered a gallon of the primer and a gallon of the top coat. You can easily paint a BCC with 1/2 gallon of each. I did 4 coats of primer followed by sanding with 325 grit using a graphite guide coat, then 3 coats of topcoat, then sand with 325 using a graphite guide, then final show coat. This was done outside, uncovered, with lots of mosquitoes.
After 4 coats of primer…Dont sweat how the primer looks too much, it will sanded smooth using a guide coat before the topcoat…
After final show coat…Looks like a spray job imho, at least as good of one if I was to hire a local clown to do the job. With 4 coats, I have plenty of room to fix and dings down the road and buff her in a few years…
Make the new engine cover counter removable. It makes engine maintenance so much more pleasant.
Are you planning on three 200 Ah batteries for your house bank - so 600 Ah bank? I think that’s overkill. We have 200 Ah lithium on Calypso - so call it 160 Ah usable capacity - equivalent to the usable capacity of 300 Ah lead acid. That’s plenty adequate for our needs. You should be able to get 80% usable capacity from lithium vs 50% for lead acid. So you don’t need as much “rated” capacity.
Watch out for your alternator if you are going all lithium. Alternators are not typically lithium friendly - and vice versa. Lithiums will take high charge current right up until they are fully charged. This will often cook standard alternators. And if the lithium battery BMS trips it might be like disconnecting the battery while the alternator is spinning - which may cause a high voltage spike on the output and cook the alternator diodes and other electronics. We kept engine start as AGM on Calypso, and installed a Victron Orion DC-DC charger to charge the house bank from the engine start battery.
I think the original SLM FRP rudders were built by Foss Foam. I’d get a quote from them before building a new one from wood. Balance your budget vs your time and the other projects on your list.
For the scale of effort you are doing, I’d say getting all of the old or compromised coatings off the bottom and giving her a new barrier coat foundation is a very worthwhile project.
Is the existing mast black anodized aluminum? When you make a new mast step, elevate it out of the bilge a couple inches to help ensure the step and base of the mast stay dry. You can make a new step from stacked FRP or g10 sheet material pretty quickly. The block to elevate it can be plastic block. I used a single block of delrin for Calypso - procured from McMaster Carr.
Thanks Jeremy! Ive watched your YouTube videos and they have been helpful.
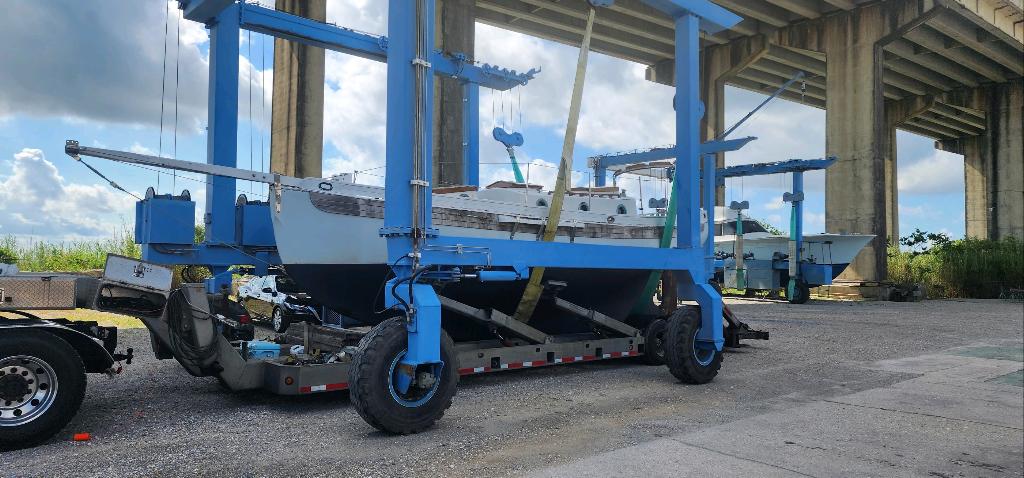
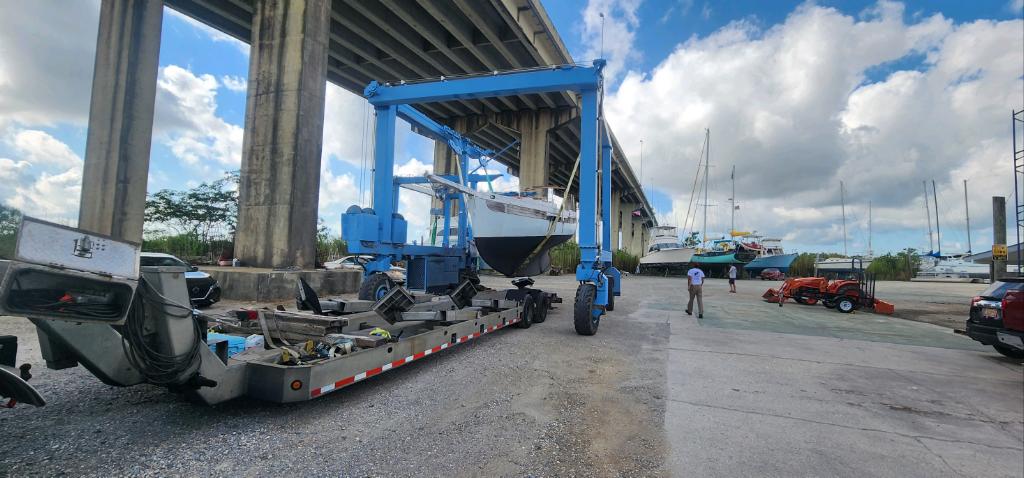
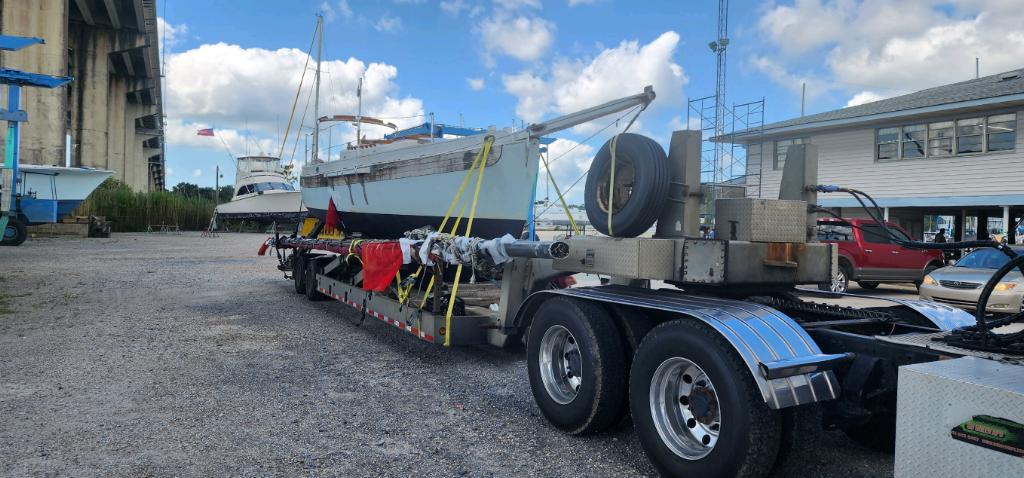
The trailer has 3x 6000# axles, and about 5 miles to the boat yard. The wood framing is temporary, now that she is in the trailer, I can make some proper aluminum side supports. It was a bit sketchy, and lots of “your crazy looks” from the yard dogs, I just returned the look and got er done. There is a huge timber under the keel that is taking all the weight and it is distributed over 5 cross beams.
Ive been researching Li like crazy and I think I’ve got it figured out. I got and upgraded 120 amp alt with the Beta (also why I went 30hp vice 25 for the extra load) and will be installing a Wakespeed 500 to regulate the alternator and a Sterling alternator protect device as the alternator will be connected to the house bank. I’ll post a pic of my wire schematic soon. Also if the alternator can’t keep up, Ill upgrade it to one of those Electromaax 215 big boys.
Overkill on the house bank was intentional. Living in the Keys, AC is the one luxury I want. Ive got the room for the batteries so why not. The Mabru DC unit draws 30 amps, and the CoolBlue draws about 25 amps when running. 500 amps usable will get me thru the night and 2 Nespresso cappuccinos in the morning.
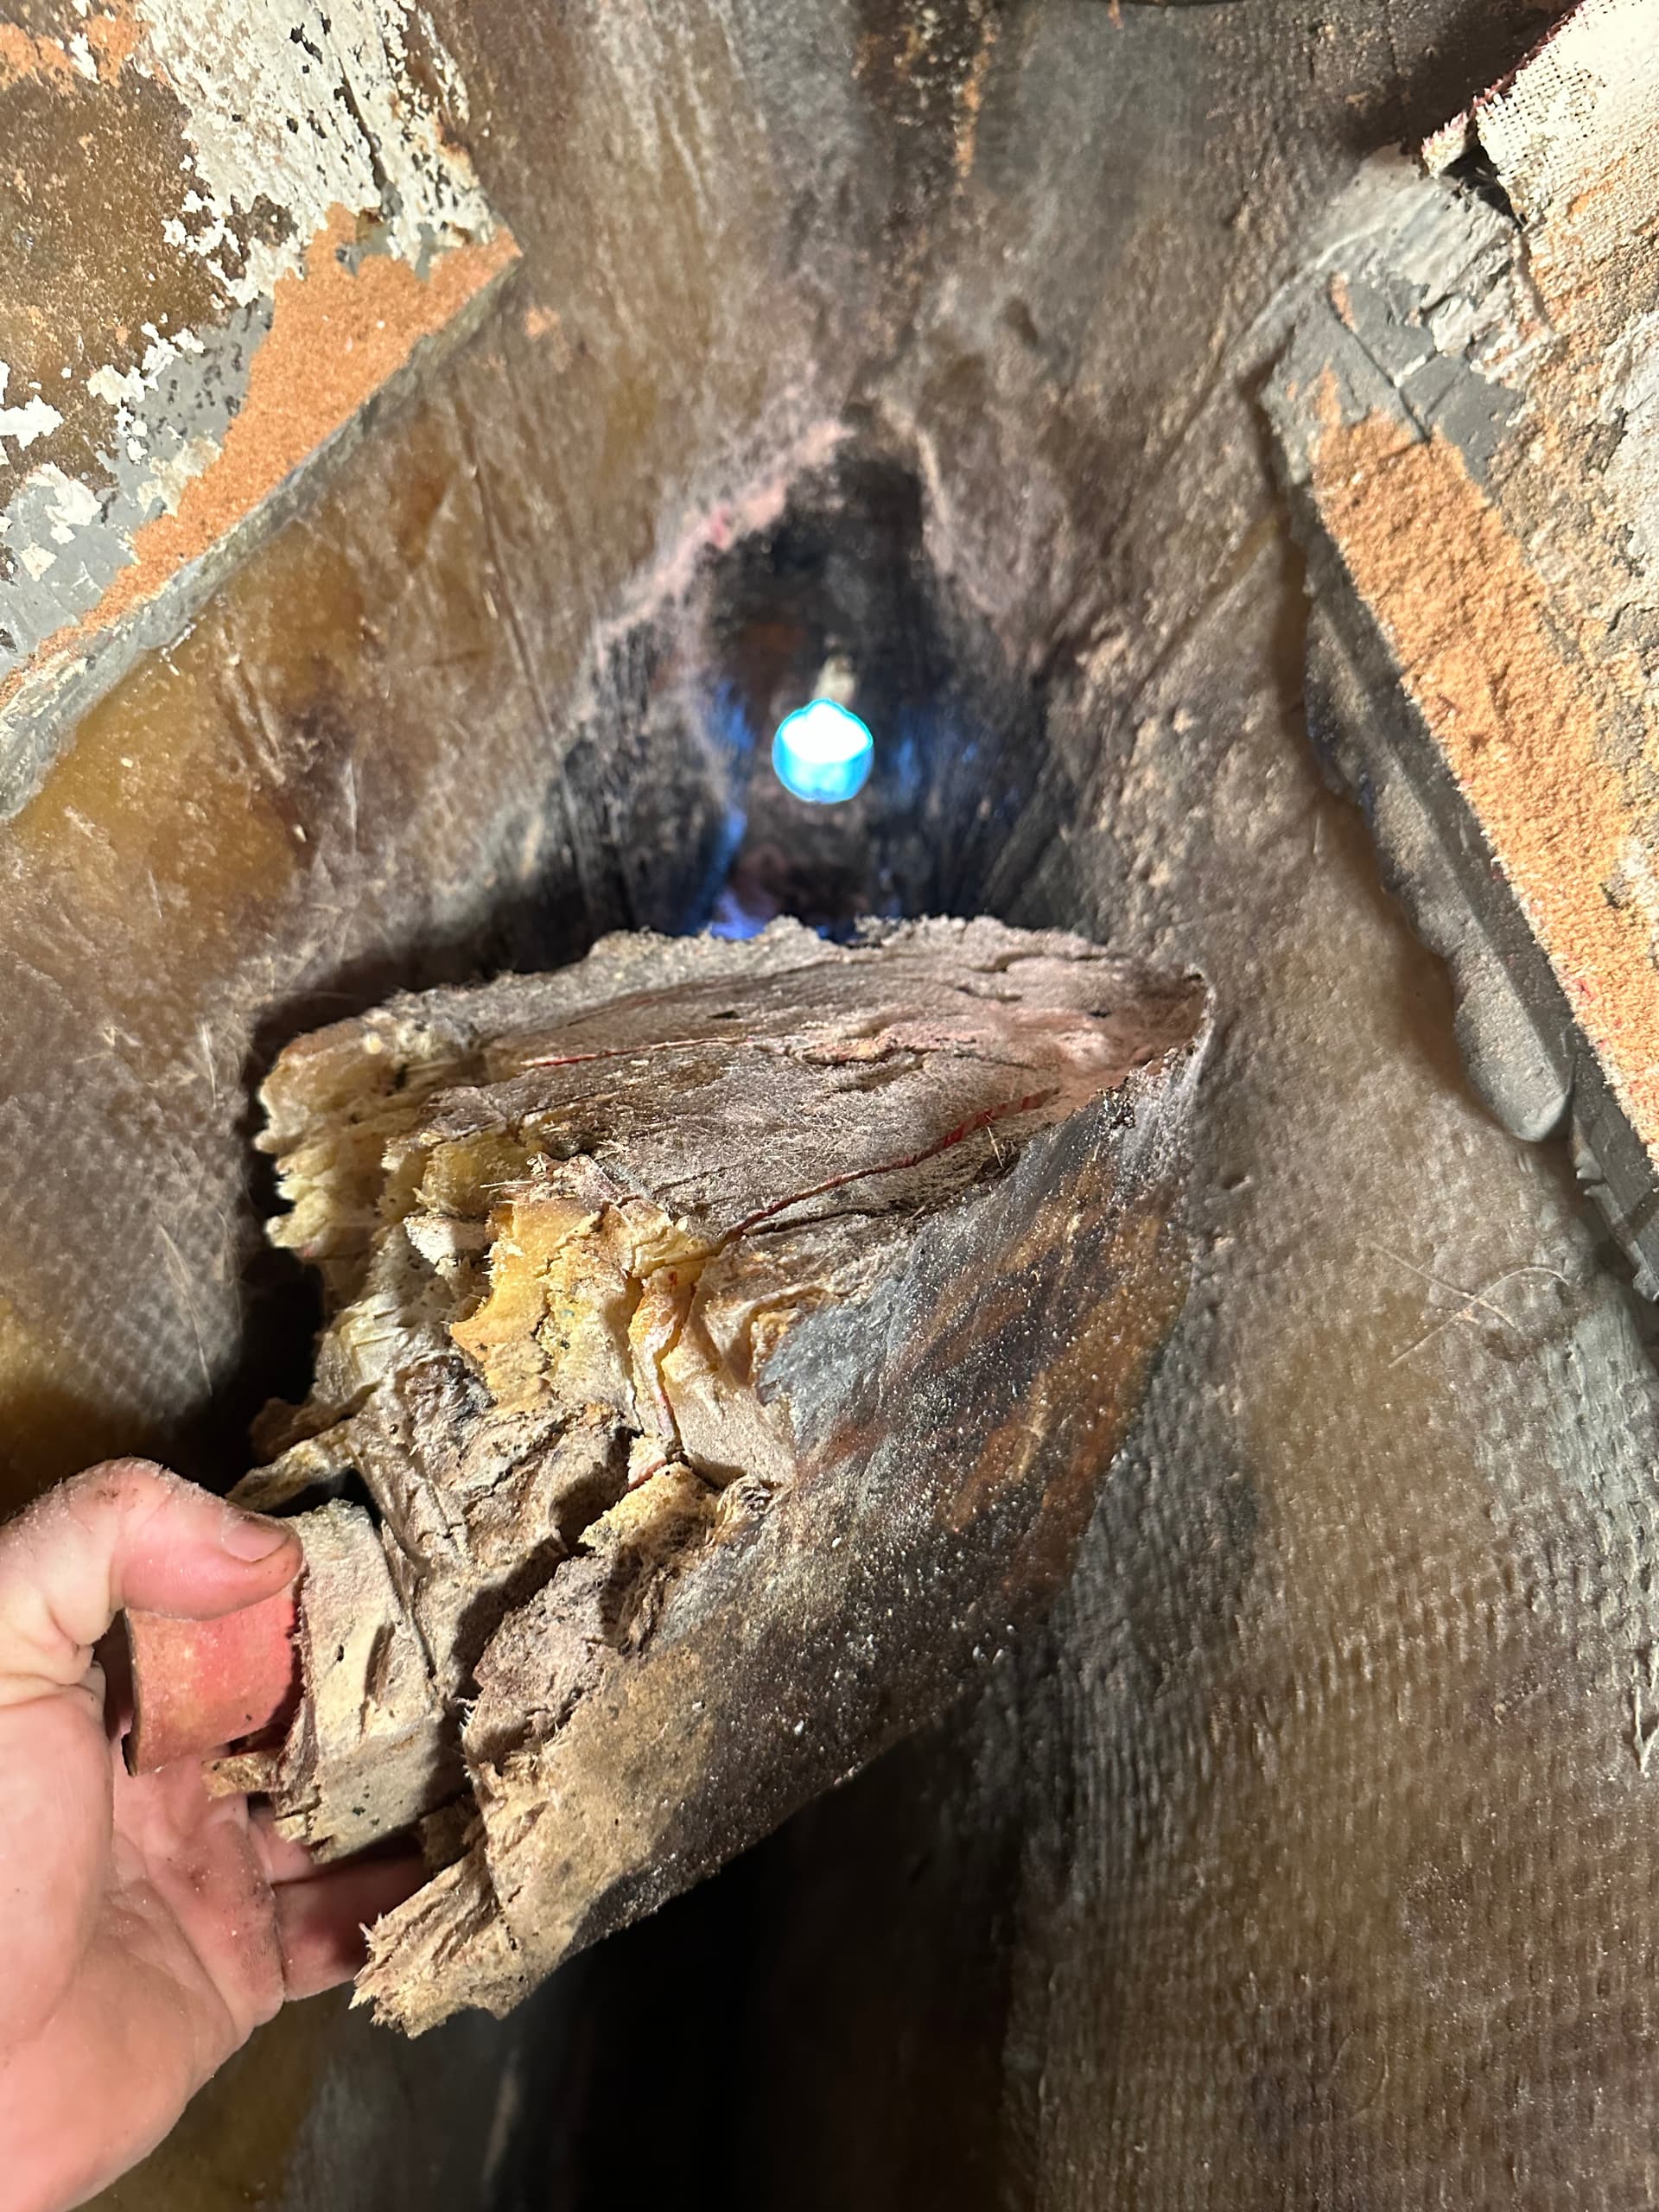
Yes the mast is the original black anodized. It was already elevated about 12" with a big chunk of oak, but It had termites and was complete eaten up. I’ll rebuild back to that height.
I know you have done the BCC restore a couple times, hope to keep the dialogue going, very helpful.
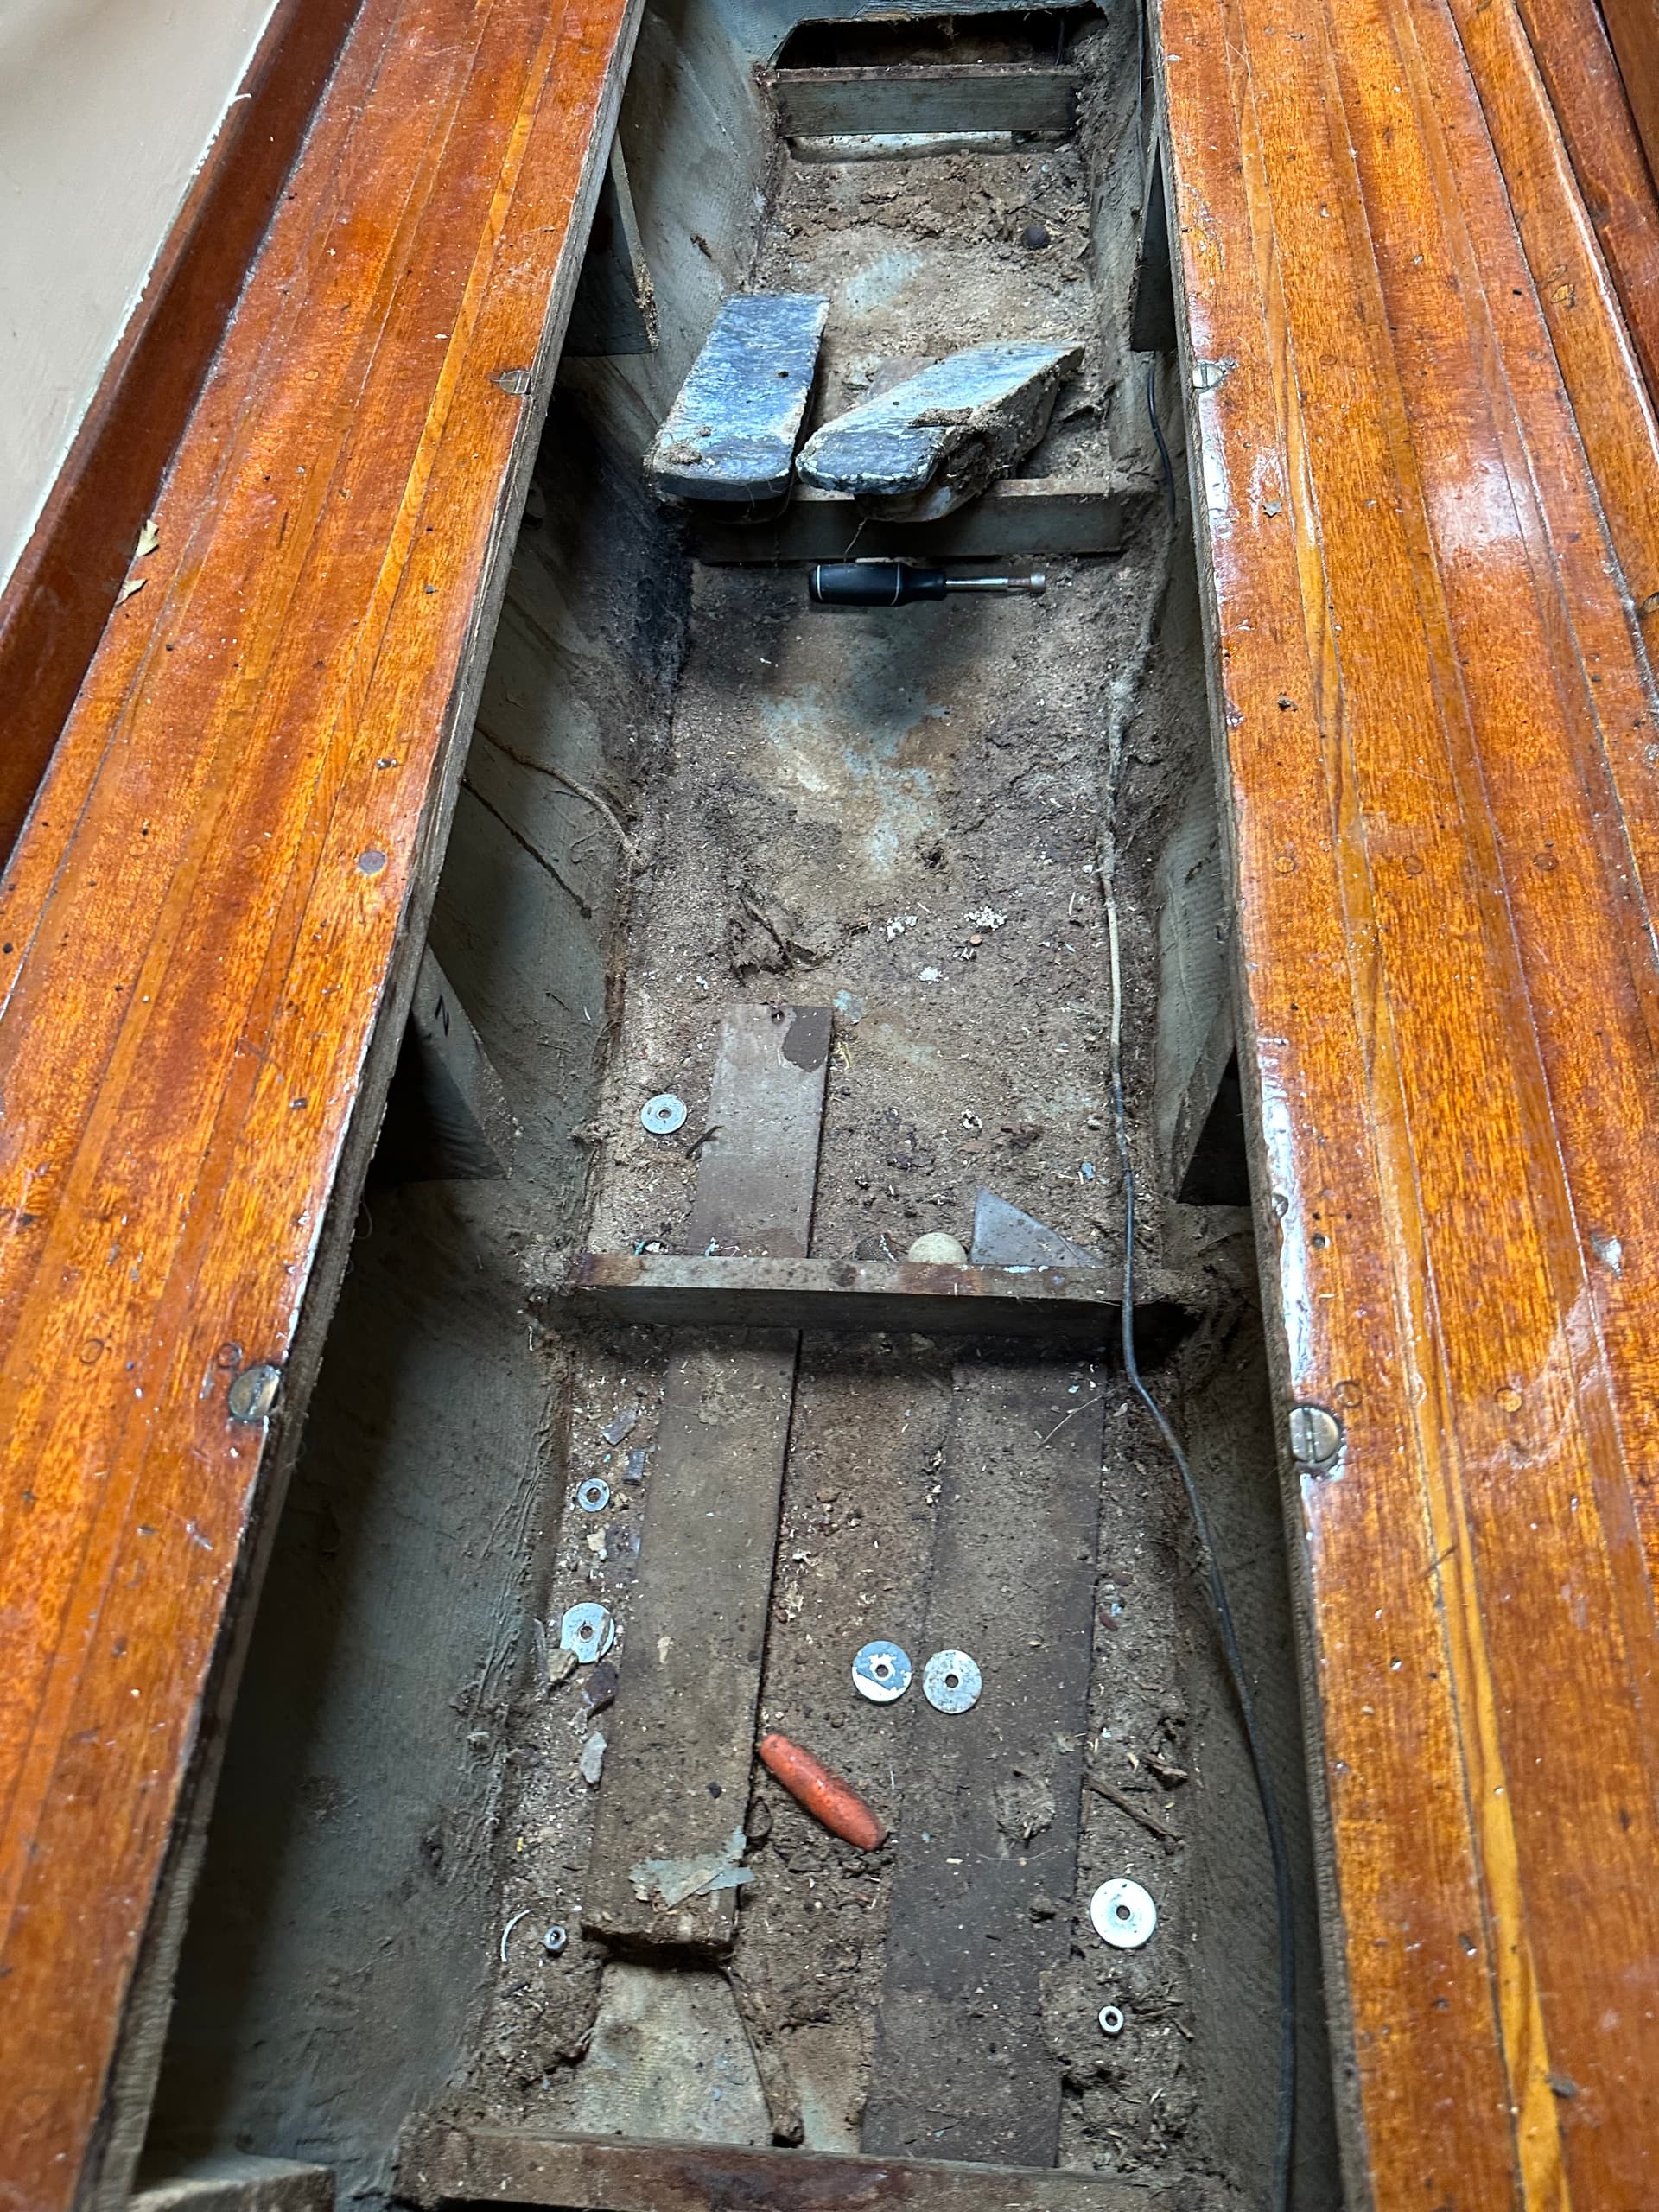
Stan had 6 50# leads in the front area of the water tank. He used them as wedges to lock the tank in. Not a bad idea, saved me from having to cut/clean foam.
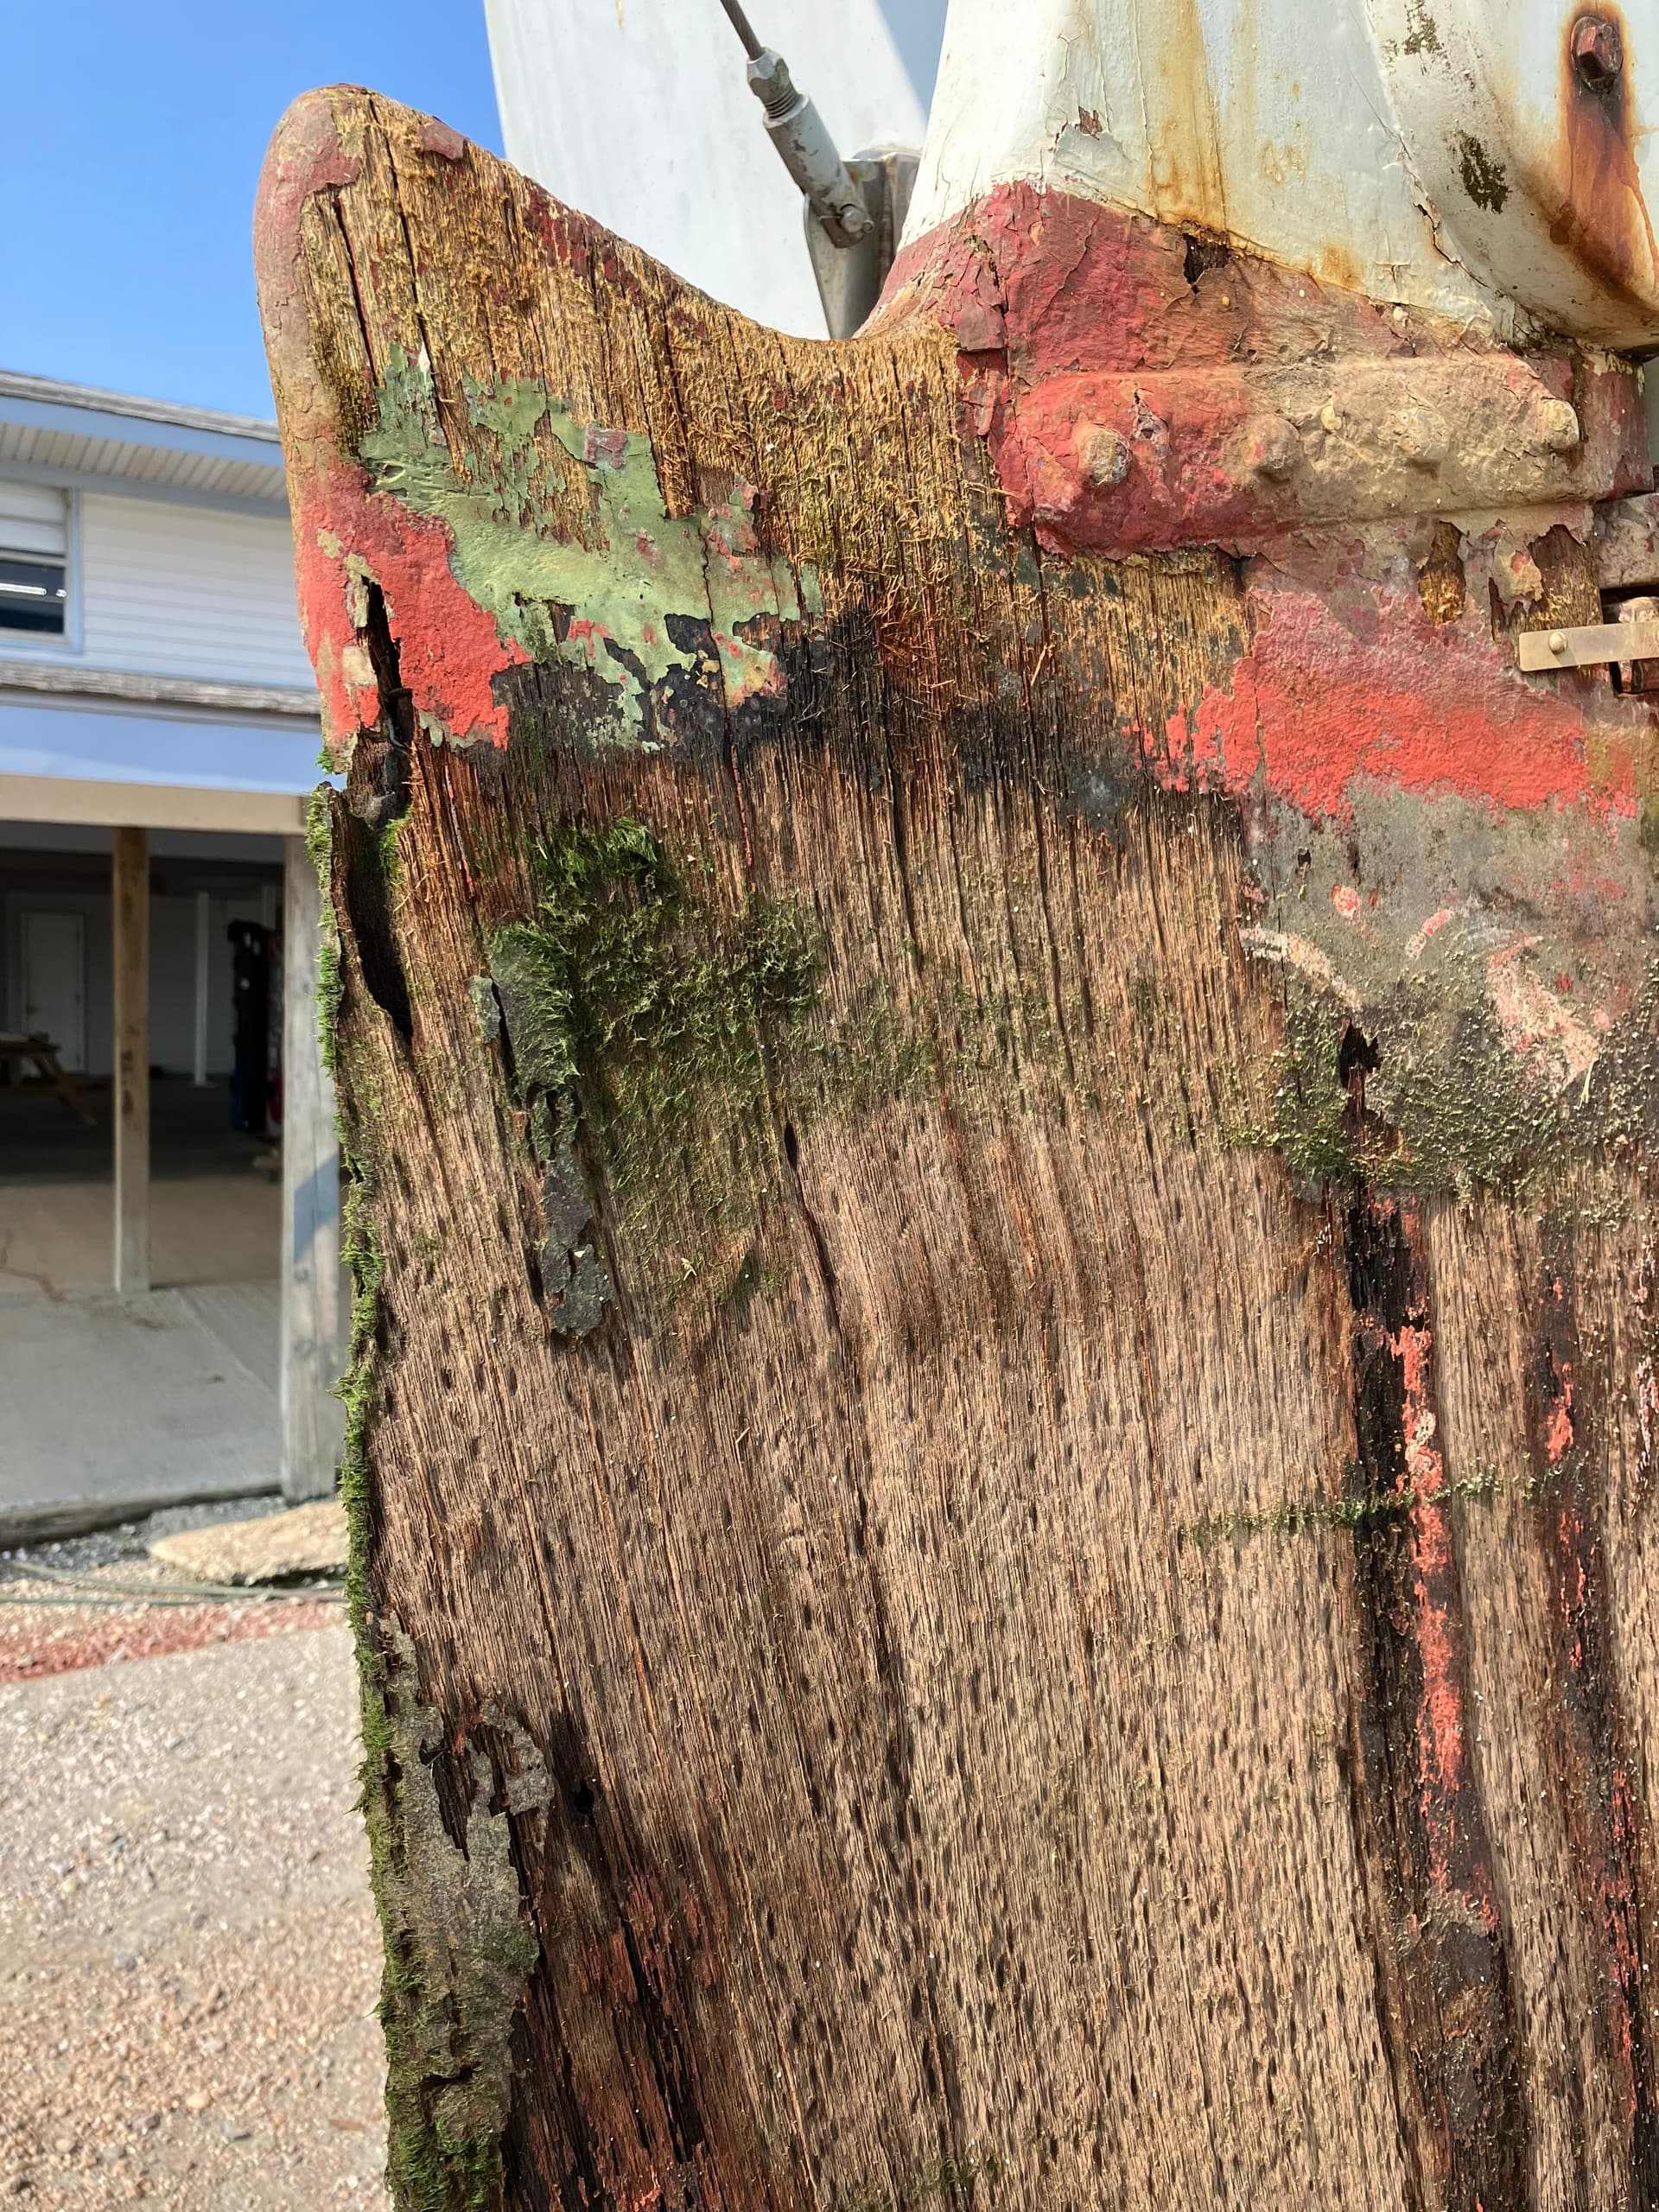
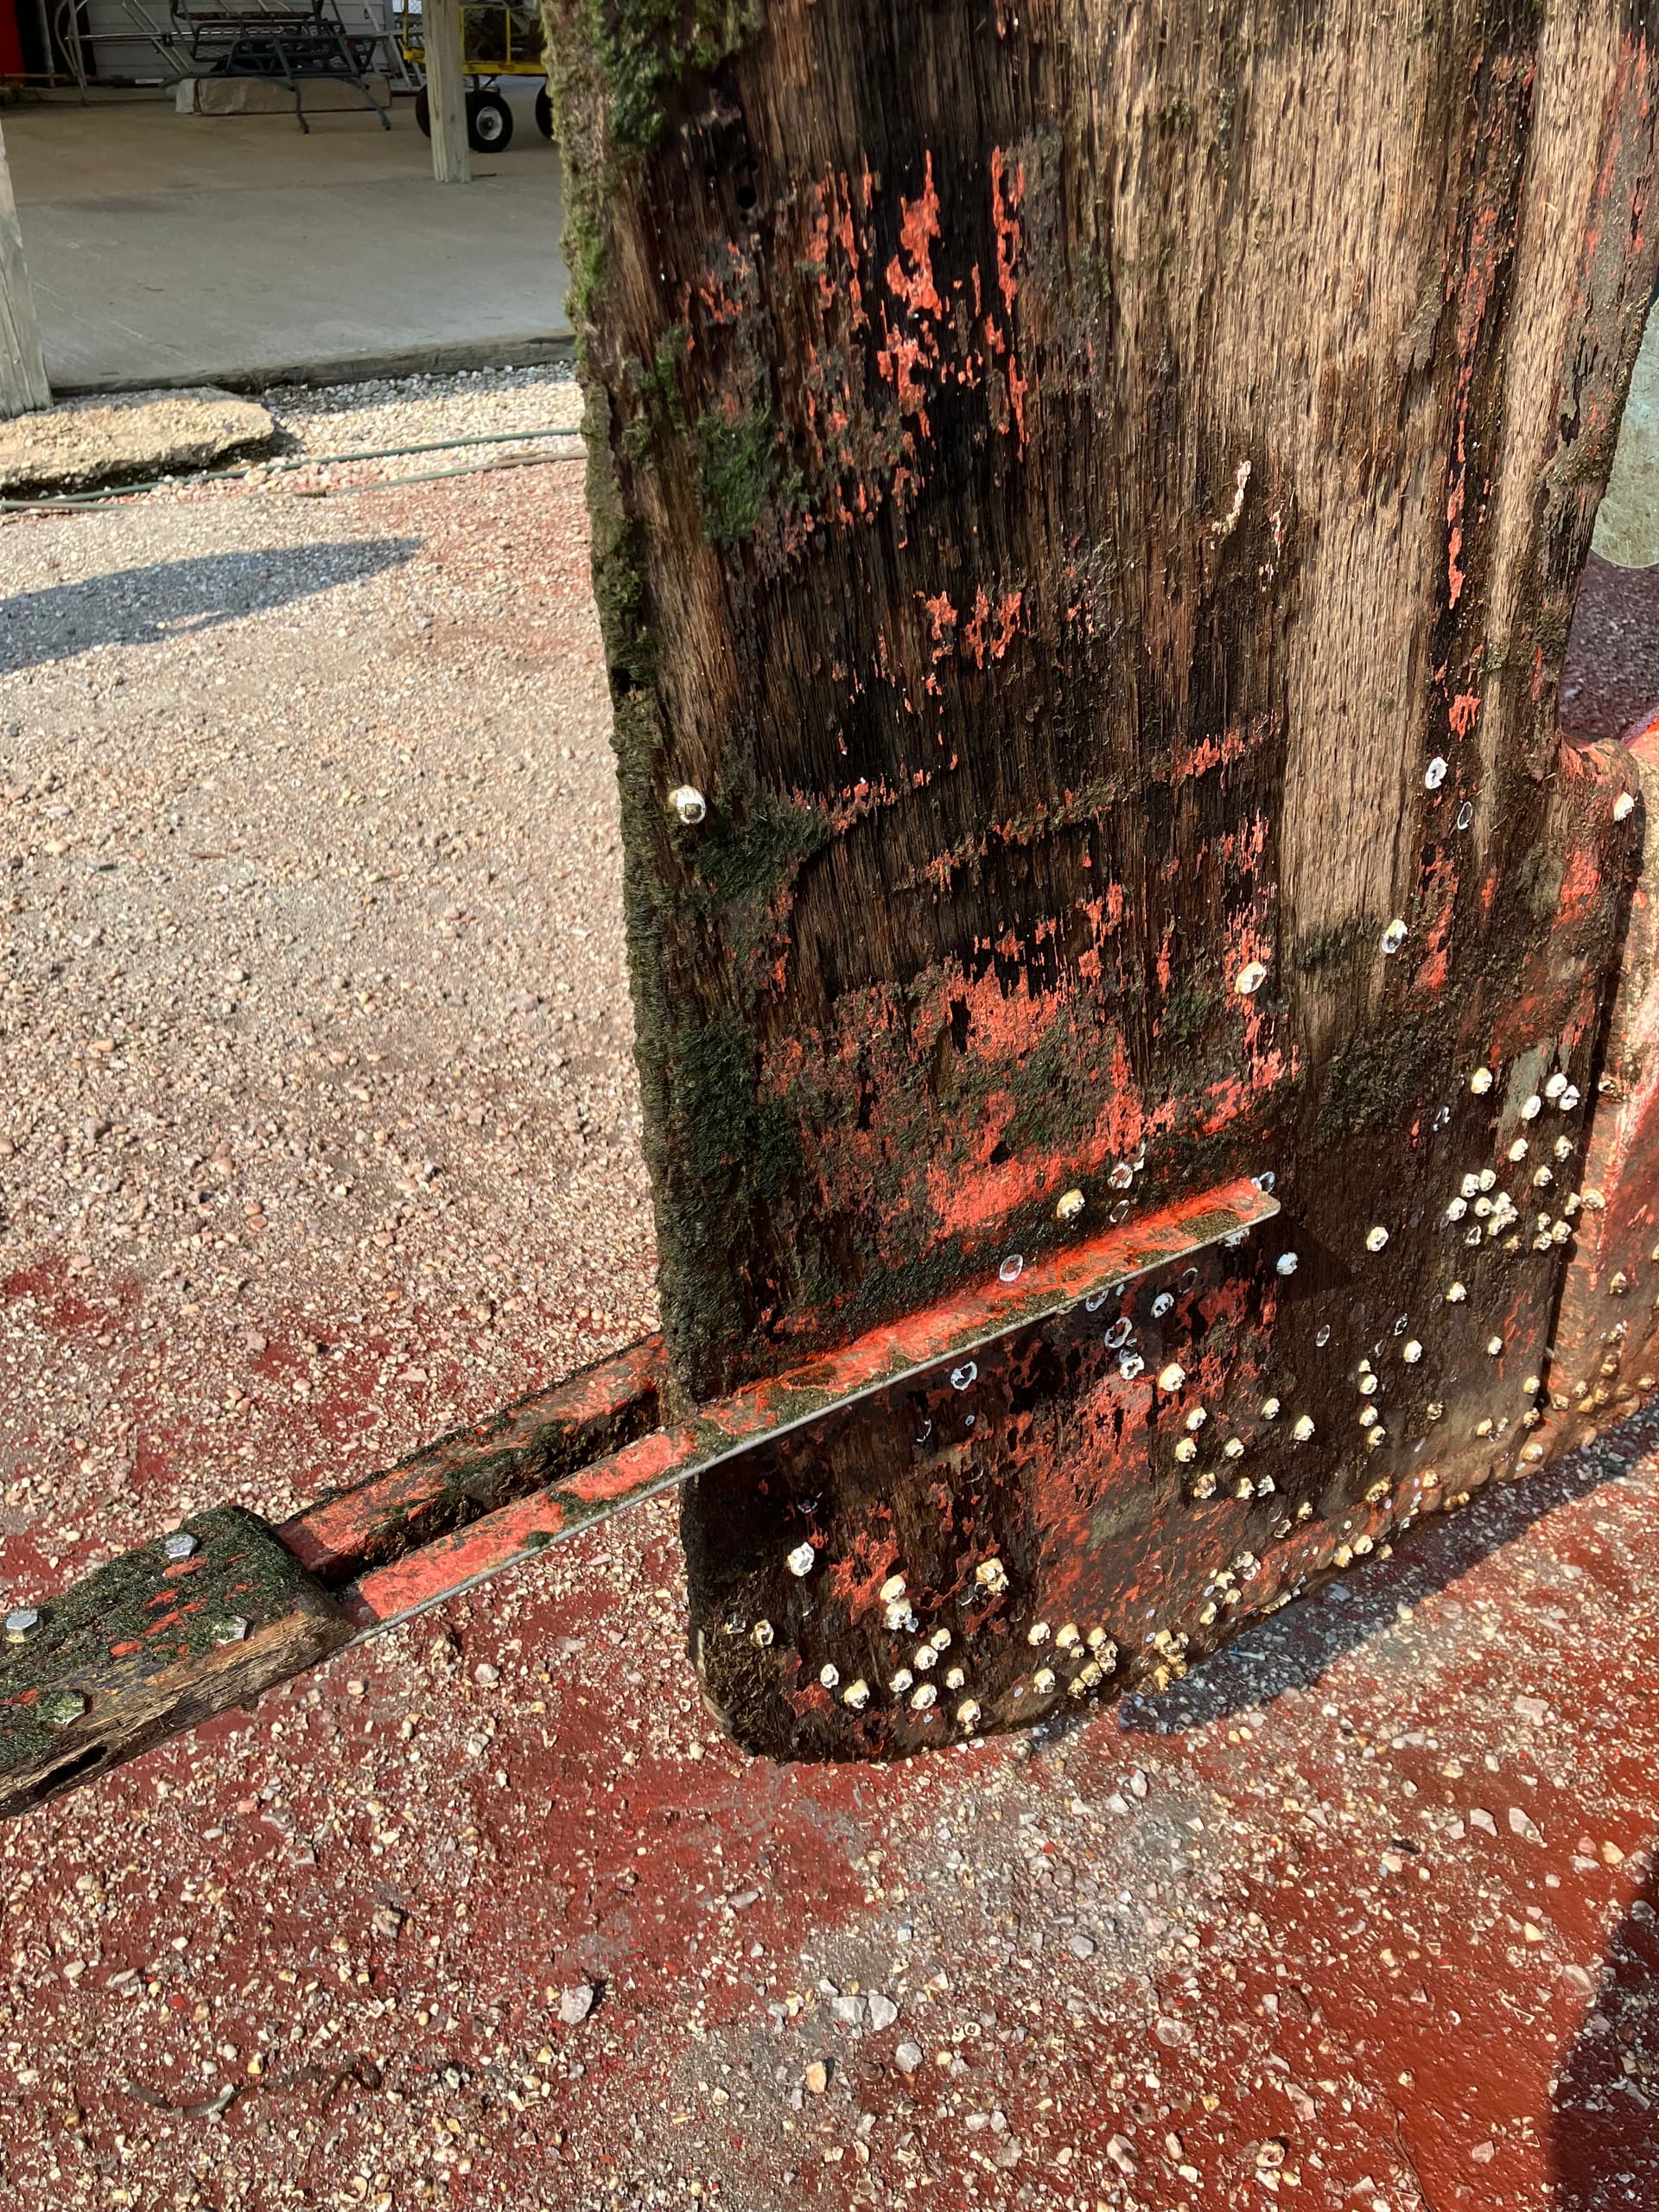
The rudder isn’t bad, I’ll prob just run the planer on it and take off about 1/4 inch, epoxy 1/4 ply strips back and then glass it with dynel cloth with several coats of epoxy resin. I might hollow out a section and add some two part foam too.
I bought new rudder hardware for port Townsend. The old original ones were shot.