Shaft log and cutlass

Houston, we have a problem.

Well at least I have a problem. It appears I will need to haul out for a repair. So I wanted to get some insights to possible solutions.

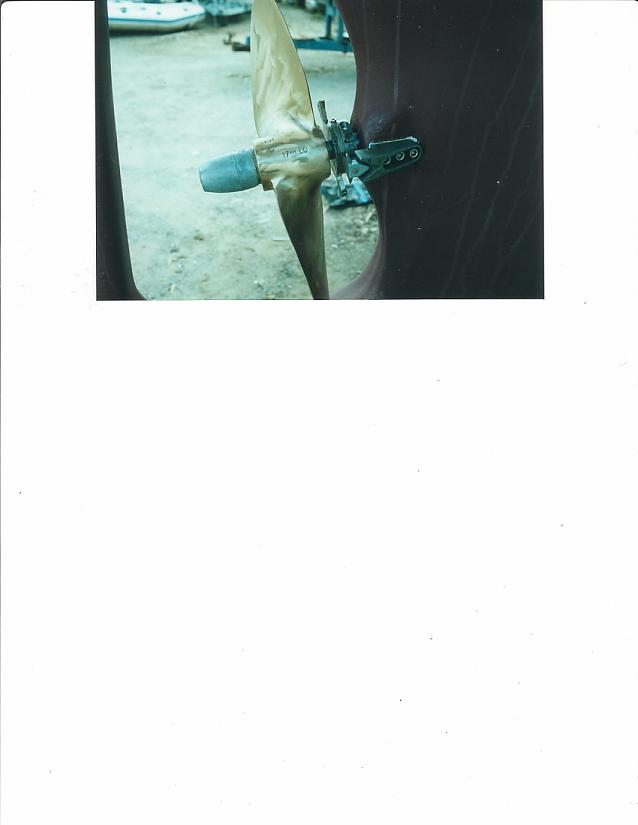
Over time and a few bad installs of the cutlass bearing, the shaft log has been damaged. When I purchased Shanti the cutlass bearing was missing. Missing? you say? Yes, it had gotten loose and moved up inside the boat. Upon retrieval and repair is was noted that no dimples were made for the set screws to sit in. So a new cutlass was installed. Hopefully with dimples being drilled for the set screws to sit in (I was not present when repair was done). After my engine went out of alignment this last time I went in the water to check things out. What I found was, the dimples had been put in the cutlass, but in the wrong place so they were never functional. So the cutlass had dislodged again.

The cutlass was almost all the way out of the shaft log. The zinc preventing it from coming completely out. So I removed the prop and installed a new cutlass underwater. I drilled the dimples myself this time! When I put the new one in it fit snugly but not tight. And unfortunately the threads for the set screws (these are drilled into fiberglass) were fairly stripped. I was able to get the port side set screws fairly snug. But open turning the prop by hand, the cutlass rotated with the shaft … my heart sank!

So I will be hauling out for repair. My question is…how hard is this to fix? do I have to grind out the shaft log and install a new one? How about the set screws set into fiberglass, this seems to be a weak point in the set up. I’m thinking off grinding off the outer part of the shaft log. The part that sticks out from the hull and installing a bronze shaft log like this one http://www.buckalgonquin.com/pages/ProductPages/drivetrain/stern_bearing_page.html

Any thought or insights will be appreciated!

Gary

For purposes of this discussion, let’s define shaft log as the fiberglass or bronze tube that houses the shaft inside the boat. The cutlass bearing supports the shaft inside either a stern bearing or at the aft end of the shaft log where it exits the deadwood.

The Buck Algonquin stern bearing is a good idea providing there is enough clearance between the “deadwood” and the rudder. If I were making the repairs, I would remove the cutlass bearing and flush the set screw holes with acetone to rinse as much water out of the fiberglass as possible - epoxy or vinyl ester resin does not adhere to wet fiberglass. Once the set screw holes were as dry as possible fill the holes with either 3M’s high strength filler or epoxy resin filled with either fumed silica (West System 406) or a high strength filler, such as West System 404. If these materials are not available, I would mix finely chopped fiberglass with a vinyl ester resin or epoxy.

Once the set screw holes are filled and sanded smooth on the outside and inside, drill and tap two new set screw holes 120 degrees apart from each other per the Machinist’s Handbook. The reason for the 120 degree spacing instead of 180 degree spacing is as follows. When the set screws are placed 180 degrees apart, the cutlass bearing is only held in the shaft log at two points. Besides holding the bearing in place the two set screws must also prevent the cutlass bearing from rotating. When the set screws are 120 degrees apart, the set screws force the cutlass bearing against the shaft log. The friction between the bearing and the shaft log prevents the bearing from moving fore or aft or rotating. in addition to the set screws.

I have never seen a boat with the set screws properly drilled at a 120 degrees spacing. The same is true for most propeller nuts - large nut against the prop and jam nut behind the large nut. The jam nut should be placed on the shaft first followed by the large nut. The small jam nut is tightened first. When the large nut is tightened, the small nut is moved forward perhaps one or two thousands of an inch. The small jam nut is now unloaded and the load is taken by the large nut.

Cheers,

IDUNA

Thanks Rod…good info!

what I am worried about now is the fit of the cutlass into the shaft log. I understand this should be a “tight” fit, but it’s not anymore. The cutlass bearing can be slid into the shaft log by hand, with a little taping with a hammer for the last 1". Hence the cutlass bearing rotating with the shaft.

Thanks Rod,
Gary

Ok, can you drill and tap a set screw hole underwater??

Drill and tap a set screw hole 120 degrees from the port side set screw. The port side set screw and the new set screw will jam the bearing against the side of the shaft log. The friction should prevent the bearing from rotating.

If this is not possible or does not work, you will need to haul the boat and dry out the shaft log. Unfortunately, the shaft must be removed. Following is another idea:

  1. Fill the dimples in the cutlass bearing, sand smooth with 400 grit paper and coat the bearing with several coats of mold release wax,

  2. Sand the inside of the shaft log where the bearing seats with 120 grit paper,

  3. Position the bearing inside the shaft log with about 1/2" of the bearing sticking out of the shaft log,

  4. Using a syringe, force vinyl ester resin via the set screw holes between the bearing and the shaft log to fill any gaps between the bearing and the log, rotate the bearing as you fill the gap, (I would add a small amount fumed silica to the resin - it still must flow)

  5. Remove the bearing and HOPE the mold release wax worked.

  6. Remove any cured resin that flowed inside the shaft log beyond the bearing seating area,

  7. Fill the set screw holes with a filled resin and drill new set screw holes 120 degrees apart.

Cheers,

IDUNA

Thanks Rod, on the hualout I think I will give that a try. I was thinking about trying to jam some larger hex head sheet metal screws in the existing holes to stop the rotation. Don’t have anything I can drill underwater with.

Cheers,
Gary

Hi Gary , are you saying that your cutless bearing doesn’t have an “Interference Fit”, in the F/G shaft log ?

Sounds like Rod is talking you through a remedy to fix your F/G shaft log, to get that all so necessary , Interference Fit , for your cutless bearing.

I hadn’t heard of installing the cutless bearing set screws at a 120 degree spacing around it, before, but spreading the load and avoiding point loading is always benificial, as you well know. I wonder if Rod could include a photo of this 120 degree offset ?

That F/G shaft log is surprisingly long, as it goes through about 7" of “dead wood” area, then daylights about 2 1/2" inside the bilge. I have had no problem sawing off the protruding shaft log end at the prop apeture. I did this to get the necessary space for a “Spurs” line and weed cutter, see attached photo .

Hi Gary , are you saying that your cutless bearing doesn’t have an “Interference Fit”, in the F/G shaft log ?

Sounds like Rod is talking you through a remedy to fix your F/G shaft log, to get that all so necessary , Interference Fit , for your cutless bearing.

I hadn’t heard of installing the cutless bearing set screws at a 120 degree spacing around it, before, but spreading the load and avoiding point loading is always benificial, as you well know. I wonder if Rod could include a photo of this 120 degree offset ?

That F/G shaft log is surprisingly long, as it goes through about 7" of “dead wood” area, then daylights about 2 1/2" inside the bilge. I have had no problem sawing off the protruding shaft log end at the prop apeture. I did this to get the necessary space for a “Spurs” line and weed cutter, see attached photo . Well that photo attachment didn’t work !

BTW , during the haulout for your shaft work, give some consideration to the prop apeture itself. Guidelines that I have read, says that the prop apeture needs a 20% tip clearence, for the prop, and my BCC didn’t have this clearence, with the stock 2 blade 16" prop.

Will try to send the prop-spurs photo later .

Trying to attach the prop-spurs photo, again .

Make sure your images are saved at 72 pixels per inch. see http://www.samlmorse.com/forum/read.php?5,7018,7018#msg-7018

Douglas,
You are correct. The shaft log does not have a interference fit. This could be the root cause of my alignment problems. To lose of a fit could have been causing to much vibration and eventually causing things to loosen up and shift out of alignment.

On another note, why do they recommend a 20% Clarence?

Thanks for the info and pic, this all helps me decide on a proper approach to a solution to this problem.

Cheers,
Gary

Hi Gary , that prop clearence is necessary to avoid “cavitation” (sp-?) , and thus ensueing prop damage.

I am not an engineer, so many of the technical explanations go way over my head , including this one involving cavitation.

I read many “get ready to go cruising” books , like Dashew’s Cruising Encyclopedia, Nigel Calder’s , Boat Owners , and such, and tried to incorporate, best as I could their engineering discoveries, that they chose to pass on , to us .

It took me eleven years to siphor out and desiminate enough info starting from that Baja 1985 Race Week , to get a boat , out fit it and get gone on the cruising dream .

There were near disaster situations along the way, that made me choose to install a line and weed cutter, on my prop shaft .

There was a shaft log bond to deadwood leak problem, that needed fixing, as well as a heap more .

There was something to do with a partial vacuum, that is created by the prop blade slicing through the water, and as the water closes in on the vacuum , that negative air space ,following the blade , becomes active , and acelerated degrdation of the bronze prop , is the result, but gosh , do your research, before you listen to me , as I probably got it all wrong , as usual !

Douglas

Douglas, It’s because you “got gone” that your input is so valuable.

I know a lot about boats because I have done it. Running into problems along the way that needed solved. you have now done this also. I have never before ran into problems with alignment, shaft logs and such, except for needing to replace the occasional cutlass from wear. So you, Rod and others experience and practical knowledge base is priceless. That’s why these forums are a godsend. In the “old” days one would go to the local bar and chat with the other skippers and pick there brains. But that was a limited resource and may not yield such insights as “drill the set screws 120 degrees apart”.

If nothing else your kind contributions are a great starting point for further research.

Thank you!
Gary

DWKkayaks:

IDUNA is fitted with a SABB propulsion system from prop to engine. The Sabb prop is a controllable variable pitch prop which is fitted to the stern bears. The shaft provided rotation and pitch control, whereas the prop thrust is taken by two stern bearing for forward propulsion and one bearing for stern propulsion. There is not cutlass bearing, hence no set screws.

Rod

Thank You, Rod , I will continue to look for 120 degree offset, “set” screw examples and see how I can install them.

BTW , does anyone know the specification type of hose that is correct for the stuffing box to shaft log ?

Any other info on choosing a hose for this application would be helpful.

BCC Calliste’s hose was installed in 1996, and I think after 14 years, it is time for a replacement, but what to choose ?

I did use those AWAB 316 hose clamps, and now they are starting to rust , under the screw housing, so what is best to replace them with ?

Douglas

Douglas, if you haven’t found your hose yet, go here http://www.buckalgonquin.com/pages/ProductPages/hose&clamps/hose_page.html

Now another question. I have my flange disconected from the trans. I have about 1/2 inch of vertical play in the shaft at the flange. In other words I can move the shaft up and down. Is this normal? If it is, how do you know where it should sit for aligning?

Also have found 2 broken engine mounts. So that was causing some of the problems. But what caused them to fail? Looks like I need to haul out, pull the engine and check everything.
8-(

Gary

Hi Gary, T Y , for the Buck Algonquin web link. I did look and found that their packing box hose is also wire re-inforced exhaust hose and 4 ply.

I remember reading in Marty Chin’s forum advice, that he was going to replace the packing box hose on his BCC Shamrock, because it was wire reinforced exhaust hose, and he considered that inappropriate.

Sooo , my search continues.

As for the shaft movement when uncoupled, of 1/2" , seems that I remember about the same movement on my BCC, after installing a new shaft and cutless bearning, but of course you are also considering that your cutless bearning may not fit the shaft log properly with an interference fit.

Yes, you have to replace the broken engine mounts before attempting a shaft alignment at the coupling.

BTW, as for the set screws for the cutless bearning, seems like I remember that I drilled right through the bearning shell, and the set screws seated in the holes, not dimples.

BTW , as for the bronze bearning housings from Buck Algonquin, there should not be a need to go that far, F/G shaft logs have worked well on BCC’s for a good long time, already. They can be repared easily with epoxy, as Rod suggested above, and they can be re-line bored, too.

Yes a haul out for access will be needed, ouch !

Another BTW , when I repowered my boat with a Yanmar, I had to make wooden blocks to mount the motor mounts on, to bring the shaft into close alignment.

This process was expidited with the use of an inexpensive lecture pencil pointer laser.
I bushed the pointer barrel to 1" OD and slipped it into the cutless bearning when the shaft was removed.
I was then able to adjust the motor mounts pretty close, as I used the laser beam pointing to the center of the engine coupling.

Then, I used the feeler gage go no go to get the closest tolerance I could, then installed the Federal Flexable shaft couple, instead of the fixed coupling.

Would you be able to attach a photo of the broken mounts ? Are your mounts, Yanmar mounts ? If they are, maybe they were installed improperly, like the forward mounts put in the aft position and visa versa.

It was explained to me when I investigated using different motor mounts, that Yanmar engineers spent a great deal of time and money engineering their OEM mounts, and substitute mounts should not be used, on the Yanmar engines.

Douglas

Gee, Gary you peaked my interest this morning.

First, my BCC hull # 072 , also came equiped, when I purchased her in Honolulu, with a Volvo 2002 .

My first keel boat was a Pacific Seacraft 27’, I purchased a Yanmar 3GM30 to replace the existing 2 cylinder Yanmar in that boat , but sold the boat, before I could install that new engine, so the engine sat on the shop floor, until later when I installed it in my BCC.

As I have previously mentioned on this forum, my used BCC came with a de-bonded and leaking, F/G shaft log , due inpart to a slightly bent shaft, due to what I think was a line - prop wrap and sudden engine stoppage, by a previous owner.

As it were , eventhough the Volvo was still a good engine, I decided to replace it with the already purchased , new , Yanmar 3GM30.

That new Yanmar came with installation and maintaince manuals.

In the Installation Manual (Pleasure Boat Use) there are v good chapters on engine and mounts, and prop shaft installations which you would be interested in reading.

I hope that you can download that Yanmar Installation Manual from the internet as there are good illustrations in it too ???

In that manual it instructs to replace Yanmar engine mounts every 2 years, and to use either or both a flexable coupling, and or a flexable stern tube which “must be employed” , they write !!!

That manual also specify’s the prop tip clearence as I mentioned before.

If you should ever need to repower with a Yanmar 3GM30 , just know that it can be done off that F/G factory installed engine pan with motor mount ways.

Douglas

Hi folks,
I just finished replacing my yanmar engine mounts after wrapping a lobster pot line. It tore all four mounts clear thru. I had added a shaft cutter this spring; it did not work in this instance. I was lucky to not have bent the shaft. Made quite a sound hitting it! I will be checking the cutlass this fall after haul out, this thread has been timely. One thing that is strange is before I did not experience the dreaded yanmar idle death shake, now I do. Hope that doesn’t mean I botched the alignment; I had it to less than .006", my smallest feely gage.
Jonathan

Hi Jonathan, would you share how much do 4 new Yanmar motor mounts cost ?

BTW , I used a special aircraft jamb nut called a “Pal nut”, to jamb the nuts on the Yanmar motor mount studs, both above and below, and the nuts have not losened.

BTW , I was able to get .003" between the shaft flanges, but just leaning on the engine pushed this to .010" or more.

Then I connected up the stiff USCG approved Trident exhaust hose from the engine to the water lift silencer, and that skewed away my .003" too.

Reason demanded that I invest in that Federal flexable coupling.

Sorry to hear that your shaft mounted line cutter didn’t work in this case, would you share with us, who the cutter manufacturer is ?

If any one knows where to find a USCG Approved “Hump” type silicone exhaust hose, in the size we need for our Yanmar exhaust, please pass on that source. I have only found exhaust “Hump” hose in 3" or larger ID .

Douglas

Hi Douglas,
I paid $133.00 plus tax and shipping for each mount, both the two 75 and the two 100 size. I’m not sure of where the boat yard got them, I could ask, they came over night to Jonesport, Maine so I would think it was on the east coast. The line cutter I have is called Shaft Shark; I bought it from Hamilton Marine. In its defense I’d have to say that I had the bad luck to snag the buoy in such a way as to pull the plastic swivel onto the rear nut behind the prop, the line then wrapped the prop once, the line where it crossed the Shaft Shark had been spliced by the lobsterman using stainless wire and electrical tape which prevented the line cutter from having a fair chance. The line travelled up the shaft with around 15 to 20 wraps. Drove the prop back into the rudder, nice gouge, my rudder has had a rough year.
Jonathan